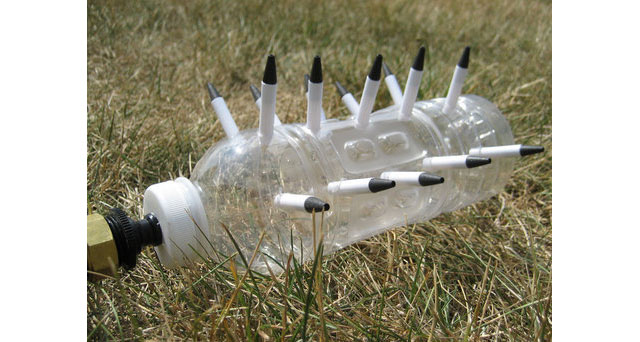
This past week has set record highs here in Wisconsin, reaching over 100 degrees in some places! Along with of all this heat comes dry, brown grass. For a way to help your garden grow while helping the environment at the same time, try this creative DIY project. This water bottle and pen sprinkler, found on Curbly DIY blog, will help you go green, and green your garden at the same time!

(Photo Source: Curbly)
Here’s what you’ll need: 1 plastic water bottle with cap, 1 male hose attachment, 15 pens with ink removed, Water sealant adhesive, Electric drill with appropriate drill bits, Measuring tape, Exacto knife, and Glue.
Here’s you do it: Drill a hole slightly smaller than the widest part of the male hose attachment into the bottle cap. Drill appropriate sized holes for the inkless pens into the bottle, three rows each with five holes. For an easier grip on the bottle, try filling the bottle with water and freezing it before you start drilling. Cut the pens to a two inch length, and insert half of the pen into the bottle. Use the water sealant to secure the pens in place, and seal the holes. Glue the hose attachment to the bottle cap, using glue on both sides to prevent leakage. Twist on the cap and seal with glue.
Not a DIY-er? Try these adorable watering cans from Willard & May: (1. Herb Pattern Watering Can, 2. Blue Blossom Watering Can, 3. Russian Teatowel Watering Can, 4. Elm Water Can)

Happy Weekend!


