Hide Your Hose in a Pot

Curb Appeal, Garden Spaces, Outdoor Decor, Pin Inspiration, Store

Let’s just admit it, garden hoses are not attractive. And neither are those plastic little garden hose holders you attach to your home or sit on your porch.

Wondering how to keep your hose close, yet hidden? How about a hose pot from Good Directions. These new products we are including in our summer catalog are a great decorative element too. You can even store other outdoor things such as firewood in them.

457B_Key-West-Hose-Pot_Brass_Glam-4 448B_Sonoma-Hose-Pot_Brass_Glam-2 448B_Sonoma-Hose-Pot_Brass_Glam-5 448B_Sonoma-Hose-Pot_Brass_Glam-3

Tropical Oasis

Beautiful Outdoors, Garden Spaces, Pin Inspiration

A warm front is coming! Though it’s not in the actual physical form, more like a virtual warm front is heading your way with these tropical oasis photos. What else is there to do on a blistery cold day other than look at pictures of warm destinations and their gorgeous tropical plants.

Here’s what we’ve been daydreaming of…

trop 90fb05cb3c01d0f6eb512001a3a24646 93e7991e6bd4e3814450627ae1da8499 4f9450dd7f4a4c575eb72051106d884c

Planting a tropical plant such as a Fiddle Leaf Tree or Elephant Ear are a sure way to bring the tropical oasis inside during the cold winter months. 56d64eb9fae20afc7e40f0458683e1cc

Want to go tropical too? Check out our Pinterest board filled with these and more tropical ideas to temporarily escape the winter blues.

tropicalplantspinterest

team-signature


Before & After: Finding Balance

Before & After, Curb Appeal, Garden Spaces

All that sunshine and fresh air we’ve been getting now that it’s finally warm is probably enough motivation for you to start getting in gear to transform your front yard for spring. But whether you are lacking in the motivation part or not, you can’t help admit this huge before and after really gets you thinking about what you could do with your space – especially if you’ve had all winter to ponder it.

Jan of the blog Green Thumb Blonde recently helped friends of hers transform their front yard. First in 2010 you can see they cut everything back, but then had to wait until 2012 to really get going – that gave them plenty of time to come up with a plan.

Jan first realized the main issue was the lack of balance due to the front door being so off centered. She formulated a plan of action that included a picked fence, stone walkways, and a ton of new plants, bushes and flowers. Check out the full before and after transformation on her blog. What a HUGE difference – we love it! 110% improvement on curb appeal!

MG_7918 (Photos: Jan Meissner)

Have a before and after you’d like to share? Feel free to drop us a comment below!
team-signature


Guest Blog: Flower Bulb Forcing

Garden Spaces, Gardening, Outdoor Decor, Store

Guest Blogger, Gabrielle from the blog FlowerBulbCrazy is here to share some unique ideas and tips for forcing bulbs this winter. After she is done sharing, head on over to her blog to check out other great ideas and tips on gardening with flower bulbs!

There are so many people who really miss out on spring blooming bulbs… people who live in the warmer zones and think it’s too warm to plant!  And then there are people like me who long for winter to be over and want flowers 24/7. Typically, growing flower bulbs is almost fool proof, but forcing bulbs takes a little more time and attention. Forcing bulbs is the term used for mimicking what normally happens to bulbs when planted outdoors.  It is a process that stimulates bulbs to bloom out of season.

The most common and easiest bulbs to force are:  narcissus/daffodilsamaryllismuscari, crocus and hyacinths.  Daffodils and tulips are not too difficult either, but choose shorter and earlier blooming varieties (Triumph, Single Early and Darwin Hybrid varieties) for the best outcome.   Generally, spring flowering bulbs usually require about 10-14 weeks at temperatures between 41-48°F in order to bloom and grow properly come springtime. Check out the chart below for the approximate number of “chilling” weeks required and number of weeks to bloom for different varieties of flower bulbs.

Name of bulb                         Weeks of cold                    Weeks to bloom

AmaryllisNone6 to 10
Crocus152 to 3
Hyacinths11 to 142 to 3
Muscari13 to 152 to 3
Narcissus/Daffodils15 to 172 to 3
Paper-whitesNone3 to 5
Tulips15 to 202 to 3

Instructions
Pot your bulbs right away if you have an appropriate location immediately available, such as a refrigerator, a root cellar, cool basement, or outdoors if temps are below 48°F. When storing pots outdoors for the cold period, be sure that if temps drop below 30°F that you cover them with some type of insulation. If you can’t plant them immediately, bare bulbs can be stored in a mesh bag or paper bag with holes that permit ventilation for several weeks in a refrigerator prior to potting without damage. Note: Do not store them in same vicinity as fruit, as the ripening process can negatively affect the quality of the bulbs.

Use clean pots with drainage holes and regular potting soil. Make sure you allow for 2 inches of soil below the bulb and select a pot large enough to allow the top of the bulb to be even with the rim when placed on the soil. The bulbs should be touching each other for the best look when blooming. Water them well after planting in order to settle the soil.

The bulbs will begin to flower anywhere from 2-5 weeks after they have been brought into warmer temperatures, provided they have been given the recommended number of weeks of cool temperature (see chart above). If you have a set time when you want them to bloom, make sure you add the flowering period to the rooting/cold period for the total number of weeks to wait. Amaryllis and Paper-whites do not need this cold period.

These next steps would be ideal for the best and most perfect blooms.
Move your pots to an indoor area with indirect sunlight and temperatures about 60°F for a week or two. When the above plant growth is 4-6 inches tall, move the pots to a bright, sunny window to stimulate blooming. A temperature of about 68°F and direct sunlight would be ideal. When you see the color on the buds, return the plants to indirect sunlight to make the blossoms last as long as possible. Keep the soil moist at all times.

After blooming, hardy bulbs such as hyacinths and tulips cannot be forced again and should be discarded. They can also be instead planted outdoors where they may re-bloom within a year or two.

Forcing Flower Bulb Inspiration – Ideas for your Home

Maybe you will want to give this a try now?  I especially enjoy forcing Hyacinths for indoor enjoyment because of their sweet fragrance!  Thanks for letting me share and I hope you found this helpful and easy to understand.

Fall Planting 101 (Part 2)

Garden Spaces, Gardening

Last week we shared with you fall bulb planting basics: including the different types of bulbs, the bulb life cycle, and the important tip that you should always plant bulbs that grow best in your zone. Now that you’re a bulb genius, we’ll share our favorite fall bulbs that we’re sure you’ll love!

Bulbs can be found just about anywhere this time of year: online, garden centers, or big box stores. Now is the perfect time to pick out what you’d like to plant as it is getting very close to planting time! The sooner you select your bulbs, the more likely you’ll have the biggest variety of and best quality bulbs to shop from!


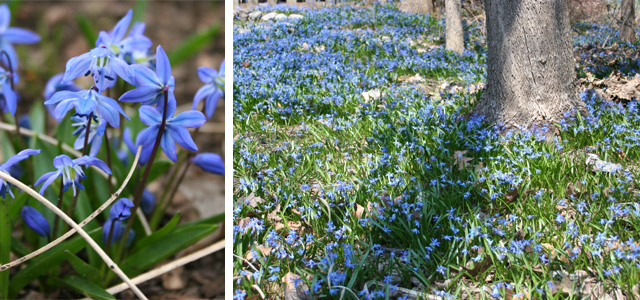
Favorite Shade Bulb:
Siberian Squill / Scilla
Scilla bulbs are great for borders and work fast at naturalizing if left undisturbed, adding a lovely blue touch to woodland areas. What is great about Scilla is that they can be planted under trees where you think shade would be a problem. Due to the fact that most trees loose their leaves during winter, Scilla has less sun blockage in the spring. These bell-shaped, dainty blue blooms adorn this early spring bloomer and look best when planted in masse. Hardy in zones 3-9.


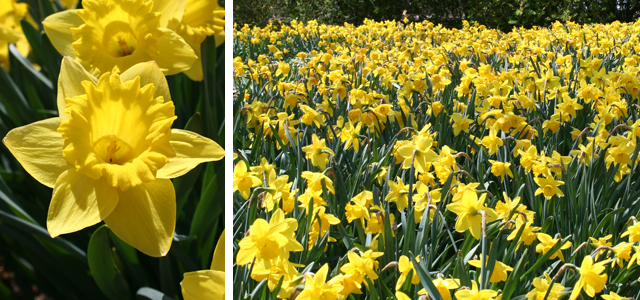
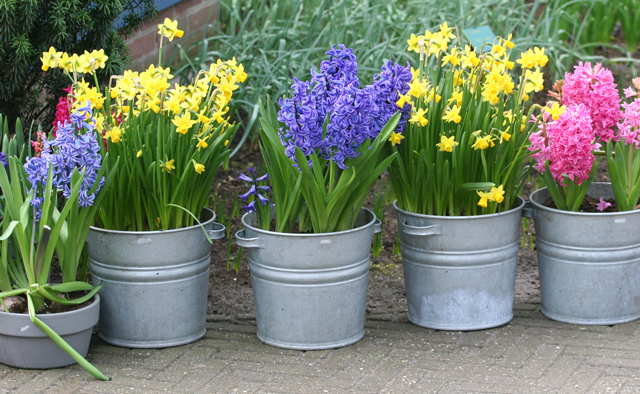
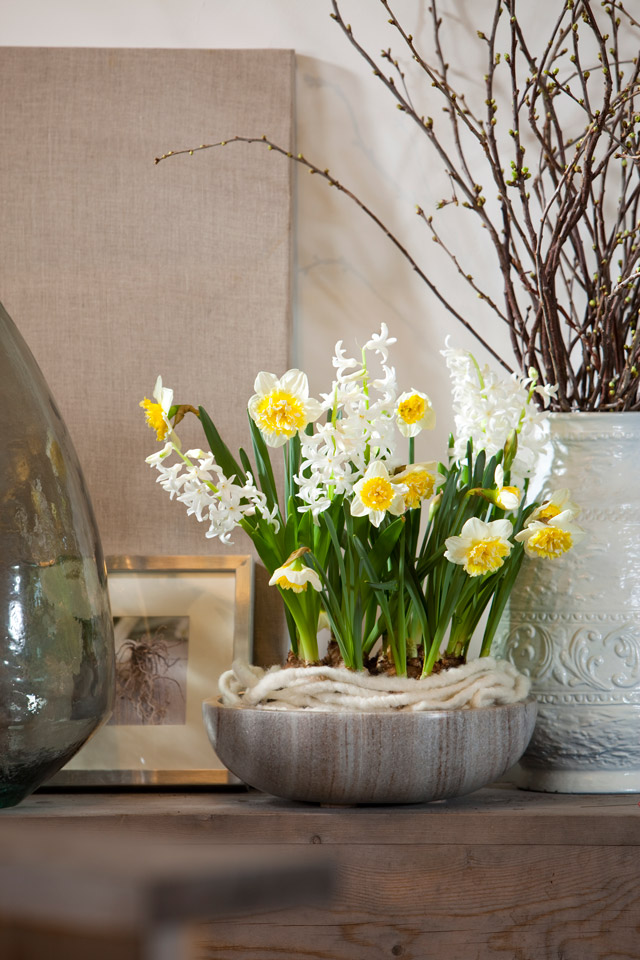
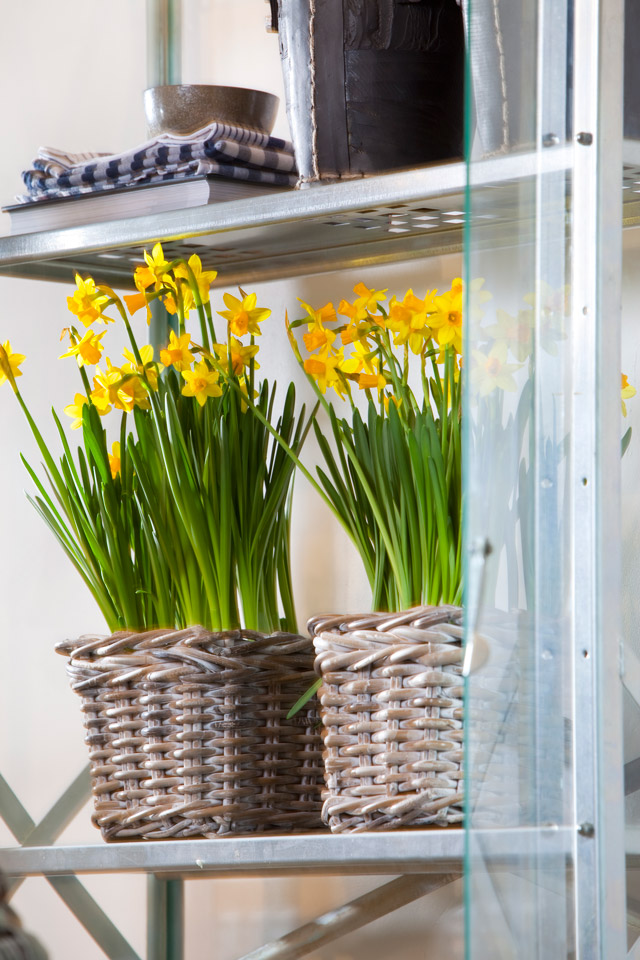
Favorite Mulitplying Bulb:
Dutch Master Daffodils
Daffodil bulbs are one of the best beacons of spring, with their large and bright flowers appearing early in the season. There are a variety of daffodils such as Large Cupped, Trumpet, Pink, Butterfly, Double and Rock Garden. If you want to stick with a traditional looking daffodil, we’d suggest the Dutch Master with their golden yellow blooms. Daffodils are one of the easiest bulbs to grow as they survive in a variety of conditions, multiply each year and are deer and critter resistant. Daffodils are hardy in zones 3-8 and prefer full sun to partial shade.


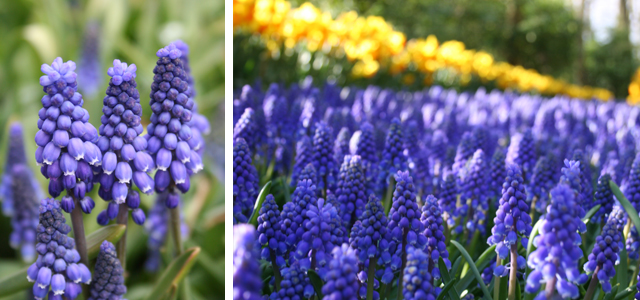
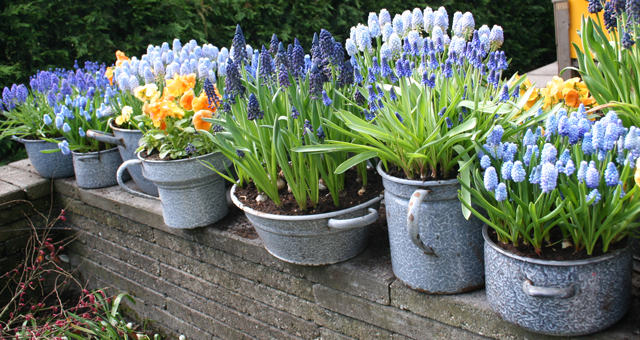
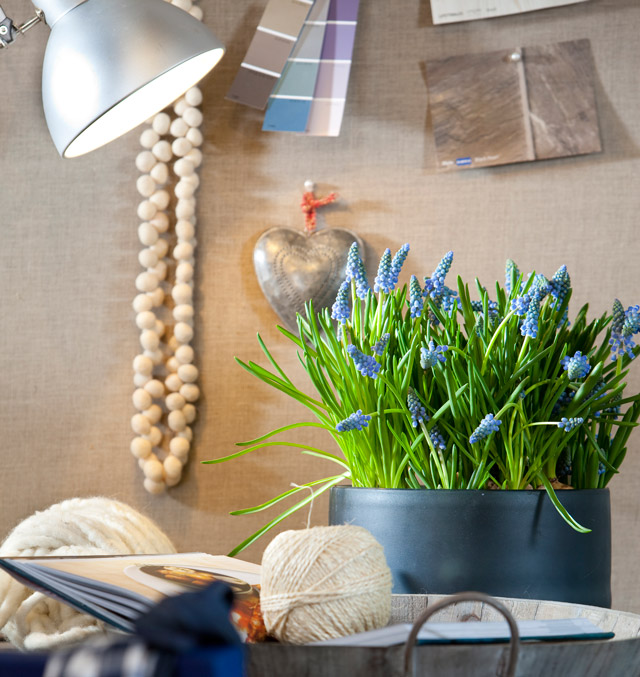
Favorite Groundcover Bulb:
Blue Muscari
Muscari bulbs are little fragrant clusters that look beautiful when planted under trees, throughout the lawn or in a naturalized setting such as a wood line. These little blue bunches multiply fast and provide great groundcover. Muscari should be planted in groups of 100 or more for their largest color impact. An idea we’ve seen and loved is to make a river-like effect with the blue bulbs. Hardy in zones 3-8.


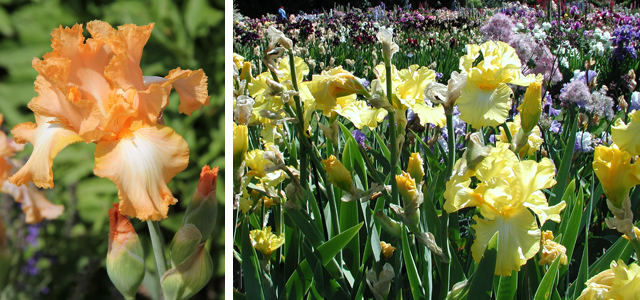
Favorite Perennial Bulb:
Piping Hot Bearded Iris
Bearded Iris are an old-time favorite amongst many gardeners. Available in tall, intermediate, and dwarf sizes as well as almost every color of the rainbow, there is a place in any garden for a Bearded Iris. Bearded Iris reproduce fairly quickly and should be divided every 3-5 years to ensure a bounty of blooms. They are hardy in zones 3-9, best planted in full sun and slightly below the soil surface. Use for beds, borders and cut flowers.


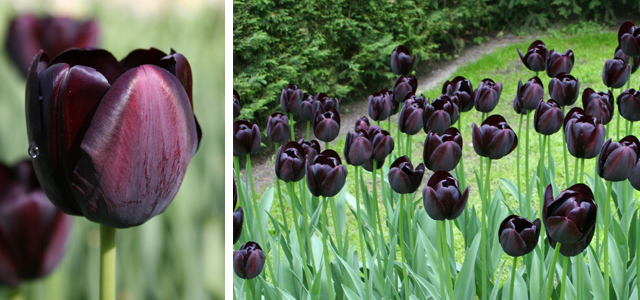
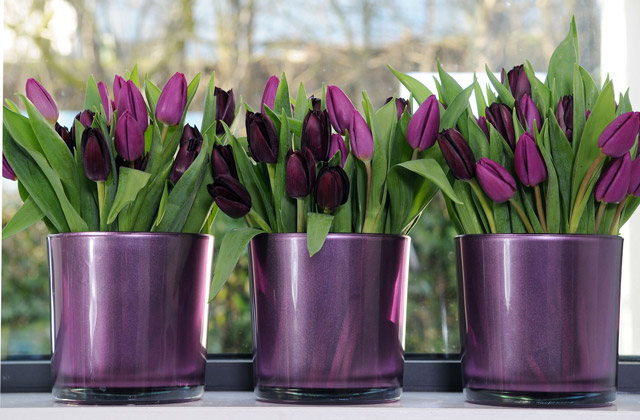
Favorite Bulb for Cut-Flowers:
Queen of the Night Single Late Tulip
Tulips come in many different varieties and each boast different characteristics to make them unique. Single Late tulips are known for their tallest and strong stems (which can withstand wind and rain), making them the best for cut flowers. They also come in the widest variety of color options. The Queen of the Night is our favorite due to it’s almost black blooms! All tulips prefer full to partial sun and are hardy in zones 3-7. Check out all the different varieties of tulips available here from TulipWorld.


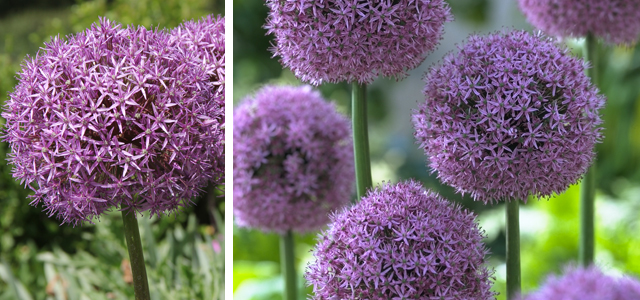
Favorite Long Lasting Bulb:
Globemaster Allium
Allium bulbs are not only deer resistant and great for cut flowers, they also add a unique and noticeable texture to the spring garden. Blooms are typically spherical, densely packed florets and come in a variety of colors including purple, white, and yellow. Also – once they are dried out, move them inside for a floral arrangement or even spray paint them to give them some color. Blooms in late spring and are hardy in zones 4-8.


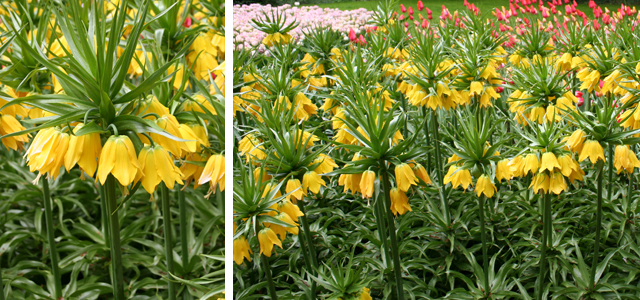
Favorite Deer Proof Bulb:
Yellow Fritillaria
Fritillaria bulbs have bright and exotic-looking blooms and are hardy in zones 5-9. Be sure to amend your planting area with organic matter, such as peat moss and compost manure as well-drained soil is a must for Fritillaria. Always plant Fritillaria slightly on their sides, as the center of the bulb is hollow and may collect water if planted upright. Blooms inmid-spring, prefers full sun to partial sun, and is extremely deer and critter resistant!


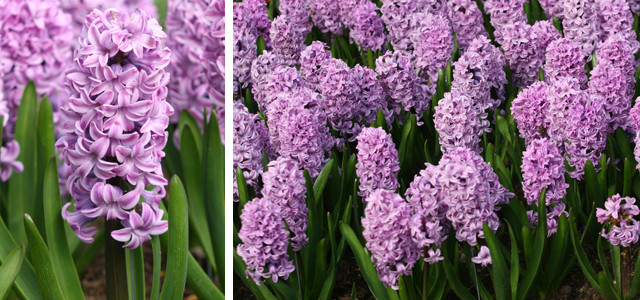
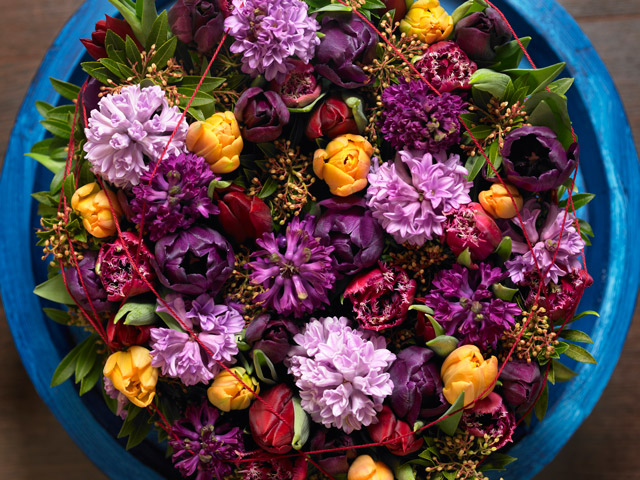
Favorite Fragrant Bulb:
Splendid Cornelia Hyacinth
Hyacinth bulbs are some of the most fragrant flowers in spring and can be used for outdoor blooms. They are also one of the easiest bulbs for indoor forcing. Hyacinths also come in almost every color of the rainbow, so there is bound to be at least one variety that will go with your garden color scheme. Hyacinths perform best when planted 4-6 inches deep, in full sun with well-drained soil that has been amended with organic matter.


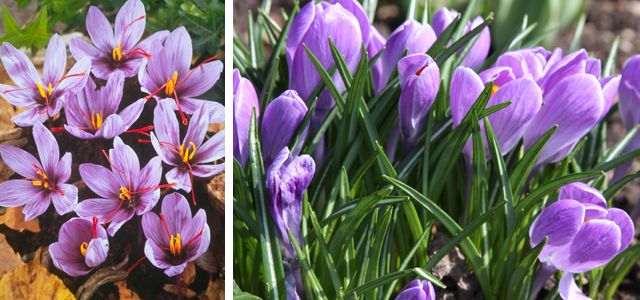
Favorite Unique Bulb:
Saffron Crocus
Crocus bulbs, one of the first signs of spring, can begin to grow even while there is still snow on the ground! Their petite stature makes them perfect for use in rock gardens, to fill between plants, or in garden borders. Plant them in groupings of odd numbers for a natural look. While most crocus bloom in the spring, the Saffron Crocus uniquely shows its foliage in springtime, but the crocus flowers don’t appear until the fall. Why is this unique? There isn’t a huge selection of fall blooming bulbs out there – this Saffron Crocus provides a pop of color while everything else is dying back.

Happy Fall Planting!

Weekend DIY: Log Path

Garden Spaces, Gardening, Outdoor Decor, Weekend DIY

Now is the time to begin cleaning up your yard. This includes removing plants which may have died over the course of the summer and making room for new bulbs to be planted. While normally having to cut down a failing tree in your yard may make you sad, at least you can use the wood in a creative way! Why not make a Log Path inspired by this photo from the Sherwsbury Flower Show?

Log path at Shrewsbury Flower show

Thanks to our friend Pinterest, we were able to find a post on how to re-create this masterpiece. Also, since the blog author wrote the post a bit ago, she has some new learned tips to pass on! Here is what you’ll need to complete this project: an old tree (or a variety for different size steps), a saw, and a sealant that provides UV projection (think deck stain).

(Photo Source: Domesticated Nomad)

Step 1: You’ll first need to create a solid, relatively flat surface of dirt. This may mean stripping the existing sod and removing or adding soil in certain areas. You’ll also want to make sure the remaining soil is well compacted and level to prevent the steps from sinking. Step 2: Determine the width and length of your space and cut the wood about 3-4″ thick to prevent splitting when stepped on. Step 3: Apply the stain to the logs and allow for proper drying time. Step 4: Finally, arrange pattern on the ground and fill sand, gravel, or dirt around and between logs for a level walkway to assure no tripping :)

We think this would look amazing along a garden path! It creates just the perfect touch of wood without dishing out the money and time required for a complete wooden walkway made of 2x4s. Another great idea was to add groundcover plants in between. Like most home projects, the possibilities are endless!

Happy Weekend!

Before & After: California Dream

Before & After, Garden Spaces

Every time you look at your backyard do you think there is no way I can transform this into my dream? We’re here to prove you wrong and help inspire you. A great resource we’ve come across is Apartment Therapy’s outdoor blog. They have oodles of Before and Afters of outdoor spaces that get our brains’ wheels spinning.

Check out this Before and After of this Oakland, CA backyard via Apartment Therapy. We love geometric patio they added with the checker board pattern. What do you love about this space?

(Photo Source: Apartment Therapy)

Have a Before & After you’d like to share with us, let us know in the comment section below!

Weekend DIY: Garden Stones

Garden Spaces, Outdoor Decor, Weekend DIY

For many, gardening is a way to relax, forget about life’s craziness and release some anger on those weeds! While you’re out in the garden, it’s can also be nice to reminisce about the things you planted and how they came to be. Maybe that hydrangea the with bright pink blooms was once your grandmother’s and reminds you of how sweet she was or the time you spent gardening with her when you were young. It’s great to bring memories into your garden – and with this fun and easy DIY project from the blog Prudent Baby, we’ll show you how to make a garden stone that will inspire you to continue to garden for years to come.

diy garden stone
(Image Source: Prudent Baby Blog)

Here is what you’ll need to get started: a small amount of cement (or stepping stone kit from a craft store), a mold (a bread pan for example), oil, and stone stamps (can be found at a craft store). You could also get creative and use other tools to engrave your stone, such as pebbles or your children’s hand or foot prints.

Here are the basic instructions – (for more detailed instructions, refer to the blogpost from Prudent Baby.) Step 1: Mix your cement according to the directions on the kit or package. Step 2: Spray or spread oil into your mold. Step 3: Pour cement inside the mold, smooth the surface out, and tap the pan to remove air bubbles. Step 4: If you want to add objects to your stone, do so now. If you just want to engrave, wait 30 minutes before doing so. To see if the stone is ready for engraving, scratch the surface and if you get a “dry mark” you are ready to go. If it’s still a bit liquid-y, wait a little while longer. Step 5: Let stone dry for at least 24 hours before removing from the mold.

diy stepping stone garden ston

diy stepping stone garden ston

diy stepping stone garden ston
(Image Source: Prudent Baby Blog)

And there you have it! Display your stone for all to see – or make it a tradition to add something new to your garden each year.

Happy Weekend!

Chimeneas – Outdoor Fireplace

Furniture, Garden Spaces, Outdoor Decor, Outdoor Party, Store

Create the neighborhood evening hot-spot in your own backyard by adding a Chimenea! You may ask, “A Chima-what?” I’m sure you’ve seen these patio ornaments during your last trip to Mexico or in western movies…the Chimenea actually originates from Mexican Tribesmen who developed a way to simultaneously keep their families warm and cook, all while keeping the rain off of their fires. Recently, these Chimeneas have gained popularity in the world of outdoor decor since they also make a wonderfully affordable fireplace/firepit. Also, unlike the Mexican Chimeneas, Chimeneas today are crafted out of durable deluxe clay and are made to last and use outdoors year-round – even in the northern areas.

mexican fireplace chimenea garden chiminea

Chimeneas are an easy way to add warmth, light, and comfort to your backyard space. The long-lasting Chimeneas from Willard & May can be enjoyed year-round when placed amongst your garden, on your patio or deck, in your pool area and even while camping. Use your wood burning outdoor fireplace to add an inviting ambiance, warm-crackling flames, and a delightful wood burning aroma to your backyard space. You can also burn pinion woods (a hardwood pine found in the mountains of the southwestern United States)  as a natural mosquito repellent!

CHIMENEA CARE TIPS
– Use the included metal stand as this helps to prevent the clay from retaining moisture. Your Chimenea will last longer if kept above the ground and allowed to breathe.
– Use a 2-3″ barrier of sand or pea gravel in the base of the wood burning area. Do not build a fire directly on the clay.
– Cure the Chimenea fire pit by building 2-3 small fires prior to regular, prolonged use. Allow the clay to cool completely between firings for at least 4-6 hours.
– Use newspaper or kindling to begin all fires. Never use starter fluid, charcoal, or artificial logs in your Chimenea.
– Keep your Chimenea free from water by protecting it during rain or freezing weather. If water does find its way inside, replace the sand and allow it to dry completely before starting another fire. Apply a non-flammable water-based sealer annually.
– Chimenea will get very hot during and after the burning process. Children should be supervised in the vicinity. Also, keep Chimenea away from roofs, overhangs, and branches and take care when using on a wood deck.

To properly see how you should care and handle your outdoor Chimenea, view the complete Chimenea Care Instructions here.

mexican fireplace chimenea garden chiminea from willard and may store

Included with our Willard & May ceramic Chimeneas are the powder coated stand, the cap, metal grate, and care instructions to get the best enjoyment from your Chimenea. There is no assembly required, just plain ol’ fun and easy! Check out all the different styles available for sale now!

Weekend DIY: Backyard Water Feature

Garden Spaces, Outdoor Decor, Weekend DIY

Everyone is familiar with the tranquil environment that a waterfall and stream creates – it’s so peaceful, yet most people don’t have the luxury of enjoying one in their own backyard. However, that can change within just two weekends! Even though it may seem like a daunting task, perhaps you’ve decided to be adventurous and create a water feature in your backyard. Great! We’ve found some great step-by-step instructions that will help you achieve a great looking waterfall and stream with only a little bit of elbow grease.

Here are the supplies you’ll need: Level, Wheelbarrow, Rubber mallet, Spade, Utility knife, Large waterfall pump, Hose kit and connections, PVC primer and cement, Ball valve and clamps, Sewage basin (18” x 30”) and lid, Two hole saw bits (2” and 1”), EPDM pond liner, Underlayment fabric, Waterfall foam sealant, Gravel, Field boulders, Decorative boulders, Hand tamper, Scissors, and a Ball cart (for moving boulders).

Here are the simplified steps, but refer to The Family Handyman for the complete step-by-step DIY waterfall instructions. Step 1: Understand how waterfalls work in a backyard setting. Step 2: Plan out your waterfall. Step 3: Purchase the stone materials. Step 4: Map the waterfall and stream and dig. Step 5: Complete the lower basin. Step 6: Dig out or build a long staircase. Step 7: Arrange liner and layout the stones. Step 8: Add additional stones and fill gaps. Step 9: Add gravel and clean the system. Step 10: Enjoy!

Here are a few photos of the process:
easy backyard waterfall diy(Photo Source: The Family Handyman)

As additional inspiration, we’ve included some photos below from one of our very own team members. She has created many water features in others’ yards as well as her own! Here are a few of her tips to create your own backyard oasis:

If you build it into the ground and lay layers of thick weed barrier under the liner, it will last a lifetime. Shade is helpful in keeping algae at a minimum. You may also want to purchase an algaecide to help. Maintenance will be less than a flower bed! Dig the width of the stream wider than your finished desired width as rocks will fill it in a lot. Also, purchase a waterfall pump that is designed for the height & width of your design (its more than just gph).

create a water stream in your backyard
how to create a waterfall in your backyard diy backyard waterfall diy backyard waterfall
diy backyard waterfalldiy backyard waterfall

Maybe you don’t have two weekends to create a waterfall, but still love the serenity one creates? Why not try a small water fountain in your backyard like this from Willard & May:


Happy Weekend!