Boot Trays – 4 Ways

Before & After, Outdoor Decor, Pin Inspiration, Store

Entry ways are the fastest spot in a home to get cluttered. Everyone comes in the door and feels the urge to drop any and everything! One way to combat entry way clutter is with a boot tray!

A new addition to our outdoor living products are these copper boot trays from Good Directions. The three different patterns are sure to match your home, now it’s just figuring out how to use it! There are four ways to use Boot Trays, read on to find out!

1. Use a boot tray for shoes. Obviously this isn’t rocket science, the main reason you’d use a boot tray is for shoes and an occasional umbrella.

103VB_Square-Boot-Tray_Bronze_Glam-1

2. Add pebbles to a boot tray. This is a simple way to add a more natural element to your home, it also allows the dirt and water to sink to the bottom of the boot tray. It’s best to rinse it out occasionally.

101VB_Pine-Cone-Boot-Tray_Bronze_Glam-2

3. Use a boot tray for plants. Position the boot tray on a dresser or ledge and create a mini garden in your home. What’s great is the tray will catch all the water that runs out from the bottom of the flower pots when you water them.

103VB_Square-Boot-Tray_Bronze_Glam-2

4. Use a boot tray to simplify your pet’s food, water and toys. This will keep Fluffy’s eating area tiddy – also easy for clean-up! PS why do dogs and cats always spill their food?

101VB_Pine-Cone-Boot-Tray_Bronze_Glam-5

Winter’s Latest Holiday Trends!

Before & After, Gifts, Pin Inspiration, Store, Weekend DIY

This Holiday season make sure you’re up to date on the latest trends! You won’t want to miss these great ideas for your Holiday parties and celebrations! Spoiler Alert: You will definitely be seeing a lot of winter terrariums this season!

wm-holiday_trends2013{Sources: 1, 2, 3, 4, 5, 6, 7 }

So if you want to be trendy during this Holiday season, follow our tips, decide which ones you like the most and incorporate them into your home! You’ll be sure to have the trendiest decor, that people will be talking about! Find some of these items at Willard & May!

We’d love to hear what you think, let us know your favorite trend this season and how you’re incorporating them into your Holiday festivities this season!

team-signature1

Before & After: A Renewed Deck

Before & After, Weekend DIY

About a year ago we shared a DIY lesson on how to power wash your deck and how to get it looking brand new! We also shared one of our team member’s deck that could have used some TLC and pressure washing magic. Here is the before to remind you and another view of the before once they had their own personal items added to the deck.

1252210ws (1)

IMG_5901blog (1)

Now, we’re back a year later to share how the deck looks after getting power washed and then re-stained following the DIY instructions.

First, came the pressure washing using a borrowed pressure washer from one of their parents. View the behind the scenes instagram of how it went down with a before and after of the power washing step:

Next up was to brush on a a weatherproofing stain, here is the behind the scenes look on that (nevermind the cabinets, they were also renovating their kitchen at the time).

And now view the deck completely done and re-assembled! The process took quite a few weekends since both of them have full time jobs – shout out to all the weekend warriors out there! Three weekends were spent pressure washing and cleaning up the boards which included some sanding on the railings. Another, two weeks were spend staining the deck with a weatherproofing stain and making sure to get all the nooks and crannies. The best part of the project: the cost, because it isn’t that large considering the transformation. Just three gallons of weatherproofing stain were used.

IMG_7064blogIMG_7069blogIMG_7062blogIMG_7075blogIMG_7089blogIMG_7088blog

One last tip: If you can borrow a pressure washer from someone you know, you’ll save more. View all of our Weekend DIY posts.
team-signature1

Trend: Outdoor Curtains

Before & After, Outdoor Decor

Ever seen your neighbor put something in their yard and wonder what are they thinking?That is exactly how I imagine my neighbors think, but I’m really hoping they actually think wow, I would have never thought of that – I love it. Love it or hate it, outdoor curtains are a unique way to bring some color and life to your patio.

As a team member at Willard&May, I love the outdoors. My husband and I purchased a home last fall and we were excited to finally get outdoors this summer and improve our outdoor deck. When we first toured this house, we imagined our backyard would be a great space to entertain our friends and family, but also a relaxing retreat for ourselves.

Our large deck features two stories with the second story acting as shade to the lower deck. The upper deck is right off the kitchen and the perfect spot to enjoy a morning coffee. The lower deck is a great place to set out our grill and relax in the afternoon shade. Since the upper deck creates a cabana-like space over the lower deck, we thought it would be a great idea to try out curtains on the support posts. We thought it would add some color to the space and make it feel like an extension of our home.

To make our outdoor curtains, we purchased four curtain panels from Ikea and a few cheap curtain rods. We sprayed the fabric with water repellent spray, similar to what you’d use for camping purposes. We’d hope that by spraying them it would help them last longer and endure the summer weather elements. We then hung them with the curtain rods underneath the deck so they would be hidden from view. Next, we tied them around the posts to complete the look!

IMG_5909blog IMG_5907blog1 IMG_5906blog
IMG_5895blog IMG_6483blog

To inspire you more, check out other ways to use outdoor curtains on our Outdoor Curtain Pinterest Board and check out our outdoor decor items at Willard&May.
team-signature1


Before & After: Finding Balance

Before & After, Curb Appeal, Garden Spaces

All that sunshine and fresh air we’ve been getting now that it’s finally warm is probably enough motivation for you to start getting in gear to transform your front yard for spring. But whether you are lacking in the motivation part or not, you can’t help admit this huge before and after really gets you thinking about what you could do with your space – especially if you’ve had all winter to ponder it.

Jan of the blog Green Thumb Blonde recently helped friends of hers transform their front yard. First in 2010 you can see they cut everything back, but then had to wait until 2012 to really get going – that gave them plenty of time to come up with a plan.

Jan first realized the main issue was the lack of balance due to the front door being so off centered. She formulated a plan of action that included a picked fence, stone walkways, and a ton of new plants, bushes and flowers. Check out the full before and after transformation on her blog. What a HUGE difference – we love it! 110% improvement on curb appeal!

MG_7918 (Photos: Jan Meissner)

Have a before and after you’d like to share? Feel free to drop us a comment below!
team-signature


Weekend DIY: Stump Stools

Before & After, Furniture, Outdoor Decor, Outdoor Party, Pin Inspiration, Weekend DIY

Everyone dreams of having that amazingly decorated,-cozy outdoor room often seen in  magazines or design blogs. But you easily brush if off because how in the world would you make it look like that yourself? Well, we recently came across a photo of a lovely outdoor dining set up, immediately thought “oh so pretty” and next, how awesome are those stools?! Then, we thought where do you find those! Finally we thought, let’s look at pinterest for a DIY. Here’s the image we’re referring to:

stone wall outdoor dining table with tree stump stools (Source: Pinterest)

So, stumped on what to do this weekend? (no pun intended, haha) Not anymore! We’ve got the perfect DIY project for you to start and it would make a great addition to your outdoor living room,a porch or even your favorite rustic indoor space! This DIY comes from the blog, The Art of Doing Stuff. The author believes in not spending lots of money on the things that fill your home, as she’d rather find it at a garage sale or on the side of the road as opposed to a fancy store. So when she also saw a tree stump side table in a magazine, she thought, “I can make this”. And so can you.

This DIY stump project is something you’ll want to start this weekend, and finish up in about a month – as you have to allow the stump to dry out. But don’t worry; it’ll be ready just in time for the arrival of spring! The bonus is this project doesn’t cost much, especially if you can easily track down an old tree stump outdoors. Next, you’ll need some polyurethane, sand paper and a paint brush. If you want to make it into a side table, you could even add legs like she did. She shares the whole DIY instructions on her blog, so head on over and check out how to make this amazing stool or side table.

(Source: The Art of Doing Stuff)

We also found another great example of how to use a stump sidetable on the blog Design Megillah. Check it out to see how she made her stump!

Happy Weekend!
team-signature

Weekend DIY: Updating Dated Lights

Before & After, Curb Appeal, Weekend DIY

Like your front door, the entry way lights which guide your guests to your home set the tone for what’s inside your house. Don’t believe us? Go take a quick look!

Are they constructed of out-dated, hideous brass which means your house is stuck in the 90’s? Are they sponge-painted, giving the impression that your house is holding out for a return of the 80’s? Are they northwoods-y, but yet everything else in your home screams modern? Or perhaps they are simply just 100% not your style. This weekend, let’s fix that and enhance your curb appeal!

This weekend DIY project is inspired from Katie of the blog BowerPower. A few years ago, they traded in their outgrown home for their dream home – completely dreamy, besides the fact that most of the design aesthetic was stuck in the 80’s — for instance check out their sponge painted light fixtures. For a quick update she decided to spray paint them rather than replace them. The only cost involved was painters tape, spray paint and pieces of leftover cardboard. Head on over to her blog to read the step-by-step DIY instructions for easily updating your own outdoor light fixtures, plus her amazing before and after pictures.


(Photo Source: BowerPower Blog)


(Photo Source: BowerPower Blog)

(Photo Source: BowerPower Blog)

Have you ever transformed something in your outdoor space with just a little spray paint? What style are your front porch lights? Are you able to transform them with some spray paint, or were they just too big of a crime so you ended up replacing them? Tell us in the comments below!

Happy Weekend!
team-signature

Weekend DIY: Add Privacy to your Front Door

Before & After, Curb Appeal, Outdoor Decor, Pin Inspiration, Weekend DIY

Have you watched a scary movie or tv show lately? You know, the kind that makes you have that creepy un-easy feeling that someone is just outside your home, staring into your living room while you go about your life?  Or it makes you second guess every action you do in fear of the neighbors thinking you’re crazy?  And now with the sun rising later and setting earlier, it seems as though it is always dark when you are at home – dark before you leave for work, dark when you get home – you have the urge to add some extra added  privacy to your windows…blinds, curtains or the like. And you better do it FAST, before they get you! ;)

While blinds and curtains work well for windows throughout your home, putting blinds on your front door can seem a bit gaudy or just not as classy as you’d like. We have the perfect DIY idea that quickly transforms the “dark unknown” into a graphical focus in your entryway! This DIY comes from one of our team members who wanted to add some privacy to her front door after removing some blinds that once filled the window on the door.

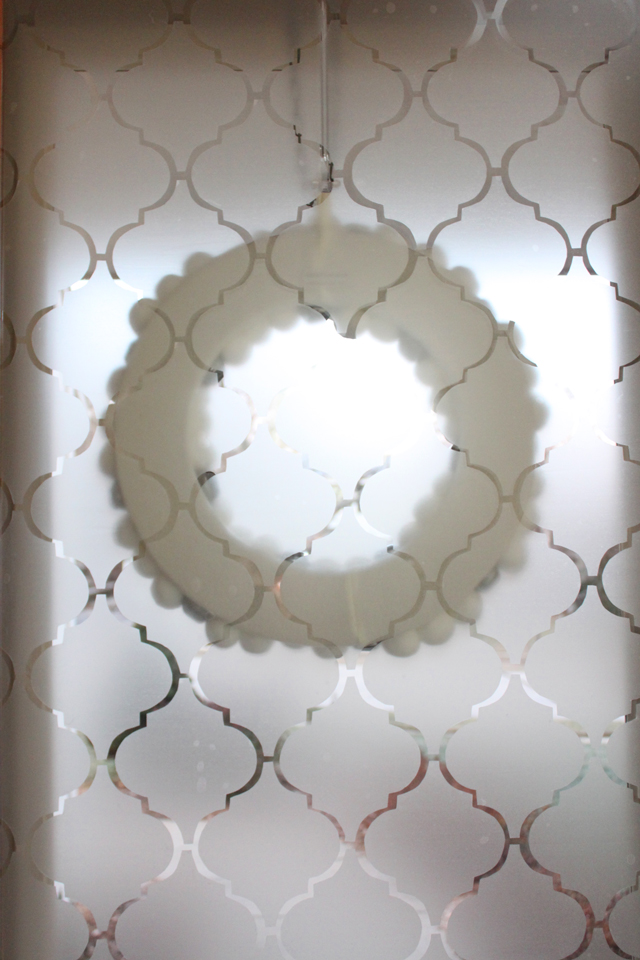
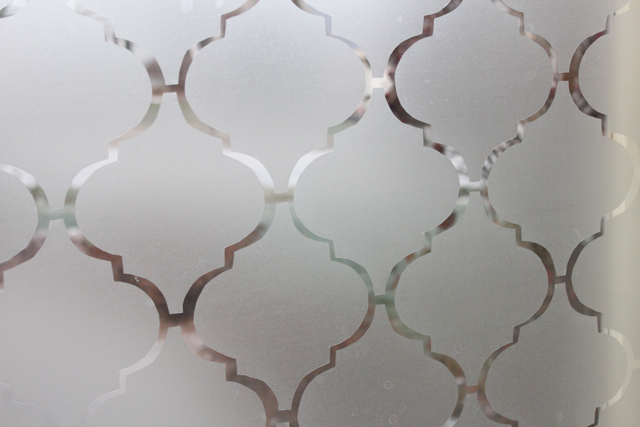
She got the window idea from the blog, 7th House on the Left, who even provides a handy template for the cut-out shape, to help your cutting go easier and faster. Also, by reading the comments on the blog, you’ll learn a lot of bonus tips. The blogger transformed her front door (with half a window) by applying contact paper in a unique Moroccan shape to the window to give it a faux-etched look.

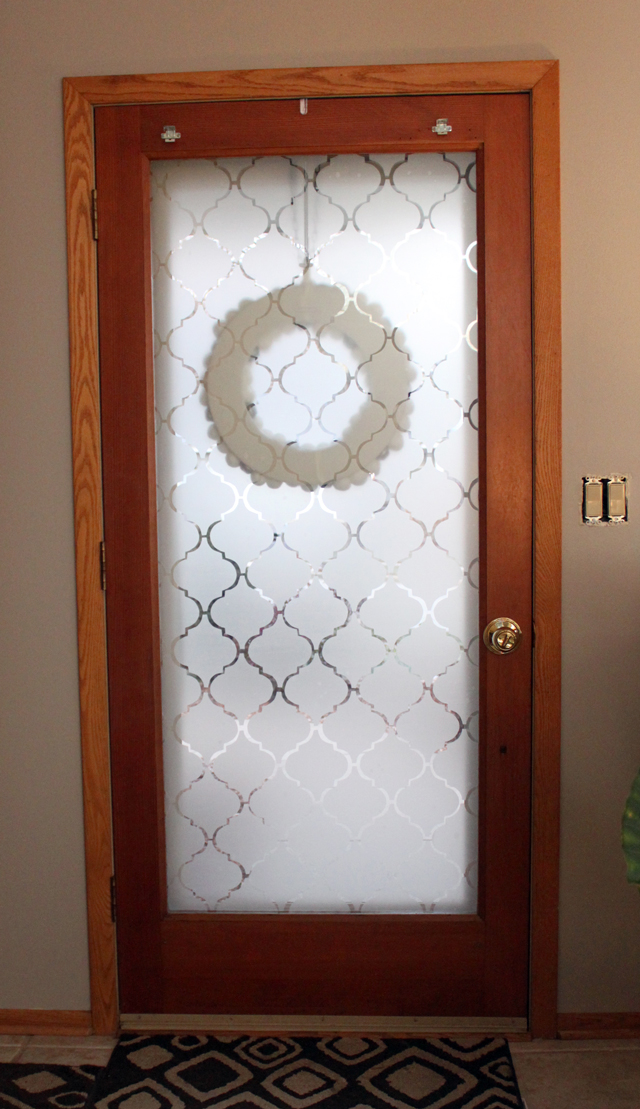
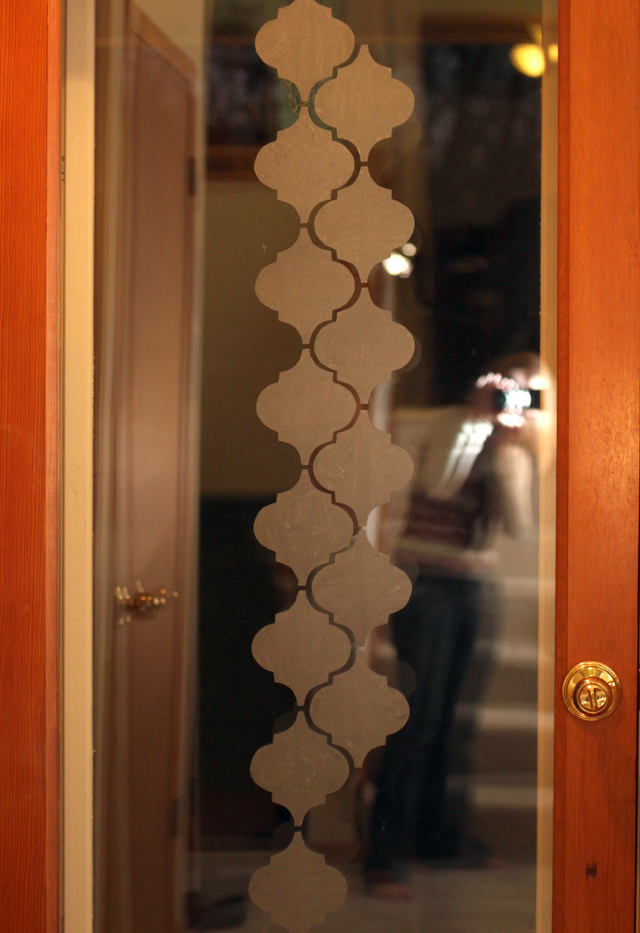
Our team member, Vanessa, tried this same effect, applying it to her completely glass front door. Check out the finished look below – talk about a unique entryway that provides privacy but still allows a lot of light in! Here are her summarized instructions, but you can feel free to also head to the 7th House on the Left blog for more information!

add privacy to windows with contact paper

What you’ll need: 1 roll of contact paper (find at any big box store), template provided, cardboard or cereal box, black marker, scissors, tape measure, exacto knife/utility knife and a dry erase marker.

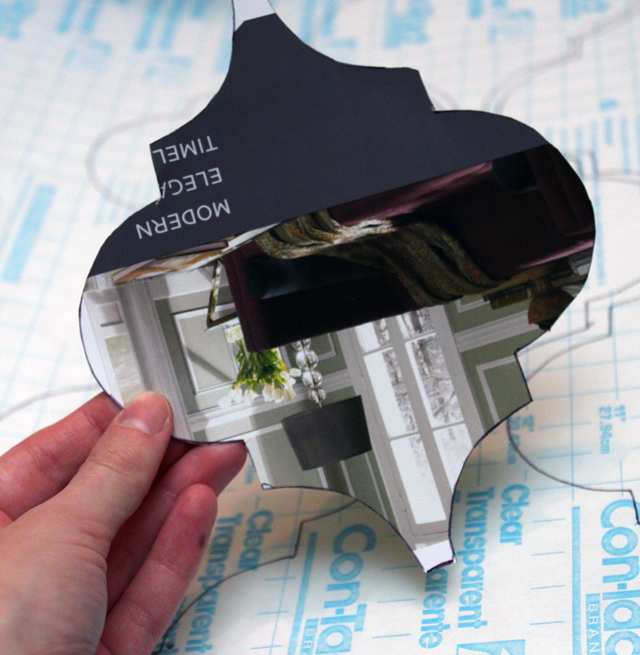
1. Print out the template provided by 7th House on the Left blog.
2. Cut out the shape and transfer it to a thicker paper, such as a cereal box or other piece of cardboard.
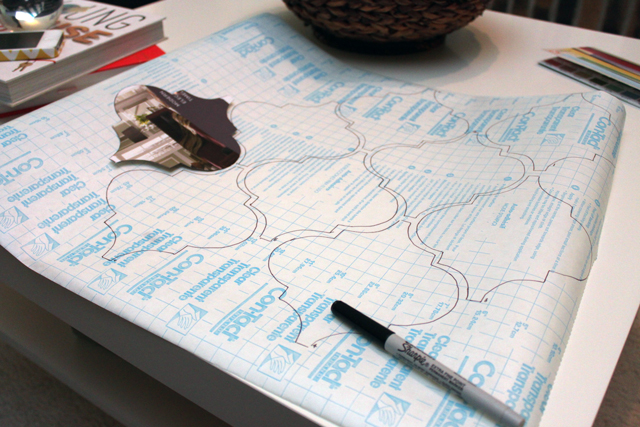
3. Trace out as many shapes as your heart desires onto the back (or paper) side of the contact paper. Our team member found that drawing 8 of the shape, and then cutting out those provided the easiest route. Since the paper has been rolled up, it tends to want to keep rolling, so only having 8 keeps it much more manageable.
4. Once you have a decent amount cut out, you’ll need to measure your space and gauge how many more you’ll be needing.
5. The first time Vanessa counted how many she’d need, she was way off – you’ll soon see how many more you need and how you can use bits and pieces of them to fit around the edges.
6. Measure your window and mark the exact middle (vertically and horizontally) with a dry erase marker on the opposite side of window.
7. Start your first shape in the exact center and then apply the first column going up and down. It’s best to do a complete column first, also keeping about 1/2 an inch between the tops and bottoms. This will allow for the best possible spacing throughout your window which helps to keep things consistent.
8. Keep applying more and more until it’s covered. Vanessa found that hers wasn’t perfect due to the fact it’s handmade, each cut being unique. But from a few feet away, she says, you can’t even tell and it just looks AWESOME!
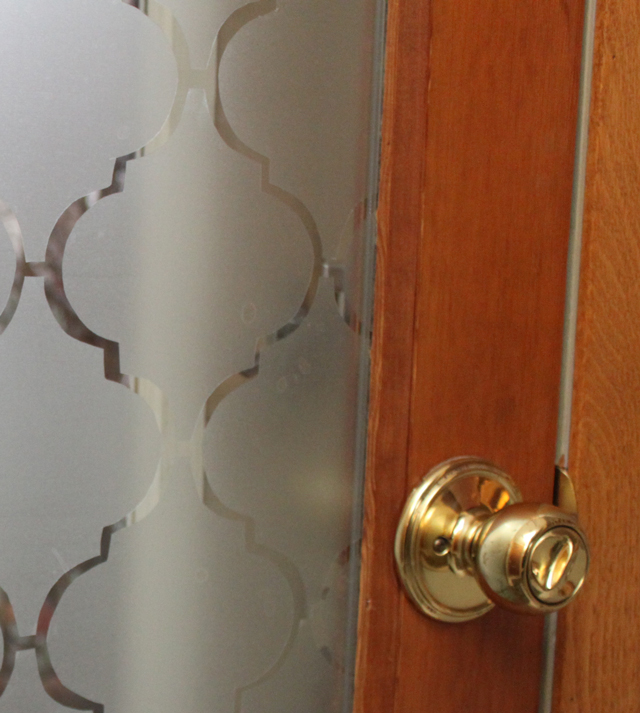
9. Once you’re done, use a credit card to smooth out any tough bubbles that may have formed. Also, use the utility knife to trim the excess from shapes around the edges.
10. Sit back and enjoy (without being terrified of the unknown that lurks outside!)

The best part about this, is that it’s only about $3 to create and it’s removable if you decide later on that you’d like to switch things up! It also adds a very classy touch to your home when viewing it from the outside. Thanks to the 7th House on the Left blog for inspiring us!

Happy Weekend!

Before & After: Deck Do-Over

Before & After

Decks are either a hit or miss. They are a hit when you first build and stain and seal them, but as the weather takes it’s toll on the wood, is starts to become a miss. Maintaining a deck is a task you’ve got to commit to. If your deck is crying for a makeover, check out this deck do-over inspiration we found from Apartment Therapy.

(Photos: Apartment Therapy)

Have a before and after you’d like to share with us? Just drop us a message in the comment section below!

Before & After: California Dream

Before & After, Garden Spaces

Every time you look at your backyard do you think there is no way I can transform this into my dream? We’re here to prove you wrong and help inspire you. A great resource we’ve come across is Apartment Therapy’s outdoor blog. They have oodles of Before and Afters of outdoor spaces that get our brains’ wheels spinning.

Check out this Before and After of this Oakland, CA backyard via Apartment Therapy. We love geometric patio they added with the checker board pattern. What do you love about this space?

(Photo Source: Apartment Therapy)

Have a Before & After you’d like to share with us, let us know in the comment section below!