
In our last post titled “Memorial Day Party Inspiration” we showcased a few great Memorial Day Party Ideas. Included in that post was a photo from the blog, You + Me of a twister game created right on the lawn – no need for the official game board! We found the original DIY post from another blog, Sassy Style and thought we’d share how to re-create this budget-friendly game!

Here is what you’ll need: cardboard, craft knife, large bowl (or other round object), pen, red, blue, yellow and white spray paint, 1 piece of paper, scissors, and two containers or hats to hold the paper slips.
Step 1: Trace the large bowl onto the piece of cardboard. Then, cut out the circle on the cardboard, so what you have left is a stencil of the circle.
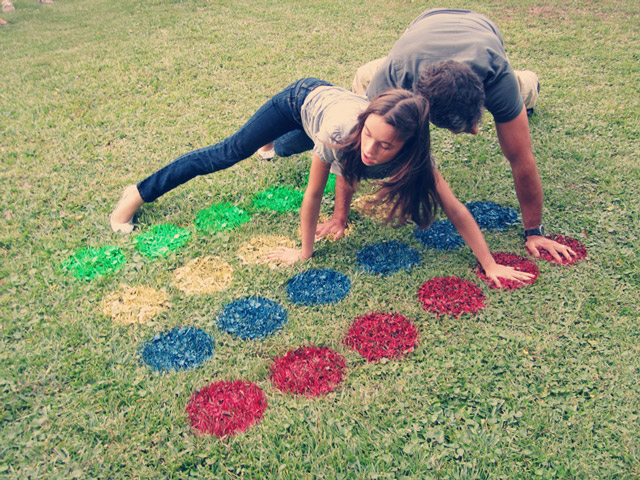
Step 2: Find a large enough space in your yard on the grass (the more level the better although a steep slope can add some extra fun!). You’ll need 1 row of 6 dots for each color (4 colors) – so measure out the 6 circles if you are unsure.
Step 3: Lay down the stencil and fill the area with spray paint. Make sure to spray enough so that it is dark enough to see. Then, move the stencil down, leaving enough space and spray paint another circle, and so forth, until you have 6 dots of each color in a row. (One note: many hardware stores will sell an outdoor “landscape” spray paint which washes off in just a few rainstorms! :)
Step 4: Instead of recreating a spin-board, make slips to draw out of the container or hat. Out of a piece of paper, make small slips that say: right hand, left hand, right foot, left foot, and you could get creative with other parts if you’d like! Then create slips for each color you spray painted.
Step 5: To play, just draw one slip for each container for each turn. Have fun!
Do you have a fun game you play outdoors with your family? If so, please share it with us below!