Hide Your Hose in a Pot

Curb Appeal, Garden Spaces, Outdoor Decor, Pin Inspiration, Store

Let’s just admit it, garden hoses are not attractive. And neither are those plastic little garden hose holders you attach to your home or sit on your porch.

Wondering how to keep your hose close, yet hidden? How about a hose pot from Good Directions. These new products we are including in our summer catalog are a great decorative element too. You can even store other outdoor things such as firewood in them.

457B_Key-West-Hose-Pot_Brass_Glam-4 448B_Sonoma-Hose-Pot_Brass_Glam-2 448B_Sonoma-Hose-Pot_Brass_Glam-5 448B_Sonoma-Hose-Pot_Brass_Glam-3

Boot Trays – 4 Ways

Before & After, Outdoor Decor, Pin Inspiration, Store

Entry ways are the fastest spot in a home to get cluttered. Everyone comes in the door and feels the urge to drop any and everything! One way to combat entry way clutter is with a boot tray!

A new addition to our outdoor living products are these copper boot trays from Good Directions. The three different patterns are sure to match your home, now it’s just figuring out how to use it! There are four ways to use Boot Trays, read on to find out!

1. Use a boot tray for shoes. Obviously this isn’t rocket science, the main reason you’d use a boot tray is for shoes and an occasional umbrella.

103VB_Square-Boot-Tray_Bronze_Glam-1

2. Add pebbles to a boot tray. This is a simple way to add a more natural element to your home, it also allows the dirt and water to sink to the bottom of the boot tray. It’s best to rinse it out occasionally.

101VB_Pine-Cone-Boot-Tray_Bronze_Glam-2

3. Use a boot tray for plants. Position the boot tray on a dresser or ledge and create a mini garden in your home. What’s great is the tray will catch all the water that runs out from the bottom of the flower pots when you water them.

103VB_Square-Boot-Tray_Bronze_Glam-2

4. Use a boot tray to simplify your pet’s food, water and toys. This will keep Fluffy’s eating area tiddy – also easy for clean-up! PS why do dogs and cats always spill their food?

101VB_Pine-Cone-Boot-Tray_Bronze_Glam-5

Grilling Playlist

Outdoor Party

Looking for the perfect tunes to play at your next backyard get-together? Not only is the perfect sauce essential to a successful BBQ, but the right music is also key to a good time! One of our suppliers for our outdoor heating products, Blue Rhino, created the perfect grilling playlist based on a nationwide survey, titled Music to Grill By. Check out these top 12 grilling tunes, and download the playlist on iTunes.

grilling bbq playlist

1. “Bad to the Bone” – George Thorogood & Delaware Destroyers
2. “Ring of Fire” – Johnny Cash, June Carter, and Merle Kilgore
3. “Light my Fire” – The Doors
4. “Smoke on the Water” – Deep Purple
5. “Fire” – Jimi Hendrix
6. “Let’s Get it Started” – Black Eyed Peas
7. “Disco Inferno” – Tina Turner
8. “Love Me Tender” – Elvis Presley
9. “Another One Bites the Dust” – Queen
10. “Burning Down the House” – Talking Heads
11. “Born to be Wile” – Steppenwolf
12. “Burning Love” – Elvis Presley

We also came up with some extra songs that you could add to your playlist that would be perfect for grilling, bbq-ing, and sitting around a fire during a summer evening.

“Set Fire to the Rain” – Adele
“Up in Flames” – Coldplay
“Sparks Fly” – Taylor Swift
“Iko Iko” – Belle Stars
“I’m on Fire” – Bruce Springsteen
“We Didn’t Start the Fire” – Billy Joel

Do you and your friends have a favorite outdoor grilling song? Share it below in the comments section!

PS need a few new grilling tools? Check out this grill set on sale.

Vertical Gardening

Gardening, Gifts, Store

Obviously the age-old way to garden is to garden horizontally, on the ground – no one even thinks twice about that one. But what if you changed the way you gardened to a vertical format? Oh the possibilities!

vertical-planter-pouch

New to our selection of products this spring is a vertical gardening pouch from Esschert Design. This pouch is an easy way to grow herbs or flowers in a small space and in a condensed way. Plus, the pockets are made of tarpaulin, which makes them extra strong and holds water well.

Along with this new vertical gardening method, we’ve also been thinking of other ways to create a vertical garden. Here are some of the creative ideas we found…

vertical-garden1 (Source: Pinterest)

vertical-garden2 (Source: FytoGreen)

vertical-garden3 (Source: A Beautiful Mess)

vertical-garden4 (Source: Pinterest)

vertical-garden5 (Source: MiCasa)

vertical-garden7 (Source: BuzzFeed)

Hopefully we’ve inspired you to try a new type of gardening this summer! If you want to see more vertical gardening ideas, check out our pinterest board!
team-signature

How to: Start Begonias Indoors

Gardening, Weekend DIY

begonia-how-to
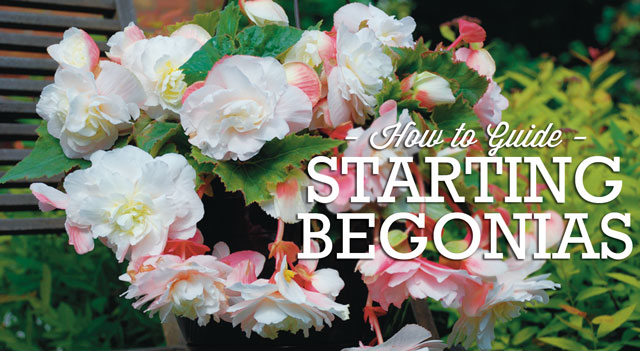
Begonias are wonderful plants for shaded areas and can give you a lush, full plant with huge blooms if grown correctly. Since they require a lot of warmth and some patience to get to this full state, many gardeners prefer to begin their begonia tubers indoors during the late winter months. Starting your begonias indoors is a fairly simple process and means fuller plants later in the summer season!

begonia-instructions1Follow these simple steps:

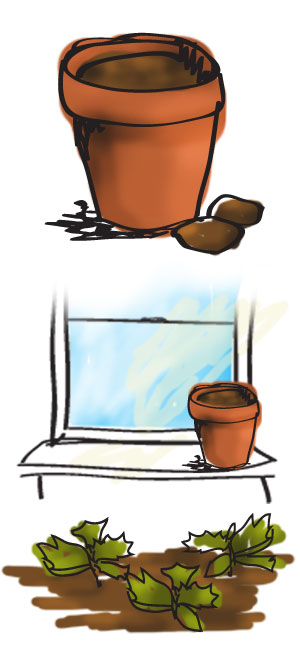
Plant tubers in later winter, hollow side up, just below the soil level in a moist peat compost mixture. Use shallow seed trays or small pots with good drainage and place on a window sill or other location that receives indirect sunlight. Be sure the temperatures for this location does not fall below 60 degrees F. Cover tray or pot with paper or plastic wrap to promote sprouting. Watering sparingly until growth begins.

Once the tubers begin to sprout (approx. 4 to 6 weeks), development becomes more rapid. Remove the plastic wrap or covering and give them maximum light but still shaded from strong direct midday sun. Water regularly, never allowing the soil to dry out completely but being sure not to let them sit wet as this can cause rotting. An application of good liquid plant food will improve and quicken growth.

When the threat of frost has passed, move the plants outdoors. The tubers can be left to remain and grow in the pots or transferred to an outdoor garden bed. Begonias thrive in semi-shade and do not do well in hot mid-day sun. They dislike dry conditions so be sure to provide them with ample water, especially in periods of hot weather. Remove all the wilted leaves and flowers during the growing season to encourage flowering throughout the summer months.

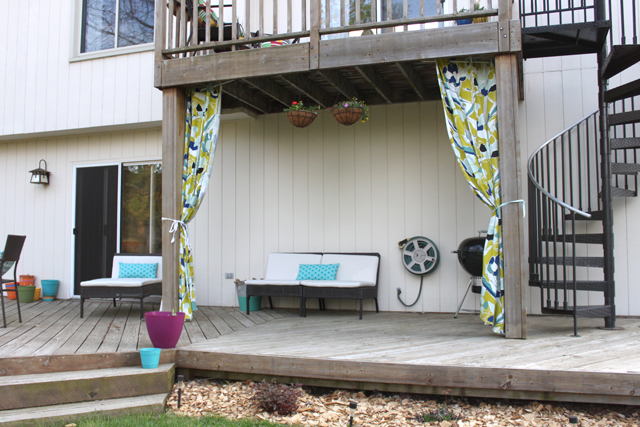
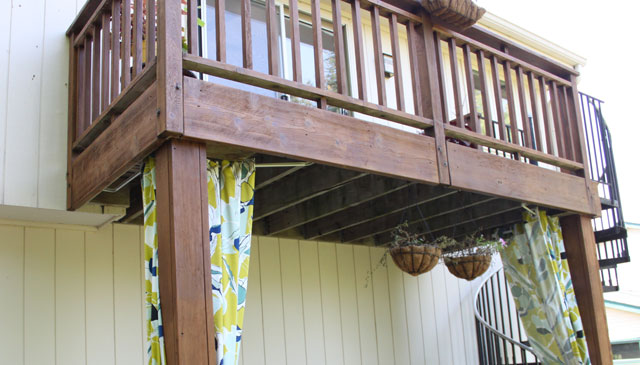
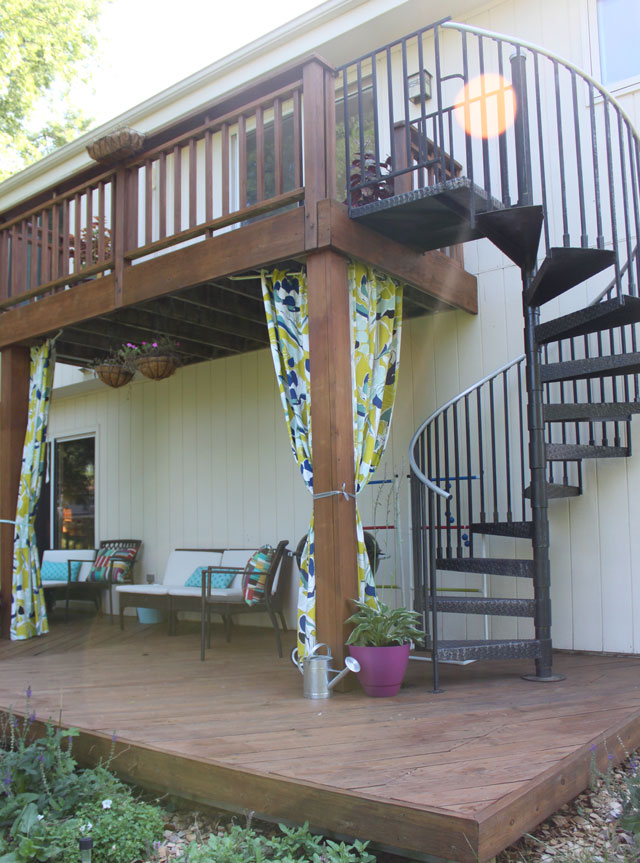
Brilliantly-colored begonia blooms in a unique hanging basket or watering can will add a splash of color on the deck, under the overhang, or even on a shepherd’s hook in the backyard! Check out our Begonia Gardening Kits which include a planter (hanging basket or watering can), begonia tubers, and a soil disk!

Happy gardening and enjoy your begonias this summer!
team-signature


Tropical Oasis

Beautiful Outdoors, Garden Spaces, Pin Inspiration

A warm front is coming! Though it’s not in the actual physical form, more like a virtual warm front is heading your way with these tropical oasis photos. What else is there to do on a blistery cold day other than look at pictures of warm destinations and their gorgeous tropical plants.

Here’s what we’ve been daydreaming of…

trop 90fb05cb3c01d0f6eb512001a3a24646 93e7991e6bd4e3814450627ae1da8499 4f9450dd7f4a4c575eb72051106d884c

Planting a tropical plant such as a Fiddle Leaf Tree or Elephant Ear are a sure way to bring the tropical oasis inside during the cold winter months. 56d64eb9fae20afc7e40f0458683e1cc

Want to go tropical too? Check out our Pinterest board filled with these and more tropical ideas to temporarily escape the winter blues.

tropicalplantspinterest

team-signature


Warm Welcome

Curb Appeal, Gifts

Sometimes it may seem as if winter will never, ever end, is that how you feel too? We’ve had a pretty mild winter, compared to some of you out east with 8 feet of snow (we can’t even imagine!) and we aren’t complaining over here.

With winter comes the snow/slushy/salty mix that everyone seems to track in on their shoes, and we hear ya, it’s a pain to clean up too! So for all that floor clean-up you have been doing, reward yourself with a cheery, warm welcome mat. If not for the bright colors, get it to save yourself some sanity!

wm_rug-spotlight_04

Here are a few other decor items we’ve put together to help warm up your entryway and create a warm welcome!

team-signature

Entertaining with the Perfect Spritzer

Outdoor Party, Store

With the winter that some of us have had, it’s hard to believe Memorial Day weekend is just around the corner! As long as the weather continues to cooperate and you have off work, it’ll be the perfect opportunity to kick off the season of outdoor entertaining.

What’s better than a warm sunny day filled with outdoor games, grilling and relaxing? A fizzy drink to sip all day long! We’ve rounded up some of our favorite refreshing spritzer recipes and thought we’d share… just in case you wanted to try something new at your next get together this summer.

(Source Tasty Kitchen)

Watermelon Spritzer from Tasty Kitchen
This one is great for when you have that watermelon, fruity craving!

  • 2.5 pounds Fresh Watermelon (seedless If You Can Find It), Rind Removed And Cut Into Cubes
  • 3 whole Lemons (seedless If You Can Find It), Juiced
  • 2 Tablespoons Honey
  • 2 cups Chilled Seltzer Water (more Or Less)
  • 6 sprigs Lemon Balm Or Mint, For Garnish (optional!)

  1. Place the watermelon, lemon juice and honey into a food processor. Process until smooth.
  2. Strain the mixture into a large bowl, pressing the juice out of any seeds or pulp that remains in the strainer.
  3. Pour the juice into a large pitcher and chill until you’re ready to drink.
  4. Serve with a splash of seltzer water and lemon balm or mint, if using.

Green Tea & Ginger Spritzer from Newport Natural Health
Green tea and ginger are always a great duo, plus they are both so healthy for you!

  • 2 cups filtered water
  • 1/2 cup raw organic honey (you may substitute a bit of the herbal sweetener stevia, if you prefer)
  • 6 green tea bags or 6 ounces of green tea leaves
  • 1 teaspoon ground ginger
  • 2 teaspoons grated lemon peel
  • 4 teaspoons fresh lemon juice
  • 1 bottle of your favorite unflavored sparkling mineral water
  1. Combine water, honey or stevia, ginger, and grated lemon peel in a saucepan. Bring to a boil over medium heat. Reduce heat to a slow boil. Cook for about ten minutes, stirring occasionally.
  2. Remove from heat. Add the green tea bags or tea leaves (inside a tea ball), cover, and allow to steep for another ten minutes. Stir occasionally.
  3. Remove tea bags or tea ball. Add lemon juice and stir. Pour into a container with a lid (preferably glass rather than plastic) and place in the refrigerator to chill.
  4. When tea mixture has cooled, pour about 1/2 cup into a glass of ice. Fill the glass with sparkling mineral water, and enjoy a refreshing, healthy drink!

Star Spangled Spritzer from Apron Strings Blog
Why not carry the patriotic spirit into the drinks with this red, white and blue deliciousness.

  1. Place a few strawberries, blueberries and chunks of pineapple in a glass.
  2. Muddle the fruit by mashing it with a wooden spoon or muddler (if you have fancy barkeep type equipment).
  3. Toss in some ice cubes and bits of the aforementioned fruits.
  4. Pour in a favorite ginger ale or lemon lime soda.
  5. Sip on your veranda whilst lounging in a swing or Adirondack chair, fanning yourself with a paper fan southern belle style. Ok, that last step is optional. But so fun.

Let us know which one is your favorite, or if you have a great spritzer recipe of your own to share! PS – Need a few outdoor living accessories to spruce up your outdoor space before you invite people over? Check out our firepits, grilling accessories, lighting decor and more on Willard and May!

Happy Memorial Day!

team-signature

Before & After: A Renewed Deck

Before & After, Weekend DIY

About a year ago we shared a DIY lesson on how to power wash your deck and how to get it looking brand new! We also shared one of our team member’s deck that could have used some TLC and pressure washing magic. Here is the before to remind you and another view of the before once they had their own personal items added to the deck.

1252210ws (1)

IMG_5901blog (1)

Now, we’re back a year later to share how the deck looks after getting power washed and then re-stained following the DIY instructions.

First, came the pressure washing using a borrowed pressure washer from one of their parents. View the behind the scenes instagram of how it went down with a before and after of the power washing step:

Next up was to brush on a a weatherproofing stain, here is the behind the scenes look on that (nevermind the cabinets, they were also renovating their kitchen at the time).

And now view the deck completely done and re-assembled! The process took quite a few weekends since both of them have full time jobs – shout out to all the weekend warriors out there! Three weekends were spent pressure washing and cleaning up the boards which included some sanding on the railings. Another, two weeks were spend staining the deck with a weatherproofing stain and making sure to get all the nooks and crannies. The best part of the project: the cost, because it isn’t that large considering the transformation. Just three gallons of weatherproofing stain were used.

IMG_7064blogIMG_7069blogIMG_7062blogIMG_7075blogIMG_7089blogIMG_7088blog

One last tip: If you can borrow a pressure washer from someone you know, you’ll save more. View all of our Weekend DIY posts.
team-signature1