Spring DIY Projects

Birds, Gardening, Outdoor Decor, Pin Inspiration, Weekend DIY

We’re over a month into spring and well, for most of us, it quite frankly hasn’t felt much like spring yet. Seems like Mother Nature is perhaps a bit confused? Here in Wisconsin we’ve been plagued with the opposite of a drought – never ending rain and very non-spring like temperatures. Some of our friends further north are even getting more snow!

Whether the outside says it’s spring or not, it can still be spring inside your heart. To get thinking spring, check out these fun DIY ideas that incorporate spring ideas – and let’s hope all of these April showers do in fact bring May flowers!

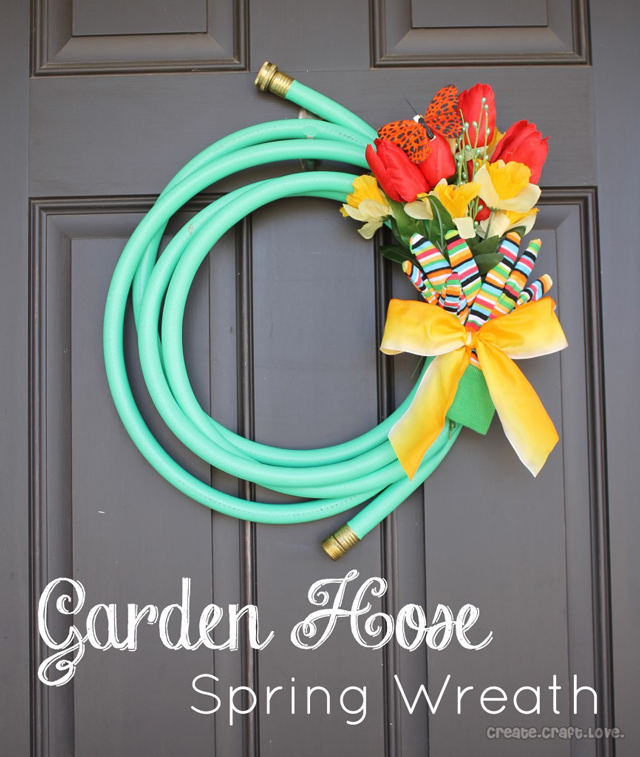
Hose Wreath Tutorial by Create.Craft.Love. hose-wreath

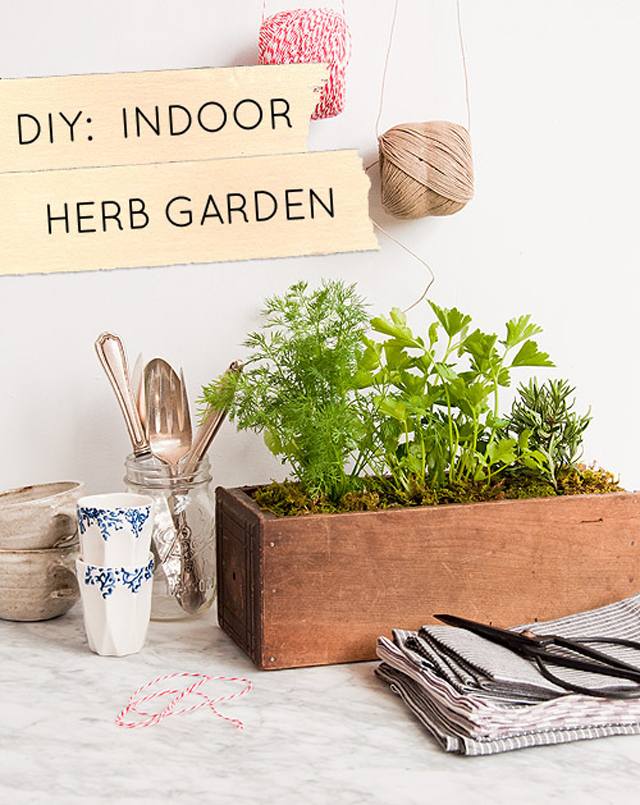
Indoor Herb Garden DIY by DesignSponge
herbgarden1

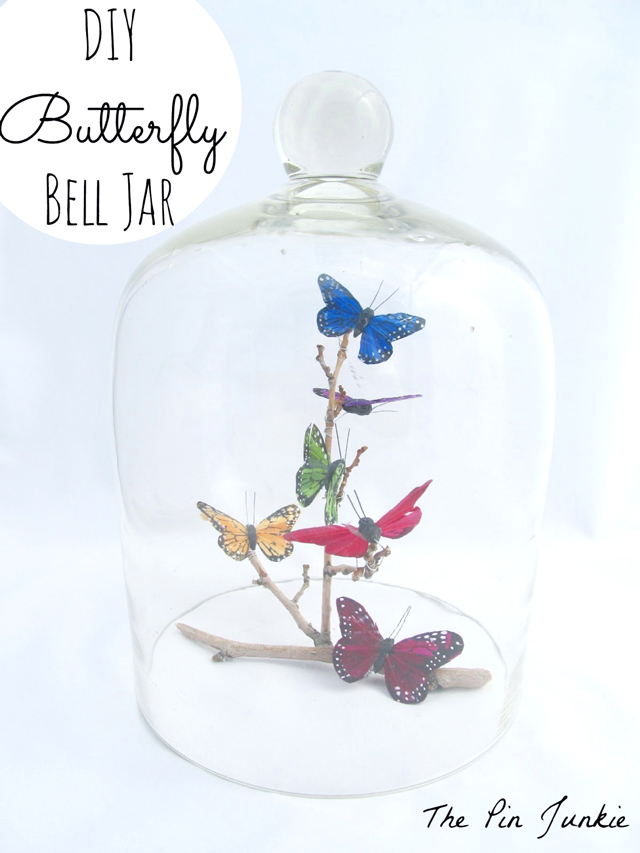
Butterfly Bell Jar Tutorial by The Pin Junkie
If you’re looking for a bell jar/cloche, check out the ones we have available here.
butterfly-bell-jar

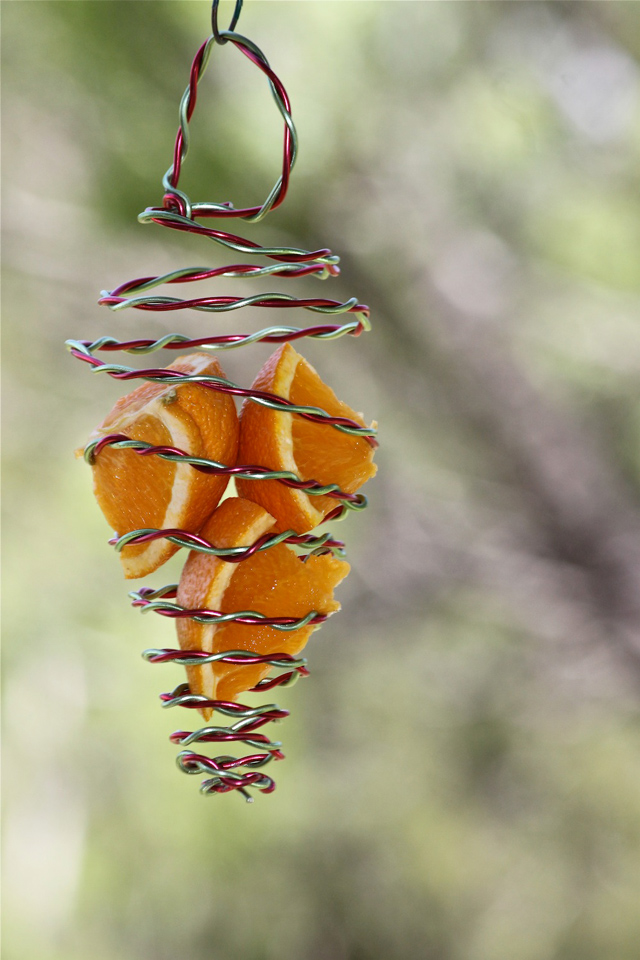
Under $5 Spring Bird Feeder by A Cowboy’s Wife
diy-birdfeeder

For more fun spring and DIY ideas, check out our entire DIY Pinterest board.

team-signature


Weekend DIY: Stump Stools

Before & After, Furniture, Outdoor Decor, Outdoor Party, Pin Inspiration, Weekend DIY

Everyone dreams of having that amazingly decorated,-cozy outdoor room often seen in  magazines or design blogs. But you easily brush if off because how in the world would you make it look like that yourself? Well, we recently came across a photo of a lovely outdoor dining set up, immediately thought “oh so pretty” and next, how awesome are those stools?! Then, we thought where do you find those! Finally we thought, let’s look at pinterest for a DIY. Here’s the image we’re referring to:

stone wall outdoor dining table with tree stump stools (Source: Pinterest)

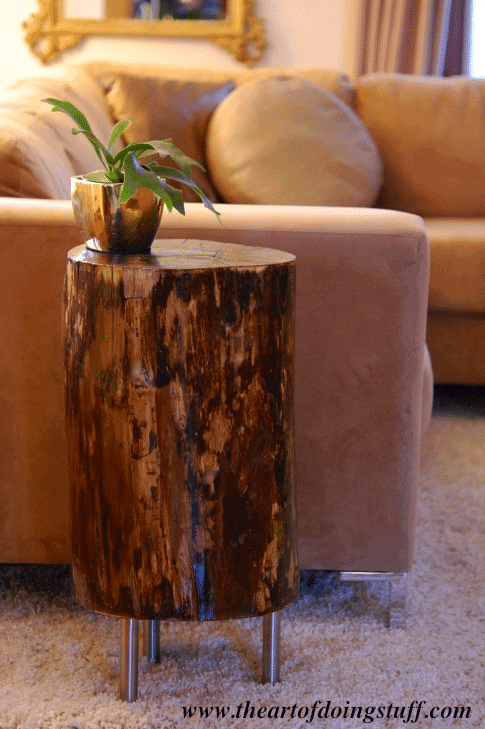
So, stumped on what to do this weekend? (no pun intended, haha) Not anymore! We’ve got the perfect DIY project for you to start and it would make a great addition to your outdoor living room,a porch or even your favorite rustic indoor space! This DIY comes from the blog, The Art of Doing Stuff. The author believes in not spending lots of money on the things that fill your home, as she’d rather find it at a garage sale or on the side of the road as opposed to a fancy store. So when she also saw a tree stump side table in a magazine, she thought, “I can make this”. And so can you.

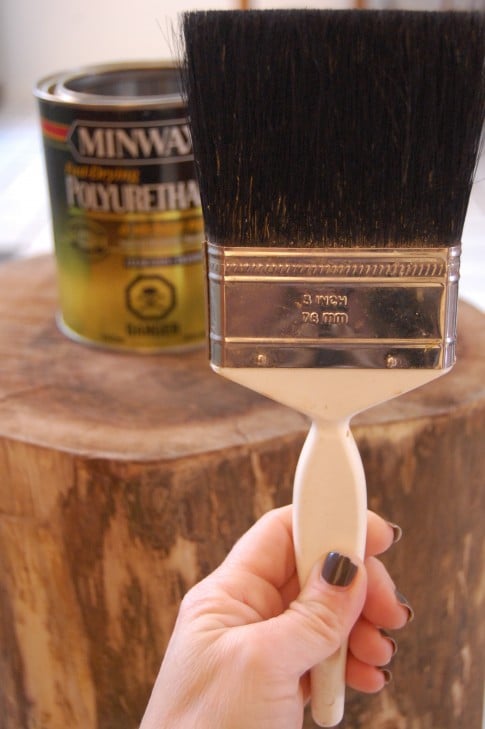
This DIY stump project is something you’ll want to start this weekend, and finish up in about a month – as you have to allow the stump to dry out. But don’t worry; it’ll be ready just in time for the arrival of spring! The bonus is this project doesn’t cost much, especially if you can easily track down an old tree stump outdoors. Next, you’ll need some polyurethane, sand paper and a paint brush. If you want to make it into a side table, you could even add legs like she did. She shares the whole DIY instructions on her blog, so head on over and check out how to make this amazing stool or side table.

(Source: The Art of Doing Stuff)

We also found another great example of how to use a stump sidetable on the blog Design Megillah. Check it out to see how she made her stump!

Happy Weekend!
team-signature

Weekend DIY: Updating Dated Lights

Before & After, Curb Appeal, Weekend DIY

Like your front door, the entry way lights which guide your guests to your home set the tone for what’s inside your house. Don’t believe us? Go take a quick look!

Are they constructed of out-dated, hideous brass which means your house is stuck in the 90’s? Are they sponge-painted, giving the impression that your house is holding out for a return of the 80’s? Are they northwoods-y, but yet everything else in your home screams modern? Or perhaps they are simply just 100% not your style. This weekend, let’s fix that and enhance your curb appeal!

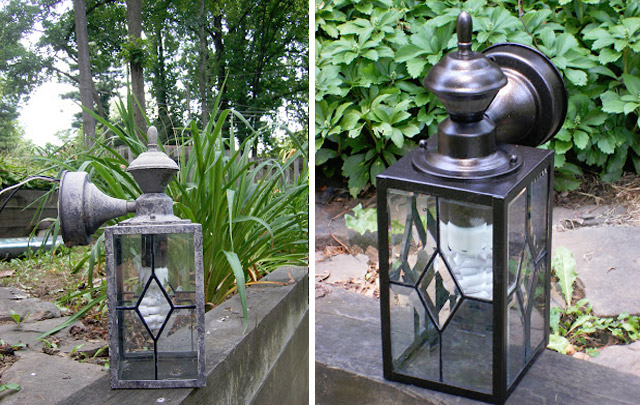
This weekend DIY project is inspired from Katie of the blog BowerPower. A few years ago, they traded in their outgrown home for their dream home – completely dreamy, besides the fact that most of the design aesthetic was stuck in the 80’s — for instance check out their sponge painted light fixtures. For a quick update she decided to spray paint them rather than replace them. The only cost involved was painters tape, spray paint and pieces of leftover cardboard. Head on over to her blog to read the step-by-step DIY instructions for easily updating your own outdoor light fixtures, plus her amazing before and after pictures.


(Photo Source: BowerPower Blog)


(Photo Source: BowerPower Blog)

(Photo Source: BowerPower Blog)

Have you ever transformed something in your outdoor space with just a little spray paint? What style are your front porch lights? Are you able to transform them with some spray paint, or were they just too big of a crime so you ended up replacing them? Tell us in the comments below!

Happy Weekend!
team-signature

Weekend DIY: Potting Bench

Weekend DIY

Look outside your window right now: do you see snow or green grass? Our office windows face the front of our building, and we’re unfortunately seeing snow right now. Green grass is not in the forecast for at least a month or two for us! If the same is true in your case, don’t let it get you down! To help wash away the winter blues and get you in the springtime mood, here is a simple one-day DIY project that can be completed in your garage: creating a potting bench.

diy potting bench centsational girl

Kate from Centsational Girl had plans to build a potting bench for years, but it wasn’t until this past summer that she and her husband actually got out the hammer and nails to do so. She followed a building plan from Better Homes & Gardens to complete this DIY project but made some modifications along the way, like adding colorful, vintage hose faucets (super cute by the way)! Head on over to her blog to read all about the DIY process and how it’s making her want to get her hands dirty!

redwood potting bench side view centsational girl

one who plants a garden

Happy Weekend!
team-signature

Weekend DIY: Chalkboard Paint Herb Pots

Gardening, Outdoor Decor, Pin Inspiration, Weekend DIY

It’s never too cold to grow herbs indoors! Even temperatures that reach -8 degrees F like we experienced in WI this week can’t stop you!  Growing herbs indoors during the winter is not only convenient for adding a special touch to your kitchen creations but also is a great way to help keep your spirits high during the winter months – who doesn’t enjoy some fresh basil or oregano?

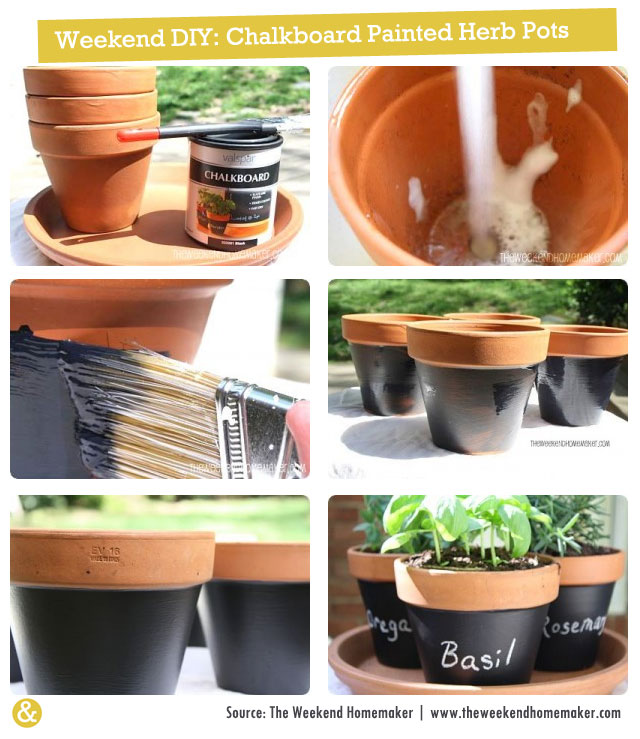
You know what else will keep your spirits high? Doing a fun and easy weekend DIY project! How about some chalkboard painted pots to grow these tasty herbs in? Wouldn’t these look great along a kitchen windowsill? The Weekend Homemaker has a great little DIY project on her blog that shows you step by step how to create this project. The only thing that you might need to do differently is start these herbs from seed since most nurseries won’t have these in plant form quite yet this season. Head on over to her blog for the full DIY instructions! (P.S. Chalkboard paint can be purchased at just about any big box home improvement store (Home Depot, Lowes, Menards). Just look in the aisle by the spray paint!)

wmblog-chalkboardPots

Does anyone else have a fun weekend project ahead of them?

Happy Weekend!
team-signature

Weekend DIY: A Christmas Tree for the Birds

Birds, Outdoor Decor, Weekend DIY

While most of our northern bird friends fly south for the winter (as would I if given half the chance), some of our bird friends stay put and wait out the long, cold winter with us. Chickadees, Cardinals, owls and many others are the brave souls you’ll see fluttering around your yard this winter. Finding food in the winter is a much larger task than in the summer months, as snow covers the ground and not as many people venture out to re-fill their bird feeder.

Once Christmas is past and your tree is starting to look dried out, here is a suggestion: decorate the same tree, but outdoors for the birds! Robin from the blog The Robin’s Nest shared a great example of just how to decorate a Christmas tree for the birds. We’ll share a few photos and ideas from her blog, but then head on over to her site to view more!

(Photo: Robin Beck)

A few examples of decor she created for the tree were peanut and berry garland, bird seed ornaments and purchased bird houses. A few tips she shares:

  • Use wire for the garland instead of string. The birds will bite through the string and take it with them otherwise.
  • You can buy square-shaped bird seed chunks and then turn them into a present with raffia. Otherwise you can find bell-shaded ones at this time of year, or make your own from these diy instructions.
  • Add bare sticks throughout the tree for birds to perch on.
  • Tie everything to the tree with wire and zip ties. Squirrels also will love the tree and will tend to run up and down – easily knocking things off the tree if items are not secured.

(Photos: Robin Beck)

Happy Weekend!
team-signature

Weekend DIY: Gift Tags Inspired from the Outdoors

Outdoor Decor, Outdoor Party, Weekend DIY

Christmas is just around the corner and the season of giving is here!  Whether you have all of your Christmas shopping done or you haven’t even started, you can begin checking one thing off your list today: holiday gift tags! We’ve seen so many amazing ideas on pinterest for gift tags, everything from scrabble letters, ornaments, crossword puzzles and more. We figured we’d share with you an easy gift tag idea that brings the outdoors inside this holiday season. These unique gift tags come from the Frolic! blog. After finishing the project, head on over to their blog for more inspiring floral arrangements, decoration ideas and style tips!

Holiday cards
Frolic! Blog

If there are any Santa believers in your home, you may have to do this weekend DIY in a closet, but otherwise you can start off your wrapping with these outdoors inspired wreath gift tags!

Here are the supplies you’ll need: spool of wire, greens (Frolic! used boxwood, oregonia, rosemary, myrtle, seeded eucalyptus), clippers, floral tape, twine, card stock, and a scissors.

How to make the wreaths:
No. 1 // Make a small, round shape by twisting a couple pieces of wire together. Our wreaths are about 1″ in diameter.
No. 2 // Clip pieces of greens, removing leaves from the bottom inch of the stem.
No. 3 // Twist the greens around the wire until it is covered.
No. 4 // Keep twisting small pieces of greens around the form, securing them under the other stems as you go. Secure with wire or floral tape if they need extra reinforcement.
No. 5 // Clip any stray stems that disfigure the shape of the wreath.

How to make the cards: 
No. 1 // Cut a square of card stock (around 2″ x 3″ or whatever fits your wreath best) and punch a small hole in the center, top of the card.
No. 2 // Stamp the card with a custom stamp or buy one ready-made. Or if you are into unique handwriting try finding some inspiration for pinterest.
No. 3 // Attach a mini wreath by tying a piece of twine through the hole.

homemade christmas card
Frolic! Blog

We love the simplicity of these and how just a little touch of greenery is such a classy way to adorn your gifts this season.

Happy Weekend!

Weekend DIY: Add Privacy to your Front Door

Before & After, Curb Appeal, Outdoor Decor, Pin Inspiration, Weekend DIY

Have you watched a scary movie or tv show lately? You know, the kind that makes you have that creepy un-easy feeling that someone is just outside your home, staring into your living room while you go about your life?  Or it makes you second guess every action you do in fear of the neighbors thinking you’re crazy?  And now with the sun rising later and setting earlier, it seems as though it is always dark when you are at home – dark before you leave for work, dark when you get home – you have the urge to add some extra added  privacy to your windows…blinds, curtains or the like. And you better do it FAST, before they get you! ;)

While blinds and curtains work well for windows throughout your home, putting blinds on your front door can seem a bit gaudy or just not as classy as you’d like. We have the perfect DIY idea that quickly transforms the “dark unknown” into a graphical focus in your entryway! This DIY comes from one of our team members who wanted to add some privacy to her front door after removing some blinds that once filled the window on the door.
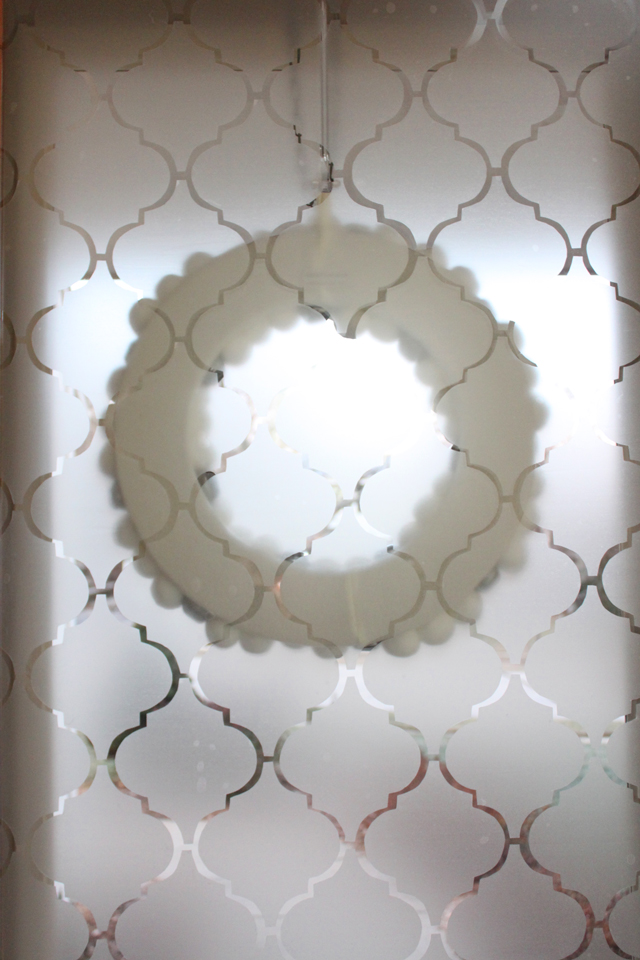
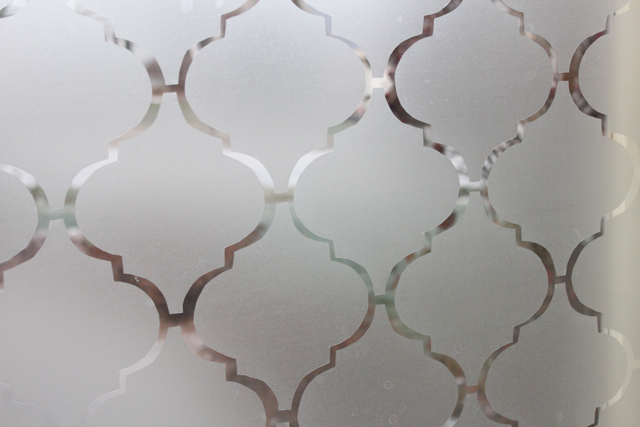
She got the window idea from the blog, 7th House on the Left, who even provides a handy template for the cut-out shape, to help your cutting go easier and faster. Also, by reading the comments on the blog, you’ll learn a lot of bonus tips. The blogger transformed her front door (with half a window) by applying contact paper in a unique Moroccan shape to the window to give it a faux-etched look.

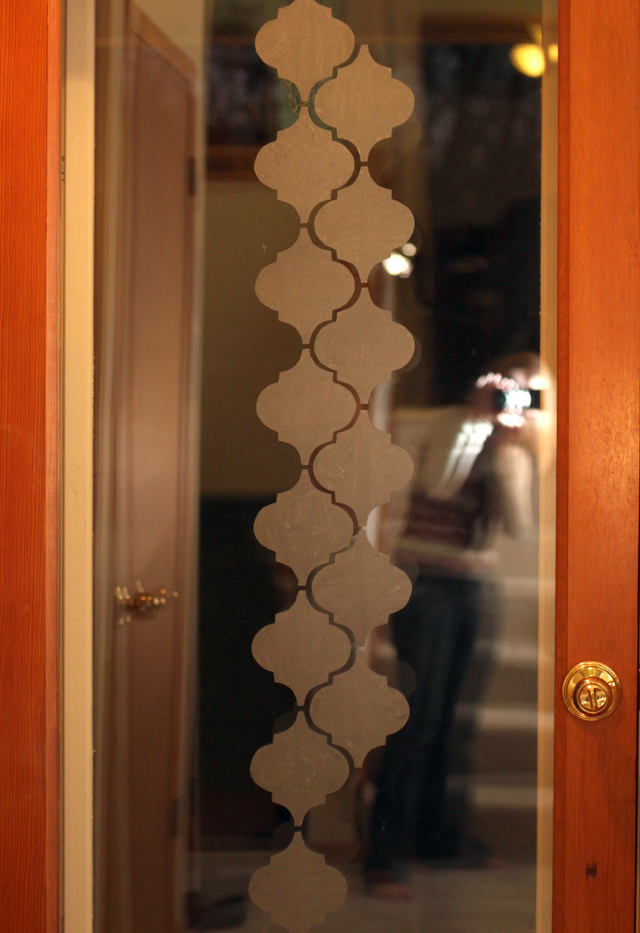
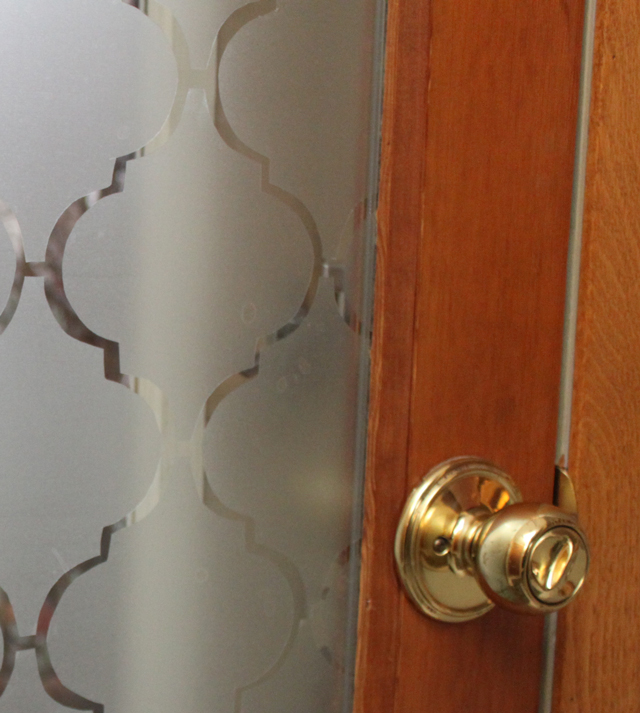
Our team member, Vanessa, tried this same effect, applying it to her completely glass front door. Check out the finished look below – talk about a unique entryway that provides privacy but still allows a lot of light in! Here are her summarized instructions, but you can feel free to also head to the 7th House on the Left blog for more information!
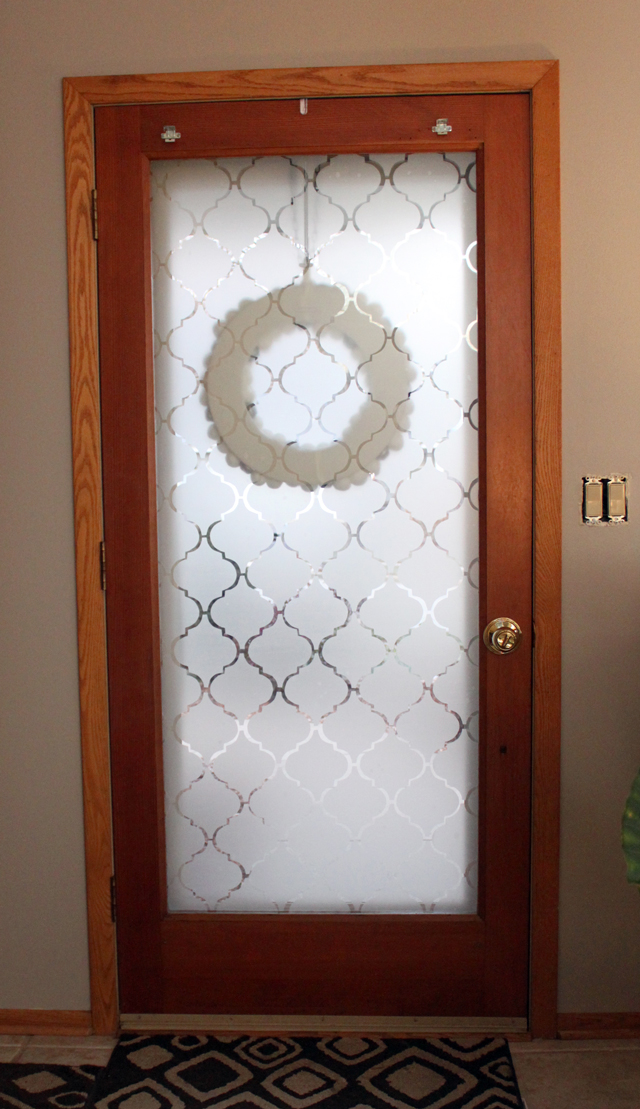
add privacy to windows with contact paper

What you’ll need: 1 roll of contact paper (find at any big box store), template provided, cardboard or cereal box, black marker, scissors, tape measure, exacto knife/utility knife and a dry erase marker.

1. Print out the template provided by 7th House on the Left blog.
2. Cut out the shape and transfer it to a thicker paper, such as a cereal box or other piece of cardboard.
3. Trace out as many shapes as your heart desires onto the back (or paper) side of the contact paper. Our team member found that drawing 8 of the shape, and then cutting out those provided the easiest route. Since the paper has been rolled up, it tends to want to keep rolling, so only having 8 keeps it much more manageable.
4. Once you have a decent amount cut out, you’ll need to measure your space and gauge how many more you’ll be needing.
5. The first time Vanessa counted how many she’d need, she was way off – you’ll soon see how many more you need and how you can use bits and pieces of them to fit around the edges.
6. Measure your window and mark the exact middle (vertically and horizontally) with a dry erase marker on the opposite side of window.
7. Start your first shape in the exact center and then apply the first column going up and down. It’s best to do a complete column first, also keeping about 1/2 an inch between the tops and bottoms. This will allow for the best possible spacing throughout your window which helps to keep things consistent.
8. Keep applying more and more until it’s covered. Vanessa found that hers wasn’t perfect due to the fact it’s handmade, each cut being unique. But from a few feet away, she says, you can’t even tell and it just looks AWESOME!
9. Once you’re done, use a credit card to smooth out any tough bubbles that may have formed. Also, use the utility knife to trim the excess from shapes around the edges.
10. Sit back and enjoy (without being terrified of the unknown that lurks outside!)
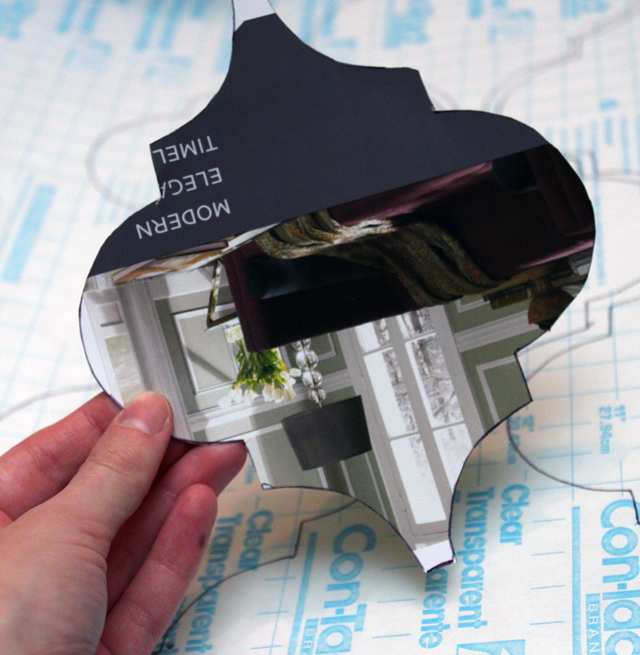
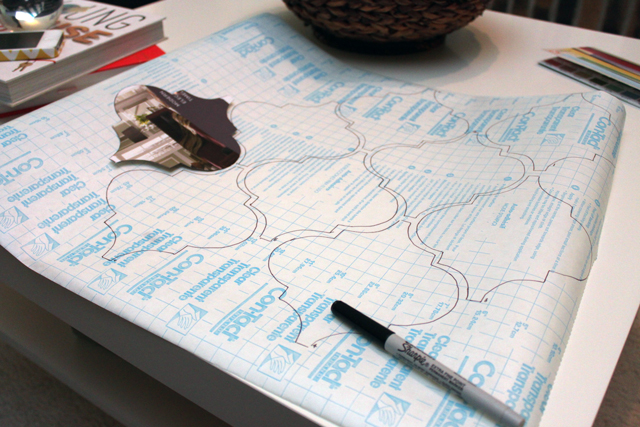
The best part about this, is that it’s only about $3 to create and it’s removable if you decide later on that you’d like to switch things up! It also adds a very classy touch to your home when viewing it from the outside. Thanks to the 7th House on the Left blog for inspiring us!

Happy Weekend!

Weekend DIY: Spray Painting Eye Sores

Furniture, Weekend DIY

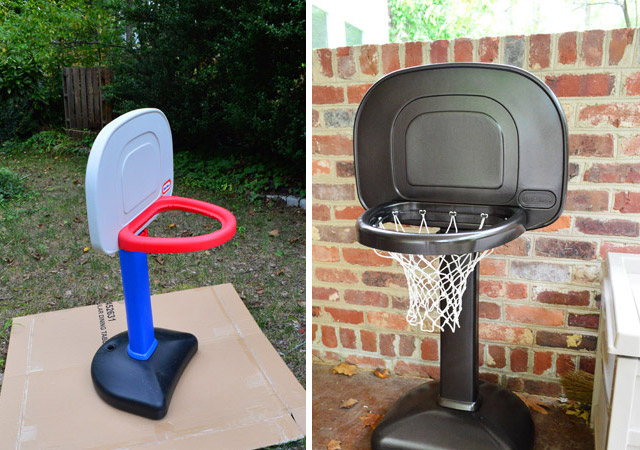
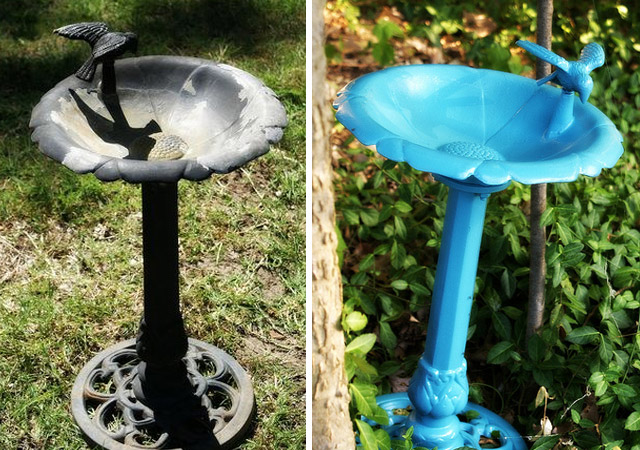
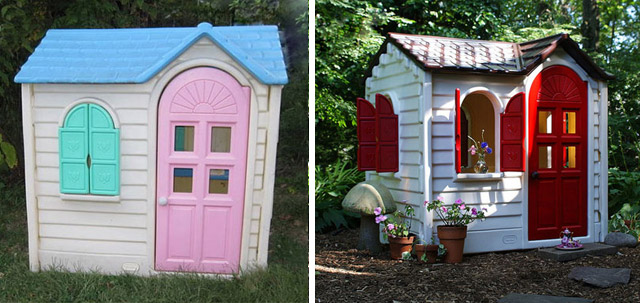
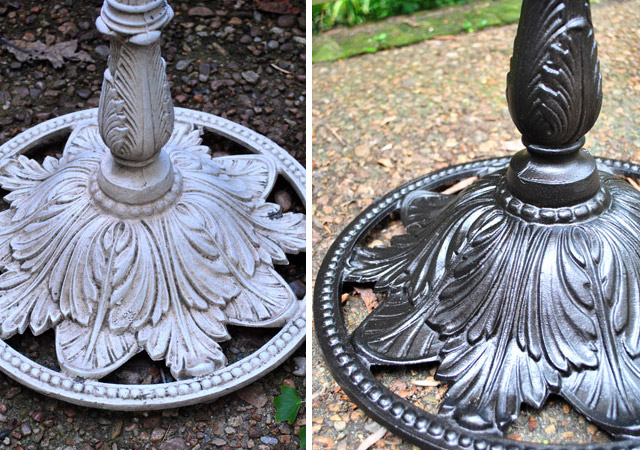
Everyone’s got one – an eye sore. And no, not on your actual eye – we’re referring to that ugly collection of ducks you have in your front yard, or the hideous paint peeling furniture set that needs to be buried. Those are pretty extreme cases, but if you’ve got something in your yard that needs a overhaul, why not try simply spray painting it to add a little bit of new life to it?

Here are some examples of how just a little spray paint goes a long way – and it’s cheap!

Young House Love

Mama Roots

Apartment Therapy

Kristen Mee

Young House Love

So now that you’re convinced, here is what you’ll need: spray paint, a primer if you want extra coverage or you think the paint won’t stick to the surface (some spray paint has a primer already in it), and newspaper or cardboard to protect the ground. (Oh, and a beautiful day also helps!)

Spray paint sticks to most surfaces, but if you fear your object is in need of a good sanding or needs smoothing out, you may want to sand the piece. Then wipe everything down to remove any remaining dust or dirt. Next, add primer if you think your object needs it. Get your object out in the yard and situate it on the ground on top of newspaper or cardboard and get spraying! It’s best to give the object, multiple, very thin coats versus one single heavy coat. What’s also great about spray paint is that it dries very fast, meaning you won’t have to wait too long to begin another coat. You may also want to avoid a windy day outside in case you get dust/debris landing on your object drying within the spray paint.

Let your object dry completely (follow on-can instructions) and presto, done! Say so long to that eye sore!

Happy weekend!