What’s New for Spring?

Gardening, Gifts, Store

Now that spring is making its appearance, we are sure most of you can’t wait to get your hands in the dirt or grill out for the first time. Now that daylight savings has past and we’ve all recouped from springing forward, it gives us the perfect amount of sunlight to be able to do a few things outdoors after work, before it gets too dark out.

And for us, spring also means new items for our Willard & May Outdoor Living Store! We’re excited to share with you our favorites that will inspire you to get out and garden with a potting bench, have a family fire with a chimenea, or welcome your new neighbors over with a cheerful doormat. Check out our favorites below and be sure to browse around our site for more new items!

new-spring13-items

1. Modern Bird Feeder 2. Decorative Butterfly Hook 3. Potting Table 4. Garden Chalkboard Sign 5. Spade and Pitch Fork Water Gauge 6. Vertical Planter 7. Grilling Set 8. Plant Markers 9. Rose Doormat 10. Gardening Stool & Tool Set

Plus, check out our new selection of Garden Chimeneas! This season we are featuring four different styles in which each can be taken apart and made into two pieces + each comes with a metal stand. The pieces easily fit inside each other which helps with shipping and storage. Since it can be shipped in a smaller box, we bounce our shipping costs savings back to you by discounting the price on these new varieties! Plus, if you need to store it over the winter, it will take up less space.

new-chimeneas

1. Black Ivy Chimenea 2. Copper Ribbed Chimenea 3. Green Ivy Chimenea 4. Toscano Ribbed Chimenea

team-signature

Green All Year – Faux Terrariums

Gardening, Gifts, Store

You’ve probably heard the phrase “luck of the Irish” – especially since St. Patrick’s Day is this weekend. Upon hearing this phrase, you’d typically think that it means that the Irish are lucky people, when in fact it’s just the opposite. If you look up the history behind that phrase and the Irish, you’ll see that it is not quite good luck they refer to, but that the Irish have particularly bad luck. Ireland faced famine, war, prejudice and had their land taken from them multiple times. However, later on in time, this phrase was also referenced to the times when the Irish came to America and found gold, therefore adding a positive connotation.

If you happen to have the bad “luck of the Irish” when it comes to gardening, you actually may be in luck after all! Keeping plants green (a.k.a. “alive”), does require some hard work. You’ve got to water them, fertilize them, keep pests away, and some of them even need to be cut back regularly. Not to mention some plants only grow in specific environments. So, if you have trouble keeping plants “green” then fake/faux plants are the way to go!

We recently launched a line of faux terrariums, cleverly named “Forever Faux Terrariums” because they will be forever green! If you’ve seen live terrariums and been envious of them, you’ll be happy to know that these Faux Terrariums look and act just like the real ones and you don’t even have to tell people they are fake!

Building a faux terrarium couldn’t be easier! Simply pick out a container. Next,  pick an artificial plant foliage option to place inside and then add a filler option such as rocks or moss. No watering, no cutting back, and no worrying required. You are also in luck because we made an easy to follow step by step How To Guide on Creating a Terrarium. Check out below all the fun options we have + save $5 this weekend only with coupon code: FOREVERGREEN5

faux-fake-artificial-terrariumsTerrarium coupon(1. Bubble Terrarium 2. Square Grass Terrarium 3. Terrarium Lid/Cover 4. Cylinder Terrarium 5. Large Bubble Terrarium 6. Cylinder Terrarium 7. European Terrarium 8. Lotus Terrarium 9. Grass Terrarium 10. Bubble Terrarium)

Not only will these Terrariums stay green forever, they’ll also add some life back into your home. Any interior designer will tell you that adding plants and greenery is crucial to good design. Place a terrarium on a bookshelf, coffee table or use it as a centerpiece for your table. It’s also a good idea to mix a few of them together. Here are just a few ideas to inspire you:

fake-terrarium-1 fake-terrarium-2 fake-terrarium-3 fake-terrarium-4 fake-terrarium-5

No more Irish luck for you and you also no longer have a valid excuse as to why you can’t “grow” a terrarium! And as the Irish say, may the road rise to meet you, which translates to may success be with you!

Happy St. Patrick’s Day!
team-signature


Attracting Birds to Your Yard // Guest Blog

Birds, Gardening

Written by Guest Blogger, Ernie
how-to-attract-birds


Many gardeners have a love/hate relationship with birds and other wildlife. While it can be fun to watch the little critters, sharing your flowers and produce with them can be a bit of an inconvenience. However, there are a lot of benefits to attracting birds to your garden. Below are reasons why and ways that you can do so.

Why Attract Birds?
Birds visit gardens to eat. Like humans, they need a varied diet. So if you provide a variety of plants, they won’t focus on just your berries or tomatoes. By providing a variety of flowers and seeds, you can get the benefits of avian visitors without sacrificing your food supply.

The main benefit of birds is that they get rid of bugs and weeds. A healthy stream of birds in your garden will prevent a buildup of harmful bugs, and uproot many of your weeds. This allows the native plants in your landscape to flourish.

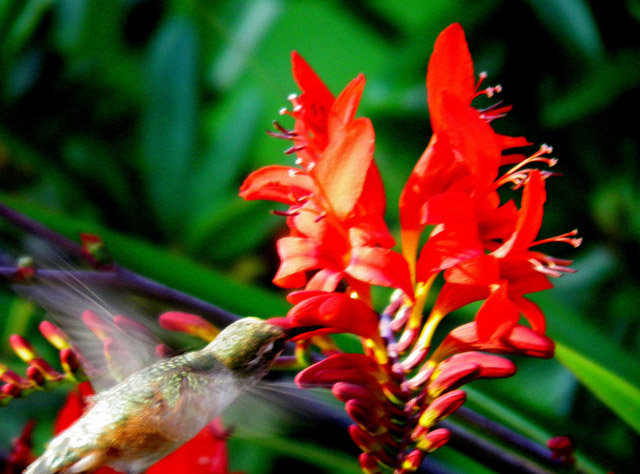
Attracting birds also provides you with the opportunity to witness beautiful creatures in your own yard on a regular basis. Keep a camera handy so that you can try your hand at some nature photography. Maybe you’ll even start scrapbooking.

If the birds are getting into your prized plants, you can always place netting over certain parts of your garden. Just be sure to get materials that birds won’t get stuck in. Finding injured birds in your garden is not worth saving a few tomatoes.

P7280003-Maxine-Scheevel-03-09-2012

How to Attract Birds
Making your yard bird-friendly does not mean you have to let it run wild. You can landscape in such a way that attracts both birds and humans. The main things that birds need are food, shelter, and water. Plant trees that offer shade and plenty of perching space. The more places there are to hide from predators, the more visitors you’ll get. For double duty, provide trees that grow seeds and/or berries. These foods, added to flowering bushes and berry growing shrubs will make your yard the hoppin’ hotspot for your flying friends.

You can supplement your natural attractions with bird baths, fountains, and feeders as well. Hummingbird feeders are inexpensive to maintain, as you can easily make your own sugar-water solution. If you have seed and mullet feeders, be sure to provide good mixes that don’t contain pesticides and harmful chemicals. A lot of packaged mixes have a bunch of filler that birds don’t actually prefer, so watch out for that.

A water feature can add a lot to your lawn. It brings an air of natural peacefulness to an area. Weather you install a pond, fountain, or bird bath, be sure to maintain it well. Water features can also be breeding grounds for bacteria, so keep them clean. You may need to add a heating function. Line baths with plastic so you can easily lift ice out. Night lights and small lamps can go a long way to prevent freezing.

You don’t have to stop at birds though. Putting nuts out might keep squirrels away from your feeders, but give you the benefit of their presence in your yard. Watching squirrels titter away can be fun as long as their aggression doesn’t startle other wildlife.

Reptiles and amphibians keep bugs away too, so if you have a pond, consider a ceramic toad house to keep toads cool in the summer. They’re great for eating those pesky insects and are great conversation pieces with the grandkids (“how about you go kiss that toad and see if it turns into a prince?” “EWWW!”).

If you take these steps to provide sufficient food, water, and shelter for your native birds, your garden is sure to benefit. You can start by utilizing the resources you already have- bugs and plants, and expand your efforts from there. If you have any tips for attracting birds to a garden, share them in the comments below.


ABOUT ERNIE

Ernie Allison 
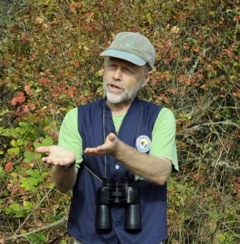
Ernie Allison has been a “bird nerd” since he was a kid. He loves contributing to conservation efforts and spreading awareness to issues concerning birds and nature in general. Writing for birdfeeders.com has given him the opportunity to spread awareness as well as learn about hummingbird migration patterns himself.


Weekend DIY: Chalkboard Paint Herb Pots

Gardening, Outdoor Decor, Pin Inspiration, Weekend DIY

It’s never too cold to grow herbs indoors! Even temperatures that reach -8 degrees F like we experienced in WI this week can’t stop you!  Growing herbs indoors during the winter is not only convenient for adding a special touch to your kitchen creations but also is a great way to help keep your spirits high during the winter months – who doesn’t enjoy some fresh basil or oregano?

You know what else will keep your spirits high? Doing a fun and easy weekend DIY project! How about some chalkboard painted pots to grow these tasty herbs in? Wouldn’t these look great along a kitchen windowsill? The Weekend Homemaker has a great little DIY project on her blog that shows you step by step how to create this project. The only thing that you might need to do differently is start these herbs from seed since most nurseries won’t have these in plant form quite yet this season. Head on over to her blog for the full DIY instructions! (P.S. Chalkboard paint can be purchased at just about any big box home improvement store (Home Depot, Lowes, Menards). Just look in the aisle by the spray paint!)

wmblog-chalkboardPots

Does anyone else have a fun weekend project ahead of them?

Happy Weekend!
team-signature

Scratching the Garden Itch

Gardening, Pin Inspiration, Store

If you’ve come to this blog, chances are you are lover of the outdoors…after all, this is intended to be an inspirational outdoor living blog! We hope this blog is satisfying your desire to be outdoors, despite the frigid temperatures or mountains of snow you are facing in your backyard. We hear you loud and clear, and we’re with you!

If you were hoping to find some ideas to “scratch that garden itch” you’ve been facing since October, or maybe the first frost, it’s your lucky day. There are numerous ways you can garden in the winter or at least prepare for your glorious spring and summer gardens.

Plan your garden
Winter is a great time to re-envision your garden. Start by heading over to Pinterest and gather inspiration for your spring and summer gardens. Make a Pinterest board with your favorite garden images that could work in your yard. Then head on over to a flower bulb or garden website and start pinning your favorite flowers and plants you’d like to add to your garden. There in one space (a pinterest board) you can see how your vision is unfolding and you’ve now also bookmarked your favorites for when you’d like to purchase them! This can also help you to decide what you like most and prioritize if you’re working under a space or money constraint.

pinterest-planning

Start seedlings
Many stores and websites start selling seeds in January, so now is the time to go pick up your favorites and start them indoors. There are numerous different and easy ways you can start them, for example in old toilet paper rolls, egg trays, cloches and more. Then after the last frost, you can transplant your mature plants outdoors!

starting-seeds-early(Photo Source: Mommysavers)

Force bulbs indoors
Fall-planted bulbs (tulips, daffodils, hyacinth, etc.) can be forced to bloom earlier indoors — all you have to do is trick them! If you have fall bulbs you haven’t planted, all you need to do is chill them or finish the process of chilling them. Once they have been chilled for the proper amount of weeks, move them to a warm location in your home and enjoy their beauty. For tips on forcing flower bulbs, read this guest blog post, Flower Bulb Forcing. If you’d like to purchase already chilled bulbs, visit Willard & May.

Create a Terrarium/Succulent Garden
We love succulent gardens because they are easy to grow, pretty hard to kill (bonus!) and have a whimsical feel – almost like you could find a little fairy floating around them. One of our designers thought she’d give a succulent garden a try last February, and we all agreed it was nice to showcase a little extra green in our homes or office. To read more on how to create your own Terrarium, visit this blog post titled, Weekend DIY: Indoor Gardensucculent miniature garden in bowl

What have you been doing to “scratch your garden itch”? We’d love to hear all about it!
team-signature

Guest Blog: Flower Bulb Forcing

Garden Spaces, Gardening, Outdoor Decor, Store

Guest Blogger, Gabrielle from the blog FlowerBulbCrazy is here to share some unique ideas and tips for forcing bulbs this winter. After she is done sharing, head on over to her blog to check out other great ideas and tips on gardening with flower bulbs!

There are so many people who really miss out on spring blooming bulbs… people who live in the warmer zones and think it’s too warm to plant!  And then there are people like me who long for winter to be over and want flowers 24/7. Typically, growing flower bulbs is almost fool proof, but forcing bulbs takes a little more time and attention. Forcing bulbs is the term used for mimicking what normally happens to bulbs when planted outdoors.  It is a process that stimulates bulbs to bloom out of season.

The most common and easiest bulbs to force are:  narcissus/daffodilsamaryllismuscari, crocus and hyacinths.  Daffodils and tulips are not too difficult either, but choose shorter and earlier blooming varieties (Triumph, Single Early and Darwin Hybrid varieties) for the best outcome.   Generally, spring flowering bulbs usually require about 10-14 weeks at temperatures between 41-48°F in order to bloom and grow properly come springtime. Check out the chart below for the approximate number of “chilling” weeks required and number of weeks to bloom for different varieties of flower bulbs.

Name of bulb                         Weeks of cold                    Weeks to bloom

AmaryllisNone6 to 10
Crocus152 to 3
Hyacinths11 to 142 to 3
Muscari13 to 152 to 3
Narcissus/Daffodils15 to 172 to 3
Paper-whitesNone3 to 5
Tulips15 to 202 to 3

Instructions
Pot your bulbs right away if you have an appropriate location immediately available, such as a refrigerator, a root cellar, cool basement, or outdoors if temps are below 48°F. When storing pots outdoors for the cold period, be sure that if temps drop below 30°F that you cover them with some type of insulation. If you can’t plant them immediately, bare bulbs can be stored in a mesh bag or paper bag with holes that permit ventilation for several weeks in a refrigerator prior to potting without damage. Note: Do not store them in same vicinity as fruit, as the ripening process can negatively affect the quality of the bulbs.

Use clean pots with drainage holes and regular potting soil. Make sure you allow for 2 inches of soil below the bulb and select a pot large enough to allow the top of the bulb to be even with the rim when placed on the soil. The bulbs should be touching each other for the best look when blooming. Water them well after planting in order to settle the soil.

The bulbs will begin to flower anywhere from 2-5 weeks after they have been brought into warmer temperatures, provided they have been given the recommended number of weeks of cool temperature (see chart above). If you have a set time when you want them to bloom, make sure you add the flowering period to the rooting/cold period for the total number of weeks to wait. Amaryllis and Paper-whites do not need this cold period.

These next steps would be ideal for the best and most perfect blooms.
Move your pots to an indoor area with indirect sunlight and temperatures about 60°F for a week or two. When the above plant growth is 4-6 inches tall, move the pots to a bright, sunny window to stimulate blooming. A temperature of about 68°F and direct sunlight would be ideal. When you see the color on the buds, return the plants to indirect sunlight to make the blossoms last as long as possible. Keep the soil moist at all times.

After blooming, hardy bulbs such as hyacinths and tulips cannot be forced again and should be discarded. They can also be instead planted outdoors where they may re-bloom within a year or two.

Forcing Flower Bulb Inspiration – Ideas for your Home

Maybe you will want to give this a try now?  I especially enjoy forcing Hyacinths for indoor enjoyment because of their sweet fragrance!  Thanks for letting me share and I hope you found this helpful and easy to understand.

Creative Amaryllis Ideas

Gardening, Gifts, Outdoor Decor

Finding affordable holiday flowers for decorations this time of year is a bit tricky due to the fact the flowers you’d be purchasing are being imported from another (warmer) country.

However, one blooming bulb, the Amaryllis, is an easy-to-grow indoor bulb that adds the perfect elegance and holiday cheer to any arrangement you’re wanting to create. Amaryllis come in multiple colors such as reds, whites, multi-colors and pinks. You can buy them as a kit or just as a bulb and plant inside your own pot. Plus, they are easy to find this time of year – purchase them online, in stores or catalogs.

Now that you are itching to grow an Amaryllis, check out these creative and unique ways of incorporating them into your holiday decor…

amaryllis
Martha Stewart

 amaryllis
Florali


Pinterest


Martha Stewart

Amaryllis
Pinterest

Amaryllis :)
Alexan Events

amaryllis
My Design Dump

Weekend DIY: Potting an Amaryllis

Gardening, Gifts, Weekend DIY

With Halloween done and over, everyone seems to be in the holiday mood, dreaming of Thanksgiving and Christmas. I’ve heard countless people say how they can’t wait until they can listen to Christmas music, watch their favorite holiday movie, and enjoy a nice holiday latte in their holiday cups at their favorite coffee shops. So, why hold back? Let’s jump on the bandwagon and get into the holiday mood this weekend!

Now is the perfect time to pot an amaryllis bulb and get it growing for blooms in time for the holidays. These gorgeous flowers create the perfect centerpieces for your family get-togethers, and even make great gifts! Not sure what an Amaryllis is? Amaryllis bulbs are one of the best flower bulbs for indoor forcing and are typically used for this purpose. Bulbs typically begin to sprout within two weeks of planting in soil without requiring any pre-chilling. The blooms of these large bulbs range in color from white, pink, red, or orange and resemble multiple trumpets in shape. The blooms typically appear within 4-8 weeks of planting and can adorn your house for as long as four weeks!


First, you’ll need to pick-up an Amaryllis bulb. Right now you can find them everywhere… online, local retail stores and even at Willard & May. You can buy them just as a bulb and use your own pot and soil, otherwise there are many kits out there that include a nice pot and soil.  Always plant your amaryllis within 2 weeks of purchasing them in order to assure quality (not dried out or not mushy). Also, buy the biggest bulb you can find! The bigger the bulb, the bigger and more numerous the blooms! Take a look at this comparison of two different size bulbs:

Here are the details on how to pot them…

  1. If purchased as part of a kit, place soil disk in the provided pot along with warm water. Allow disk to sit in water for approximately five minutes. The disk will begin to expand as it soaks up the water. As it expands, the soil can be “fluffed” with a fork to fill the pot.
  2. If no soil disk is provided, simply use a nutrient-rich potting soil in any desired pot which is approximately 2″ wider and 2″ deeper than the diameter of the bulb. Be sure that whichever container is used has adequate drainage as these bulbs do not like to sit wet.
  3. Plant the bulb so that the pointed end is up and just protruding from the surface of the soil.
  4. Water well and place in an area of your home which stays warm and receives indirect sunlight.
  5. Continue to provide water on a weekly basis to keep soil slightly moist but not wet.
  6. Set these beautiful blooms out in a spot where everyone can enjoy them – like the counter or an entry way!
Finally, once your amaryllis bulb has bloomed and faded, here are some tips (from the Bulb Blog) in order to get more blooms the following year!


Happy Weekend!


Weekend DIY: Preparing the Ground for Winter

Gardening, Weekend DIY

Winter is just around the corner, and as scary as it sounds, you’ve only got a few weekends to get your lawn in tip-top shape before the snow flies. Unfortunately, due to the sun setting early, most people don’t have time to do yard-work after work – besides who wants to work ALL day long? Not sure where to begin with the little amount of time you have? Take a look at this list of common things you can do to improve your lawn this fall for next spring and follow the links for more how-to’s and tips.

A mowed lawn(Photo Source: ishane)

Give the Lawn a Final, Shorter Mow
Drop the height of your mower’s blade one notch to cut the grass shorter as you prepare for fall. Having shorter grass will prevent the buildup of dead grass come spring.
Read more here

Add Seed
If your lawn has thin or dead grass spots (in the north) or has rye grass (in the south), be sure to overseed this fall. Be sure to spread the seed evenly and keep the areas moist at first and eventually fade out watering. Roots will grow deeper into the soil that way. Read more here

Fertilize
Grass is a huge fan of the fall – it loves the cooler nights, adequate rainfall and the morning dew. Because of the summer damage your lawn endured with the scorching heat, it is best to feed your lawn nutrients before winter. By fertilizing in the fall, you’ll strengthen its roots and increase the nitrogen it stores for the early spring. Read more here…

Clover(Photo Source: WI DNR)

Spray Weeds that are Perennial
Now’s the time to kill those weeds that you know will come back around in the spring! Fall is the best time to spray them, provided they are still green. As they prepare for winter, they will absorb herbicides easier – so by providing a fall application, you take advantage of this by getting those weeds under control. Read more here…

Remove Thatch and Aerate 
Thatch is a layer of dead grass and weeds that threatens the health of your grass. Use a power rake or vertical mower to remove thatch and then use another rake to pick up the thatch and dispose of it. By removing thatch, you can prevent disease and insect problems for your lawn. To cut down on the amount of thatch that develops, make sure to aerate your lawn every few years. It will also improve the drainage and loosen the soil. Read more here…

Red Orange & Pink Leaves on Grass(Photo Source: M. Markus)

Remove Fallen Leaves
Once the leaves have fallen from the trees that stand in your yard, be sure to rake them and set aside for disposal. Allowing fallen leaves to remain on your lawn can ultimately kill grasses or aid in insect and disease problems. Many cities will host leaf pick-ups where all you have to do is leave them in clumps near the street! Contact your city or village of residence to find out more about fall leaf clean-up in your area. PS, don’t forget to remove the leaves from your gutters too! Read more here… 

Drain Hoses and Irrigation Systems
And when winter is about to come knocking at your door, be sure to drain your hoses and irrigation systems and turn off the water if it will freeze in your area. Read more here… 

Happy Weekend!