We asked our team what’s their favorite fall activity, and here is what they said:


We asked our team what’s their favorite fall activity, and here is what they said:
With every dropping leaf, we are reminded fall is here. And as you shed a tear at each fading bloom in your garden, don’t forget – those bountiful perennials that provide summer-long color will be back before you know it next spring. But before you hang up your shovel and gardening gloves, keep them out a weekend or two longer. You’ve got some perennials to divide (and fall bulbs to plant)!
If you’re looking for more bang for your buck when it comes to gardening, than perennials are a great investment. Overtime perennials should to be divided to allow for proper growth of the existing plant, but once you divide them, you magically have more to plant elsewhere in your garden and enjoy. As perennials get more compact, they fight for nutrients and water, so don’t skip this simple and rewarding step.
Check out these Instructions from the blog, FlowerBulbCrazy:
Here are a few other tips we came across for successfully dividing perennials:
A few other fall gardening chores to include in your weekend outside: bringing your container plants indoors to avoid being swallowed by the cold, planting flower bulbs, and harvesting seeds from perennials and flowers, and again you’ll have more to grow.

Last week we shared with you fall bulb planting basics: including the different types of bulbs, the bulb life cycle, and the important tip that you should always plant bulbs that grow best in your zone. Now that you’re a bulb genius, we’ll share our favorite fall bulbs that we’re sure you’ll love!
Bulbs can be found just about anywhere this time of year: online, garden centers, or big box stores. Now is the perfect time to pick out what you’d like to plant as it is getting very close to planting time! The sooner you select your bulbs, the more likely you’ll have the biggest variety of and best quality bulbs to shop from!
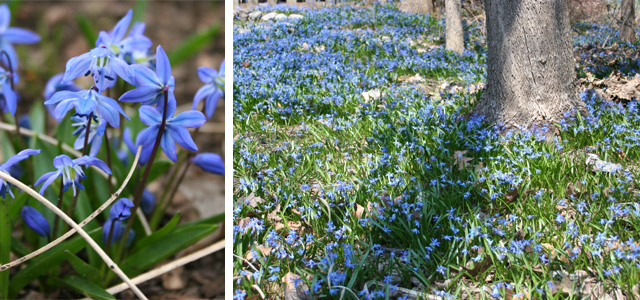
Favorite Shade Bulb: Siberian Squill / Scilla
Scilla bulbs are great for borders and work fast at naturalizing if left undisturbed, adding a lovely blue touch to woodland areas. What is great about Scilla is that they can be planted under trees where you think shade would be a problem. Due to the fact that most trees loose their leaves during winter, Scilla has less sun blockage in the spring. These bell-shaped, dainty blue blooms adorn this early spring bloomer and look best when planted in masse. Hardy in zones 3-9.
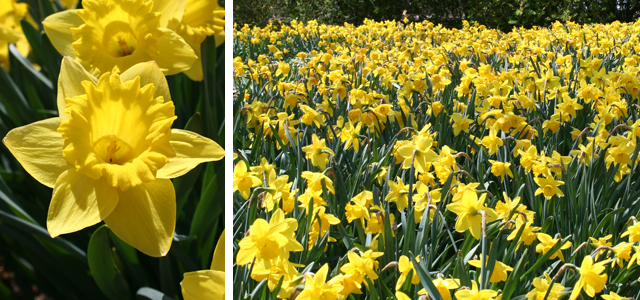
Favorite Mulitplying Bulb: Dutch Master Daffodils
Daffodil bulbs are one of the best beacons of spring, with their large and bright flowers appearing early in the season. There are a variety of daffodils such as Large Cupped, Trumpet, Pink, Butterfly, Double and Rock Garden. If you want to stick with a traditional looking daffodil, we’d suggest the Dutch Master with their golden yellow blooms. Daffodils are one of the easiest bulbs to grow as they survive in a variety of conditions, multiply each year and are deer and critter resistant. Daffodils are hardy in zones 3-8 and prefer full sun to partial shade.
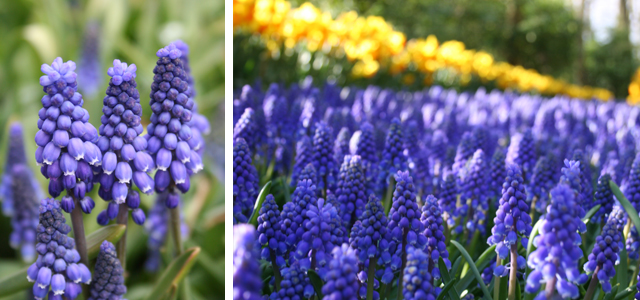
Favorite Groundcover Bulb: Blue Muscari
Muscari bulbs are little fragrant clusters that look beautiful when planted under trees, throughout the lawn or in a naturalized setting such as a wood line. These little blue bunches multiply fast and provide great groundcover. Muscari should be planted in groups of 100 or more for their largest color impact. An idea we’ve seen and loved is to make a river-like effect with the blue bulbs. Hardy in zones 3-8.
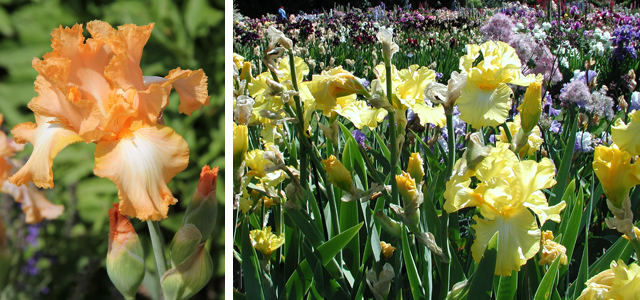
Favorite Perennial Bulb: Piping Hot Bearded Iris
Bearded Iris are an old-time favorite amongst many gardeners. Available in tall, intermediate, and dwarf sizes as well as almost every color of the rainbow, there is a place in any garden for a Bearded Iris. Bearded Iris reproduce fairly quickly and should be divided every 3-5 years to ensure a bounty of blooms. They are hardy in zones 3-9, best planted in full sun and slightly below the soil surface. Use for beds, borders and cut flowers.
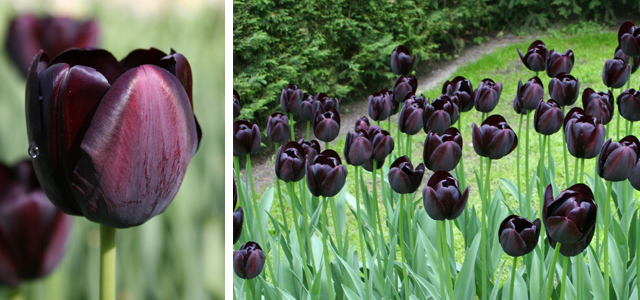
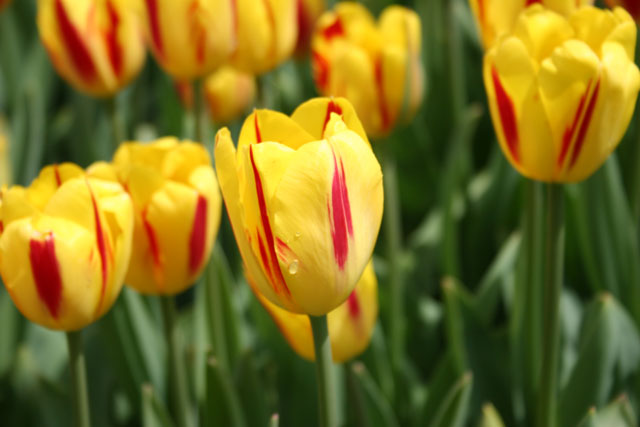
Favorite Bulb for Cut-Flowers: Queen of the Night Single Late Tulip
Tulips come in many different varieties and each boast different characteristics to make them unique. Single Late tulips are known for their tallest and strong stems (which can withstand wind and rain), making them the best for cut flowers. They also come in the widest variety of color options. The Queen of the Night is our favorite due to it’s almost black blooms! All tulips prefer full to partial sun and are hardy in zones 3-7. Check out all the different varieties of tulips available here from TulipWorld.
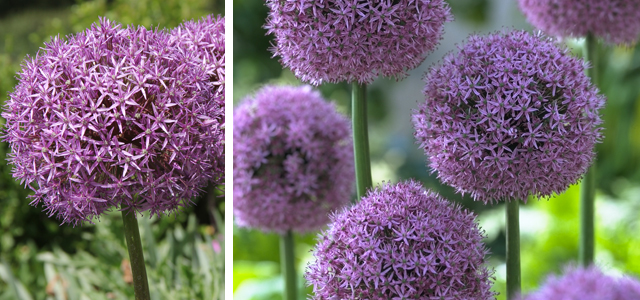
Favorite Long Lasting Bulb: Globemaster Allium
Allium bulbs are not only deer resistant and great for cut flowers, they also add a unique and noticeable texture to the spring garden. Blooms are typically spherical, densely packed florets and come in a variety of colors including purple, white, and yellow. Also – once they are dried out, move them inside for a floral arrangement or even spray paint them to give them some color. Blooms in late spring and are hardy in zones 4-8.
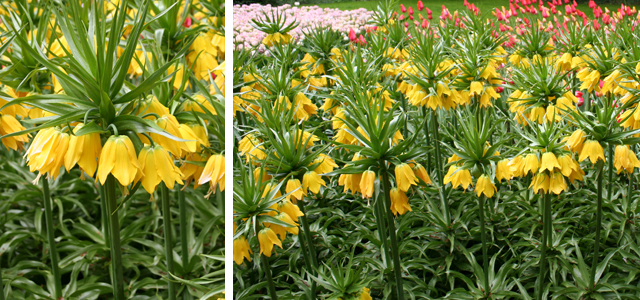
Favorite Deer Proof Bulb: Yellow Fritillaria
Fritillaria bulbs have bright and exotic-looking blooms and are hardy in zones 5-9. Be sure to amend your planting area with organic matter, such as peat moss and compost manure as well-drained soil is a must for Fritillaria. Always plant Fritillaria slightly on their sides, as the center of the bulb is hollow and may collect water if planted upright. Blooms inmid-spring, prefers full sun to partial sun, and is extremely deer and critter resistant!
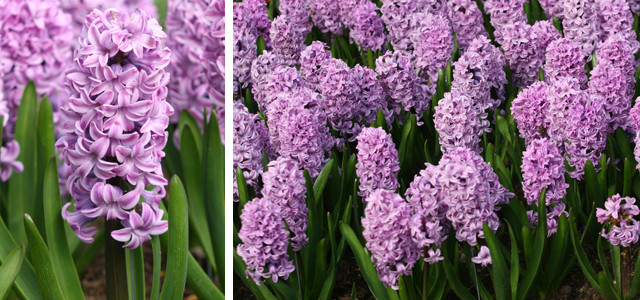
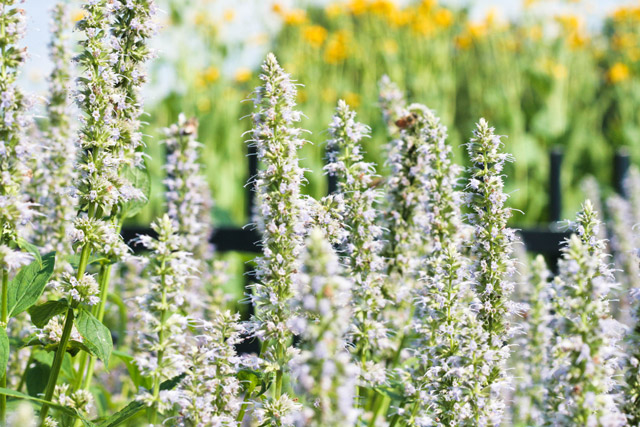
Favorite Fragrant Bulb: Splendid Cornelia Hyacinth
Hyacinth bulbs are some of the most fragrant flowers in spring and can be used for outdoor blooms. They are also one of the easiest bulbs for indoor forcing. Hyacinths also come in almost every color of the rainbow, so there is bound to be at least one variety that will go with your garden color scheme. Hyacinths perform best when planted 4-6 inches deep, in full sun with well-drained soil that has been amended with organic matter.
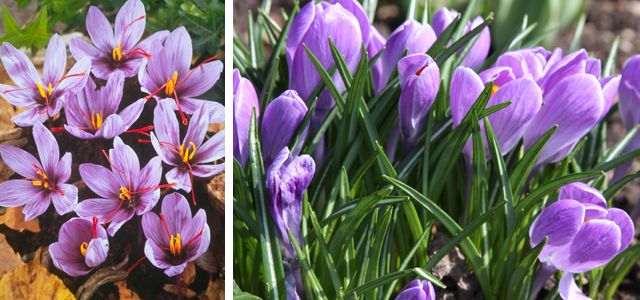
Favorite Unique Bulb: Saffron Crocus
Crocus bulbs, one of the first signs of spring, can begin to grow even while there is still snow on the ground! Their petite stature makes them perfect for use in rock gardens, to fill between plants, or in garden borders. Plant them in groupings of odd numbers for a natural look. While most crocus bloom in the spring, the Saffron Crocus uniquely shows its foliage in springtime, but the crocus flowers don’t appear until the fall. Why is this unique? There isn’t a huge selection of fall blooming bulbs out there – this Saffron Crocus provides a pop of color while everything else is dying back.
Happy Fall Planting!
Now is the time to begin cleaning up your yard. This includes removing plants which may have died over the course of the summer and making room for new bulbs to be planted. While normally having to cut down a failing tree in your yard may make you sad, at least you can use the wood in a creative way! Why not make a Log Path inspired by this photo from the Sherwsbury Flower Show?

Thanks to our friend Pinterest, we were able to find a post on how to re-create this masterpiece. Also, since the blog author wrote the post a bit ago, she has some new learned tips to pass on! Here is what you’ll need to complete this project: an old tree (or a variety for different size steps), a saw, and a sealant that provides UV projection (think deck stain).

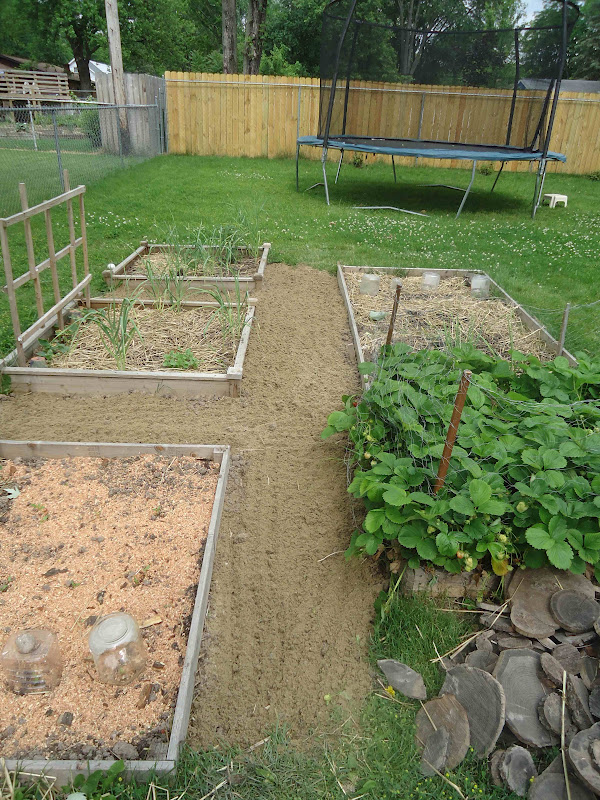
 (Photo Source: Domesticated Nomad)
Step 1: You’ll first need to create a solid, relatively flat surface of dirt. This may mean stripping the existing sod and removing or adding soil in certain areas. You’ll also want to make sure the remaining soil is well compacted and level to prevent the steps from sinking. Step 2: Determine the width and length of your space and cut the wood about 3-4″ thick to prevent splitting when stepped on. Step 3: Apply the stain to the logs and allow for proper drying time. Step 4: Finally, arrange pattern on the ground and fill sand, gravel, or dirt around and between logs for a level walkway to assure no tripping :)
We think this would look amazing along a garden path! It creates just the perfect touch of wood without dishing out the money and time required for a complete wooden walkway made of 2x4s. Another great idea was to add groundcover plants in between. Like most home projects, the possibilities are endless!
Happy Weekend!
It’s almost fall in many parts of the country and that means one thing… fall planting! Now is the time to start planning out your spring garden by selecting bulbs you’d like to plant now. Many people don’t realize that you need to plant in fall in order to get gorgeous spring blooms and we don’t want you to miss out any longer! This is part one of a two-part post on fall planting. Today we’ll explain the basics of fall planting and bulbs. Next, we’ll share some of our favorite bulbs and some tips on how they can look great in your yard, too!
What is a bulb?
One of the first things to understand when getting started with gardening is the difference in terms used when referencing a plant’s storage organ. Many times, the word “bulb” is misused when describing the root system (or storage organ) of a bulbous plant. Not all bulbous plants are true bulbs. Below we list the most common types for fall planted bulbs:


Bulbs Have a Life Cycle

Plant Things According to What Zone You Live In
Gardeners need a way to compare their garden climates with the climate where a plant is known to grow well. That’s why climate zone maps were created. Zone maps are tools that show where various permanent landscape plants can adapt. If you are looking for a shrub, perennial, or tree to survive and grow year after year, the plant must tolerate year-round conditions in your area (hardiness zone), such as the lowest and highest temperatures and the amount and distribution of rainfall. To find what zone you live in, click here.

Does the coming of fall have you feeling blue? Hopefully the relief of the impending cooler weather isn’t that depressing, but if you are feeling blue, then why not use it to decorate?
Cobalt blue has been popping up across the backyard and garden scene this summer and we are absolutely in love. This cobalt blue color adds just the right amount of color pop against any home or porch backdrop. To help you understand our love, we found these great examples of cobalt blue in use + included our favorite blue items from Willard & May. This eye-catching hue may just turn into the new black…

(1. HGTV, 2. Houzz 3. Calypso Gardening 4. Apartment Therapy 5. HGTV 6. Tesselaar 7. Willard & May)
Vary the intensity, texture, and size – Pick a color you like, but add colors that are a bit lighter or darker to create that unique ombre look we’ve been seeing from hair, to clothing, to decor. Try not only adding variation in the color, but also vary the texture and sheen of the pottery or objects. Make use various sizes to create interest. All of these will create a great unified look.
Add contrast with what you plant inside – Cobalt blue itself is a loud color, but don’t be afraid to use bold contrasting blooms inside the planter. In this case, cobalt blue is the new black and everything goes with black! Also, vary the textures and heights within the planter.
Bring it inside – Don’t be afraid to bring plants and their colorful planters indoors! Sometimes you need a pop of color to tie in a room, and that can easily be done with the color of the bloom or decorative planter. Don’t have a green thumb? Don’t worry! Check out your local crafting store for some fake flowers…some of them look extremely real!
Cobalt, Cobalt Everywhere – Don’t limit the use of this fantastic color to your pottery alone! Utilize it also in accessories, walls, shutters, furniture, fountains and much more!
 (1. Garden Fountain 2. Blue Blossom Watering Can 3. Cobalt Blue Ceramic Bird Bath 4. Cobalt Blue Decorative Turtle 5. Blue Blossom Planters 6. Cobalt Blue Cluster Pot 7. Blue Gazing Balls 8. Blue Blossom Door Mat 9. Shell Planter 10. Fish Planter 11. Cobalt Glazed Strawberry Planter)
So if you feel blue… decorate with blue!
So you have this empty spot along a retaining wall that you just don’t know what to do with anymore. You probably think there is nothing a landscaper, let alone you, could do to make this spot shine in your yard. Well think again! How about an easy-peasy-do-it-yourself project this weekend where you transform it into a giant wall-planter! Now we’re talking…


(Images: Annette Guttierez)
So those photos probably have got you hooked – now you want to make this project a reality this weekend? Go for it and check out this budget-friendly DIY planter project made of cinderblocks courtesy of Apartment Therapy and Pot-Ted – and prepare for your mind to be blown and your yard transformed!
Have a DIY project you’d like to share? Just let us know in the comment section below! Happy Weekend!
Wow. What a summer! According to the NOAA (National Oceanic and Atmospheric Administration) more than 55 percent of the United States was classified as experiencing moderate to exception drought at the end of June. The NOAA also reports that the month of June was the 14th warmest and tenth driest June on record, based on data dating back to 1895. However, you don’t need statistics to know that things are dry. All one needs to do is look out his or her window at the once green-grass now resembling more of desert sand than anything else. Even well-established plants are beginning to wilt and rivers that were once flowing have now diminished to a near trickle. As much as we all have a right to lament the dry weather because of the effect its had on our landscape, no one has the right to complain more than the farmers whose livelihoods depends on the growth of their crops. Check out these photos from the Photography Blog in the Dallas News.

(Image Source: NASA)
So we all know it’s been dry and unfortunately, no version of a rain dance is going to change that fact. But there are a few things you can do to combat the drought and give your plants the best chance at survival that you can. Here are a few watering tips to help you through the dry spell:

However you choose to water, be sure you check with your local municipality for any watering bans which may be in effect. If you are able to water and want to do it in style, check out some of these great watering accessories from Willard & May!
Happy Watering!
The summer may be half way done, but is your summer to-do list? Organization is always at the top of many people’s to-do lists, especially if they have an unorganized garden area or tell shed! Why not cross one more thing of that list with this creative organization idea, found on the blog Two Doors Down Directory, from Better Homes and Gardens.

(Photo Source: Better Homes and Gardens)
Here’s what you need: One rake head, 1-2 screws.
Here’s how you do it: Decide where you want to hang your rake organizer: on a wall, a door, window sill? The location is important for understanding the type of support your project will need. If you plan to hang it on a wall, be sure to find wall studs or use anchors to secure your screws. After you’ve chosen your location, find the center of balance for your rake. This will be the locations near the edge of the rake that you will place the screws to hang and balance your rake. Or, simply use a single screw to balance your rake using the top crook, where the metal would join the wood handle. Now just put your screws in the wall, hang your rake, and organize!
Happy Weekend!

Rain chains are a unique yet still functional way to add style to your gutters and yard. The Japanese have been using rain chains for hundreds of years, which makes them a critical part of any Japanese garden. The original rain chains were simply links of chains that would hang from the roof to the ground. Even these primitive versions provided a calming and pleasant sound, however were not nearly as decorative as the new and improved ones we enjoy today. Originally, rain chains were used primarily for functional purposes, such as catching the water as it ran off a roof and collecting into a large barrel for use later for various household purposes.
The design of rain chains has come a long way since they were first introduced. Present-day rain chains feature a series of cups that work to funnel the water, creating less splash while still guiding the water down the chain to the basin. Rain chains can actually be used in place of a traditional downspout to incorporate great style and uniqueness into the landscape. Most rain chain cups and links are constructed from copper, adding a classy and distinct look whether the copper is new and shiny or weathered showing a bit of patina. Another feature that we love about rain chains is that the cup styles vary, so you can match them to the look of your house, garden and personality. While style is always important in terms of accessories for your house, your home should also primarily be a place of enjoyment and relaxation. A rain chain can add a wonderful sense of relaxation on a rainy day. The soothing sounds of raindrops slowly trickling or abruptly splashing through the chains and links can add extremely pleasant sounds and sights to your outdoor room . Enjoying these little things in life and being able to appreciate something as simple as rain flowing through a copper chain can really help to clear the mind.
Besides the many style choices, rain chains also offer many choices for where to direct the water to after it has made it down the chain. You may choose to catch the water in a large decorative pot with no drainage holes…you could even add water plants such as Water lilies or Umbrella Palms to the pot for added color and flair! Another option would be to place a rain barrel or other type of basin at the base of the chain. Then use this water on your garden plants! They’ll love being watered by the water that collects in this barrel as it contains minerals essential for healthy plant growth and your pocket book will also appreciate it since you will be using less water from the hose! If you are thinking of installing a rain chain and would like to keep it simple, it isn’t even necessary to catch the water in any kind of container. The rain can be funneled down the chain and go directly into your garden! Simply be sure to select water-loving plants that are good for your climate such as Ligularia, or Sambucus under the chain so they can benefit from the additional water.

(Photo Source: 1. WorkBench 2. Trendir 3. Willard & May 4. Houzz)
Rain chains can be hung from the gutters in the front of your house, near a patio, by the garden shed or even incorporated into the garden. The best part is that these stylish copper “downspouts” are easy to install. First, remove the existing downspout. Second, insert the rain chain into the gutter. The rain chain will come with a large “V” on top of the chain that rests on each of the gutters at the opening of the downspout. Complete the look with your decorative pot, rain barrel, rocks or just leave it to empty into the garden! Now, just wait for that perfect rainy day to enjoy the soothing and tranquil sounds of your newly installed and beautiful copper rain chain!

You can find 3 styles of Copper Rain Chains and some fun large pottery to get you going on your new simple water feature at WillardandMay.com (1. Cute Cup Rain Chain 2. Flower Petal Rain Chain 3. Widelip Rain Chain)