Hide Your Hose in a Pot

Curb Appeal, Garden Spaces, Outdoor Decor, Pin Inspiration, Store

Let’s just admit it, garden hoses are not attractive. And neither are those plastic little garden hose holders you attach to your home or sit on your porch.

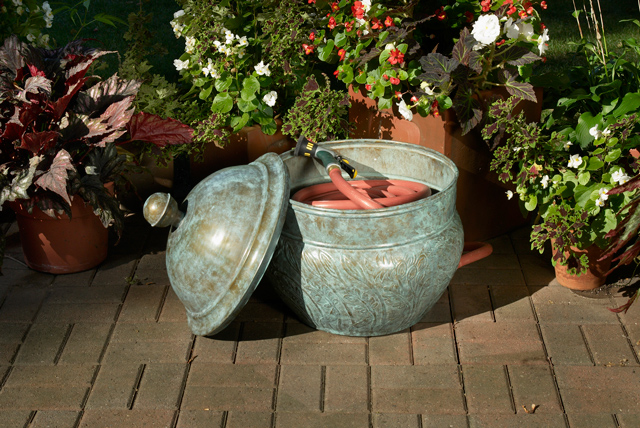
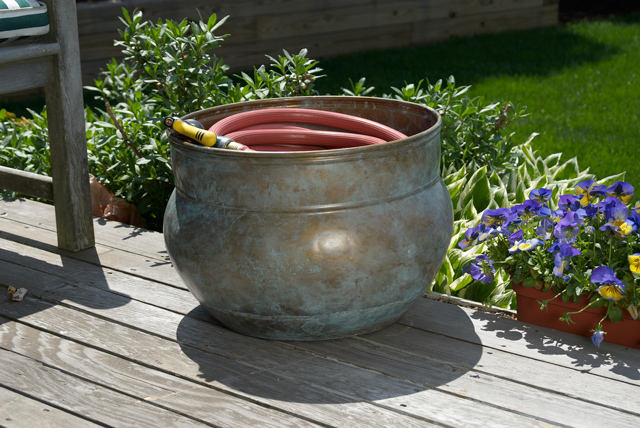
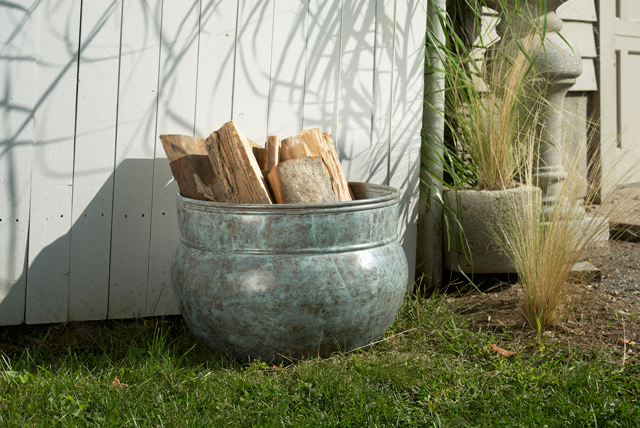
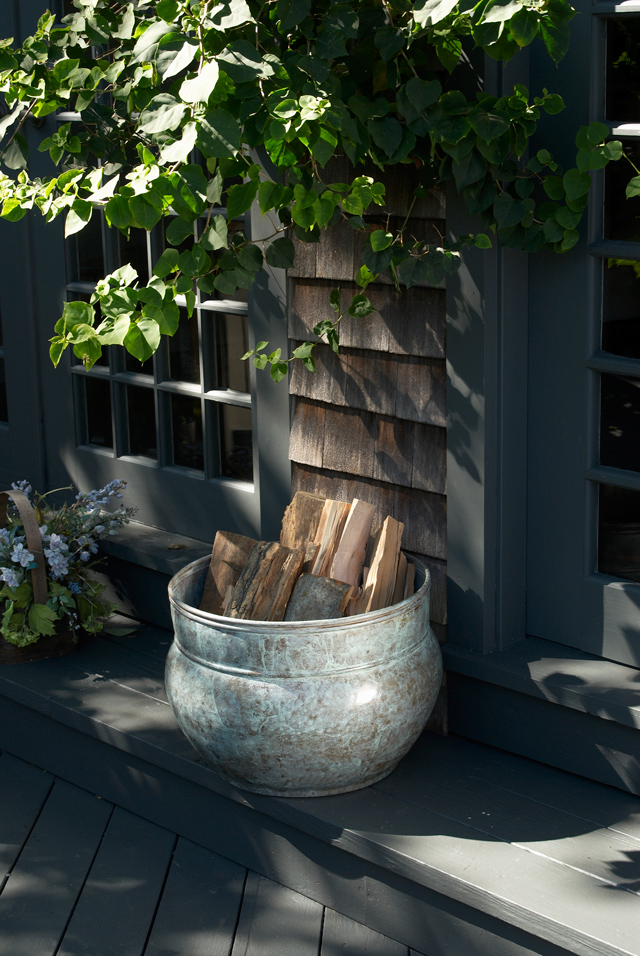
Wondering how to keep your hose close, yet hidden? How about a hose pot from Good Directions. These new products we are including in our summer catalog are a great decorative element too. You can even store other outdoor things such as firewood in them.

457B_Key-West-Hose-Pot_Brass_Glam-4 448B_Sonoma-Hose-Pot_Brass_Glam-2 448B_Sonoma-Hose-Pot_Brass_Glam-5 448B_Sonoma-Hose-Pot_Brass_Glam-3

Warm Welcome

Curb Appeal, Gifts

Sometimes it may seem as if winter will never, ever end, is that how you feel too? We’ve had a pretty mild winter, compared to some of you out east with 8 feet of snow (we can’t even imagine!) and we aren’t complaining over here.

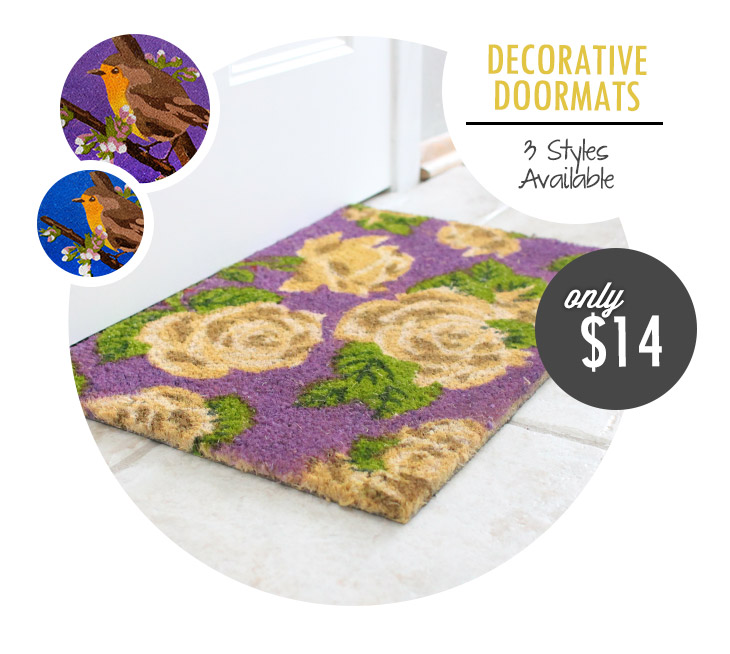
With winter comes the snow/slushy/salty mix that everyone seems to track in on their shoes, and we hear ya, it’s a pain to clean up too! So for all that floor clean-up you have been doing, reward yourself with a cheery, warm welcome mat. If not for the bright colors, get it to save yourself some sanity!

wm_rug-spotlight_04

Here are a few other decor items we’ve put together to help warm up your entryway and create a warm welcome!

team-signature

Perfect Entryway

Curb Appeal, Outdoor Decor, Pin Inspiration, Store

Looking for some change in your home, but don’t know where to start? Well how about your entryway – inside and outside! This is the perfect way to impress your guests and family as it is the first thing they see when first stepping foot into your home. It doesn’t take much to turn your front door and entryway from a stark and dull space to an inviting place for everyone who comes to your home!

Here are some great ideas and items you can use to spruce up your entryway, making that great and lasting impression on your guests!

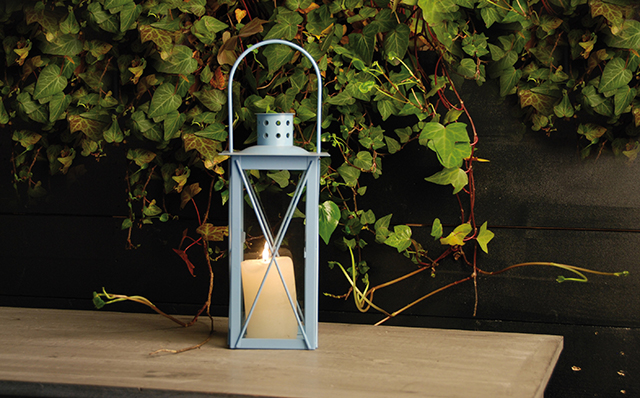
lights Light the way – As people walk up to your entrance you want to be sure that they can visibly get to it so make sure to light up your walkway as well as your entryway! You have several options: chandeliers, sconces, lanterns, etc. Willard and May has a great selection of different lanterns and lighting options to help brighten up your entryway!

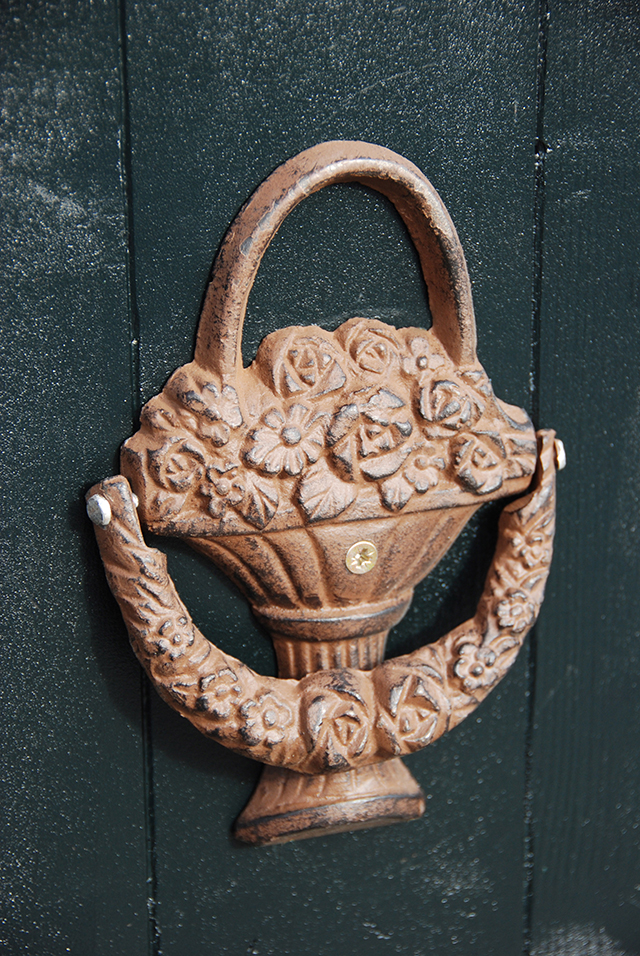
knock Knock Away – When people arrive at your front door give them something fun to knock on your door with! Willard and May have some great door knockers! Go check them out!

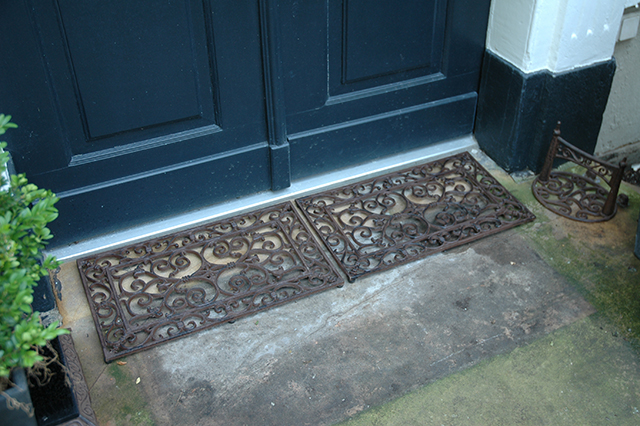
doormats Stomp the Ground – To keep all the dirt from tracking into your house, make sure to have a doormat to catch all the debris keeping your house tiding and clean! Check out some of the Willard & May Doormats!

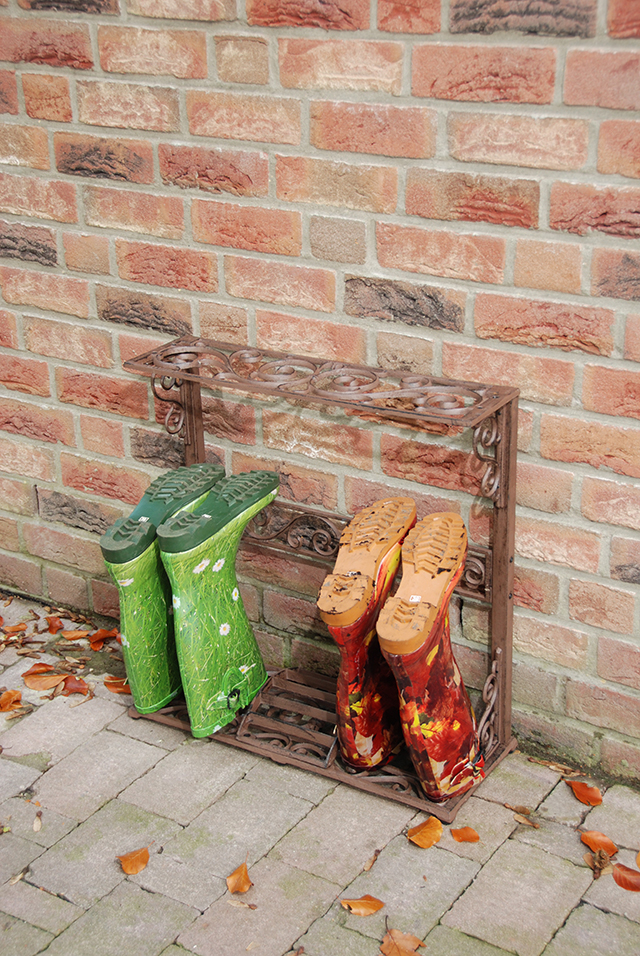
bootrack Keep it Clean _ It’s a great idea to have storage for shoes so be sure to have a shoe rack to keep everything organized! Check out Willard & May’s Boot Rack and Scraper!

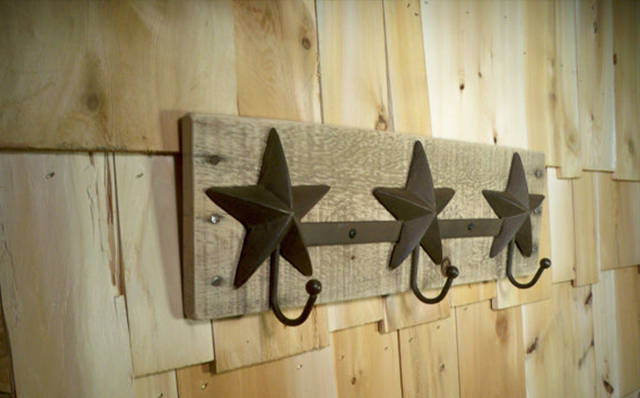
star-hook Hook it Up – It’s a great idea to have hooks for your guests coats so be sure to have plenty! Check out Willard & May’s Star Iron Hooks! (Source: Pinterest)

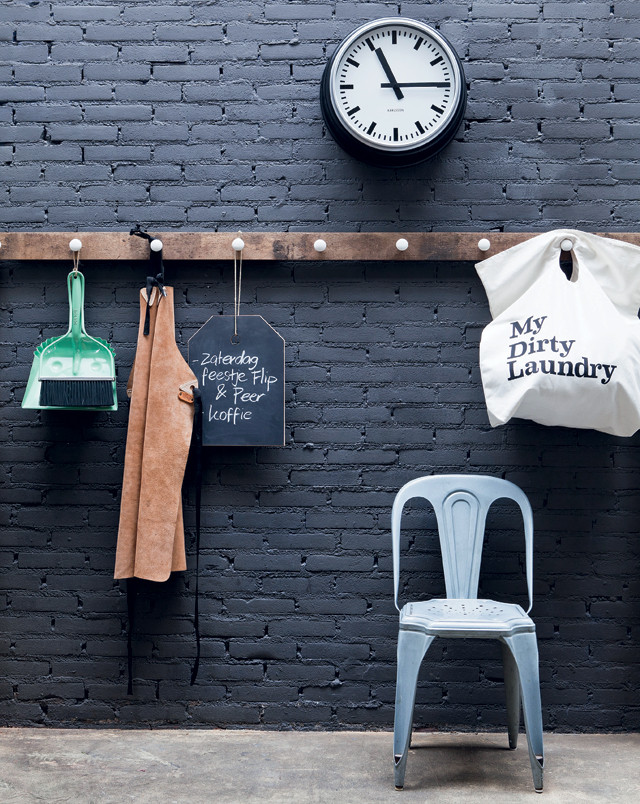
stool-chair Set it Down – Make sure you have a stool, table, bench, or chair to have nearby making the space look cozier and lets taking off those boots so much easier! Check out Willard & May’s Stool/Table! (Source: Kapstok)

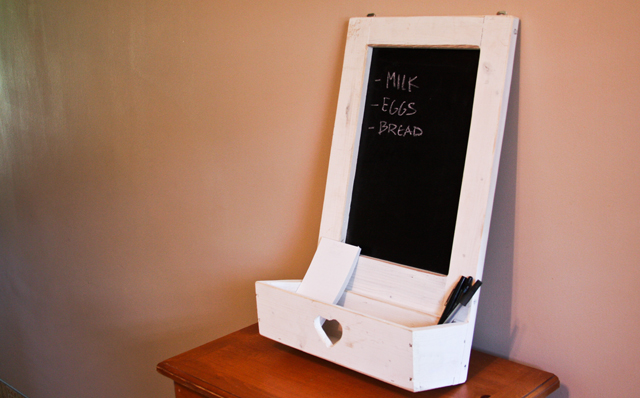
chalkboard To Do List – Use Willard & May’s Organization Chalkboard to write down whatever you may need to remember! This great chalkboard is great indoors and outdoors!

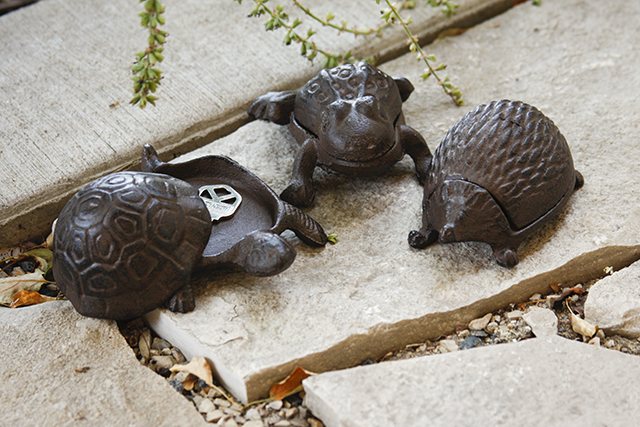
key-hider Locked Out, Keep it Hidden – Hide your house key in a fun way with these great Animal Key Holders from Willard & May!

By creating a functional entryway, you will make your life less chaotic and become organized with style! Check out the rest of our great items to create the perfect entryway at Willard & May! We’d love to hear what you think or what you’ve done to spruce up your entryway or let us know your ideas in the comments below!

team-signature1

Before & After: Finding Balance

Before & After, Curb Appeal, Garden Spaces

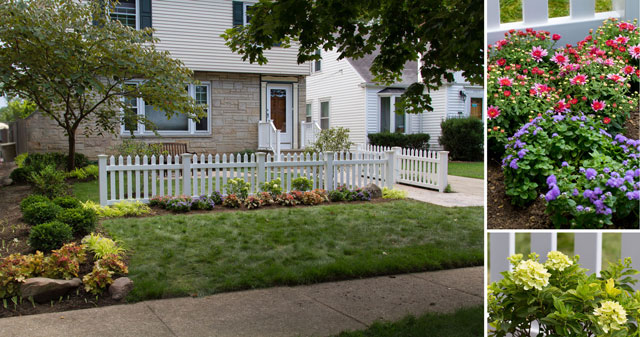
All that sunshine and fresh air we’ve been getting now that it’s finally warm is probably enough motivation for you to start getting in gear to transform your front yard for spring. But whether you are lacking in the motivation part or not, you can’t help admit this huge before and after really gets you thinking about what you could do with your space – especially if you’ve had all winter to ponder it.

Jan of the blog Green Thumb Blonde recently helped friends of hers transform their front yard. First in 2010 you can see they cut everything back, but then had to wait until 2012 to really get going – that gave them plenty of time to come up with a plan.

Jan first realized the main issue was the lack of balance due to the front door being so off centered. She formulated a plan of action that included a picked fence, stone walkways, and a ton of new plants, bushes and flowers. Check out the full before and after transformation on her blog. What a HUGE difference – we love it! 110% improvement on curb appeal!

MG_7918 (Photos: Jan Meissner)

Have a before and after you’d like to share? Feel free to drop us a comment below!
team-signature


Weekend DIY: Updating Dated Lights

Before & After, Curb Appeal, Weekend DIY

Like your front door, the entry way lights which guide your guests to your home set the tone for what’s inside your house. Don’t believe us? Go take a quick look!

Are they constructed of out-dated, hideous brass which means your house is stuck in the 90’s? Are they sponge-painted, giving the impression that your house is holding out for a return of the 80’s? Are they northwoods-y, but yet everything else in your home screams modern? Or perhaps they are simply just 100% not your style. This weekend, let’s fix that and enhance your curb appeal!

This weekend DIY project is inspired from Katie of the blog BowerPower. A few years ago, they traded in their outgrown home for their dream home – completely dreamy, besides the fact that most of the design aesthetic was stuck in the 80’s — for instance check out their sponge painted light fixtures. For a quick update she decided to spray paint them rather than replace them. The only cost involved was painters tape, spray paint and pieces of leftover cardboard. Head on over to her blog to read the step-by-step DIY instructions for easily updating your own outdoor light fixtures, plus her amazing before and after pictures.


(Photo Source: BowerPower Blog)


(Photo Source: BowerPower Blog)

(Photo Source: BowerPower Blog)

Have you ever transformed something in your outdoor space with just a little spray paint? What style are your front porch lights? Are you able to transform them with some spray paint, or were they just too big of a crime so you ended up replacing them? Tell us in the comments below!

Happy Weekend!
team-signature

Inspiration: Outdoor Christmas Lights

Curb Appeal, Lighting, Outdoor Decor, Pin Inspiration

Each weekend more and more houses are getting decked out for the holidays with Christmas lights and outdoor holiday decor. If your house isn’t one of them, it’s time to get your Clark Griswold on and hop on that roof!  And when you are done, relax and enjoy the Christmas classic, Christmas Vacation with some hot cocoa.

If you need a bit of inspiration, check out these over the top Christmas Lights caught on video! And wondering whether LED lights are worth the extra cost compared to the traditional lights? Apartment Therapy did the math and they have determined LED lights in the end save you money, read more on their blog.

Weekend DIY: Add Privacy to your Front Door

Before & After, Curb Appeal, Outdoor Decor, Pin Inspiration, Weekend DIY

Have you watched a scary movie or tv show lately? You know, the kind that makes you have that creepy un-easy feeling that someone is just outside your home, staring into your living room while you go about your life?  Or it makes you second guess every action you do in fear of the neighbors thinking you’re crazy?  And now with the sun rising later and setting earlier, it seems as though it is always dark when you are at home – dark before you leave for work, dark when you get home – you have the urge to add some extra added  privacy to your windows…blinds, curtains or the like. And you better do it FAST, before they get you! ;)

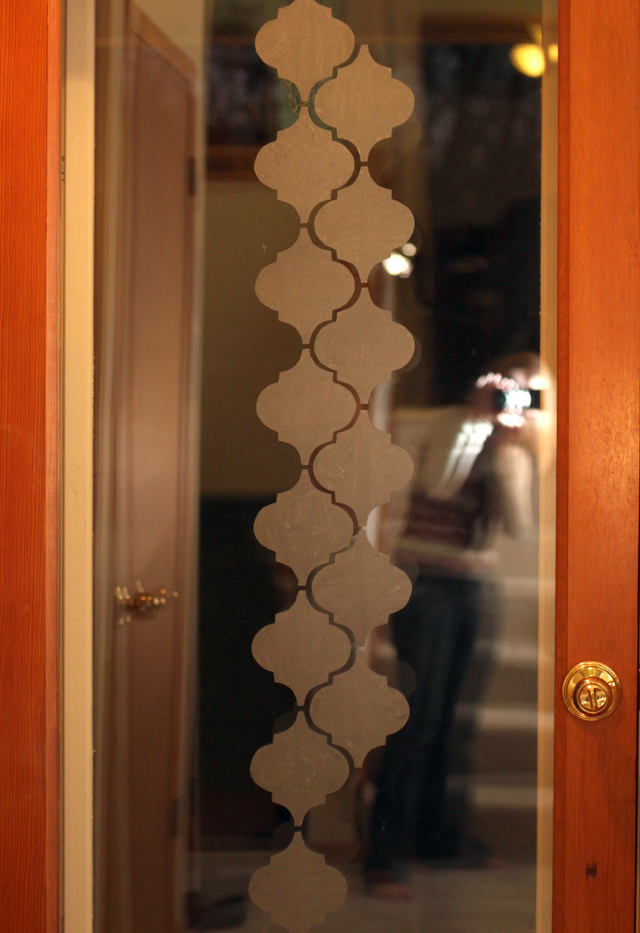
While blinds and curtains work well for windows throughout your home, putting blinds on your front door can seem a bit gaudy or just not as classy as you’d like. We have the perfect DIY idea that quickly transforms the “dark unknown” into a graphical focus in your entryway! This DIY comes from one of our team members who wanted to add some privacy to her front door after removing some blinds that once filled the window on the door.
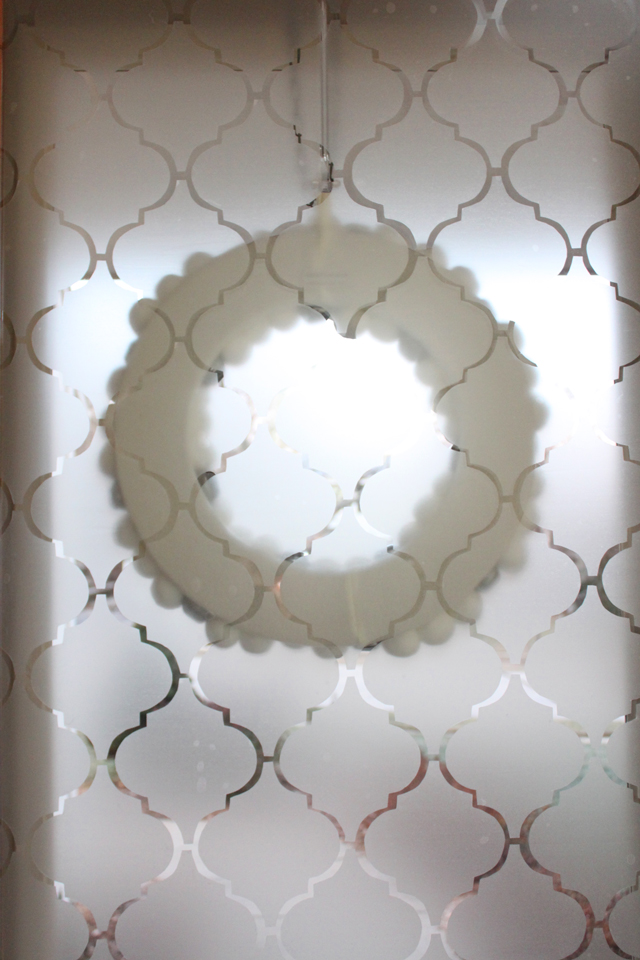
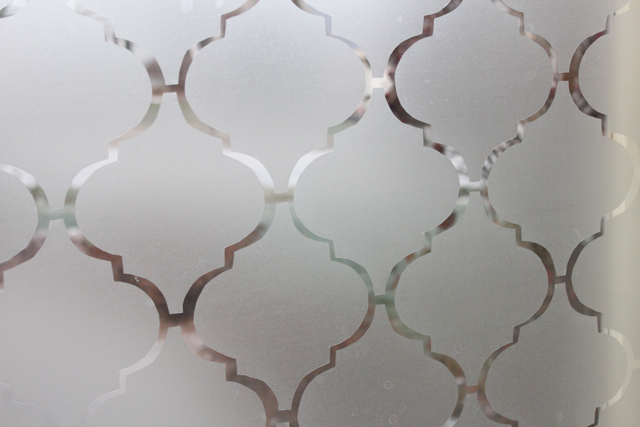
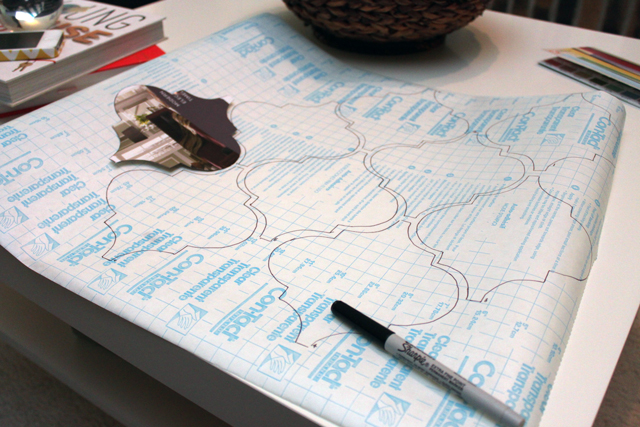
She got the window idea from the blog, 7th House on the Left, who even provides a handy template for the cut-out shape, to help your cutting go easier and faster. Also, by reading the comments on the blog, you’ll learn a lot of bonus tips. The blogger transformed her front door (with half a window) by applying contact paper in a unique Moroccan shape to the window to give it a faux-etched look.

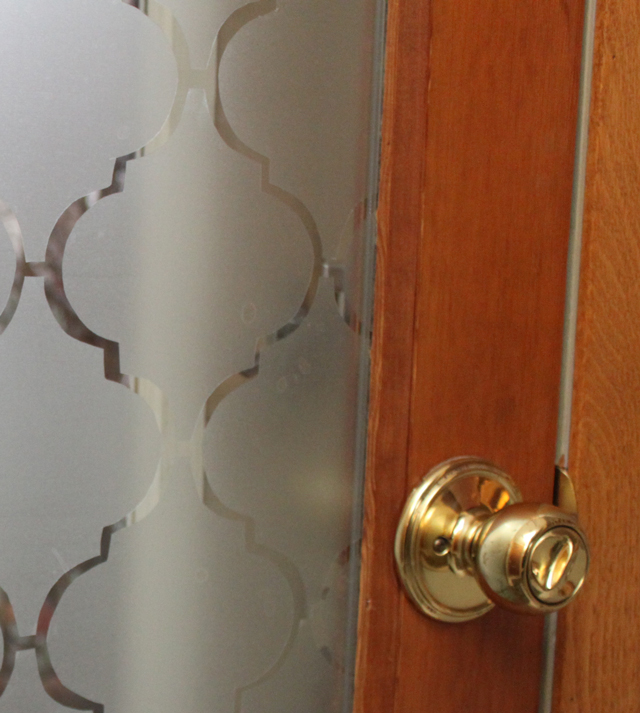
Our team member, Vanessa, tried this same effect, applying it to her completely glass front door. Check out the finished look below – talk about a unique entryway that provides privacy but still allows a lot of light in! Here are her summarized instructions, but you can feel free to also head to the 7th House on the Left blog for more information!
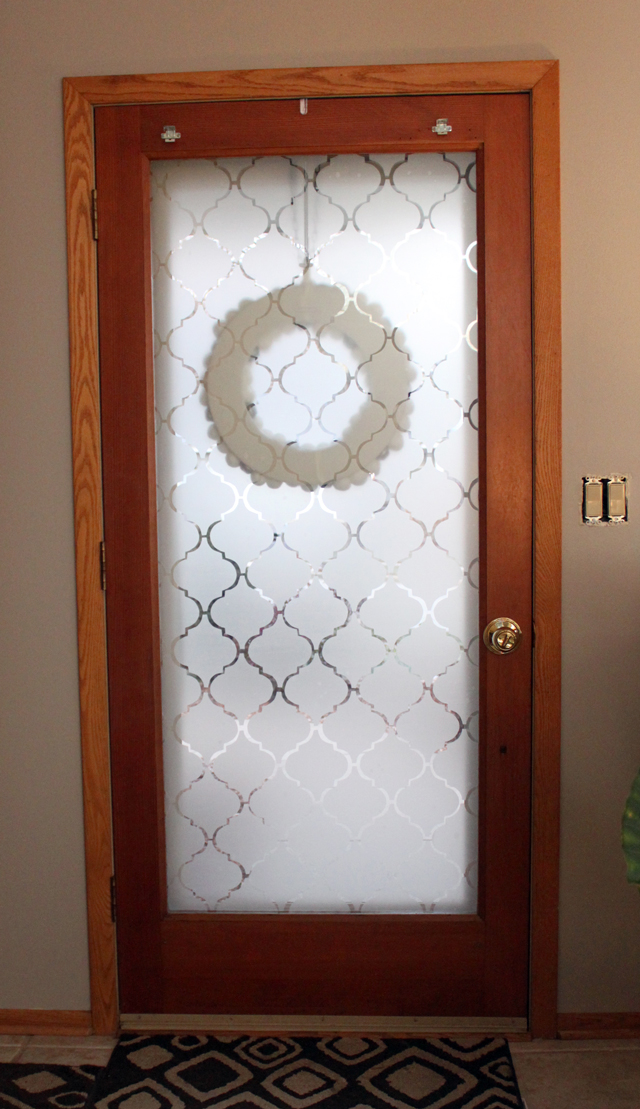
add privacy to windows with contact paper

What you’ll need: 1 roll of contact paper (find at any big box store), template provided, cardboard or cereal box, black marker, scissors, tape measure, exacto knife/utility knife and a dry erase marker.

1. Print out the template provided by 7th House on the Left blog.
2. Cut out the shape and transfer it to a thicker paper, such as a cereal box or other piece of cardboard.
3. Trace out as many shapes as your heart desires onto the back (or paper) side of the contact paper. Our team member found that drawing 8 of the shape, and then cutting out those provided the easiest route. Since the paper has been rolled up, it tends to want to keep rolling, so only having 8 keeps it much more manageable.
4. Once you have a decent amount cut out, you’ll need to measure your space and gauge how many more you’ll be needing.
5. The first time Vanessa counted how many she’d need, she was way off – you’ll soon see how many more you need and how you can use bits and pieces of them to fit around the edges.
6. Measure your window and mark the exact middle (vertically and horizontally) with a dry erase marker on the opposite side of window.
7. Start your first shape in the exact center and then apply the first column going up and down. It’s best to do a complete column first, also keeping about 1/2 an inch between the tops and bottoms. This will allow for the best possible spacing throughout your window which helps to keep things consistent.
8. Keep applying more and more until it’s covered. Vanessa found that hers wasn’t perfect due to the fact it’s handmade, each cut being unique. But from a few feet away, she says, you can’t even tell and it just looks AWESOME!
9. Once you’re done, use a credit card to smooth out any tough bubbles that may have formed. Also, use the utility knife to trim the excess from shapes around the edges.
10. Sit back and enjoy (without being terrified of the unknown that lurks outside!)
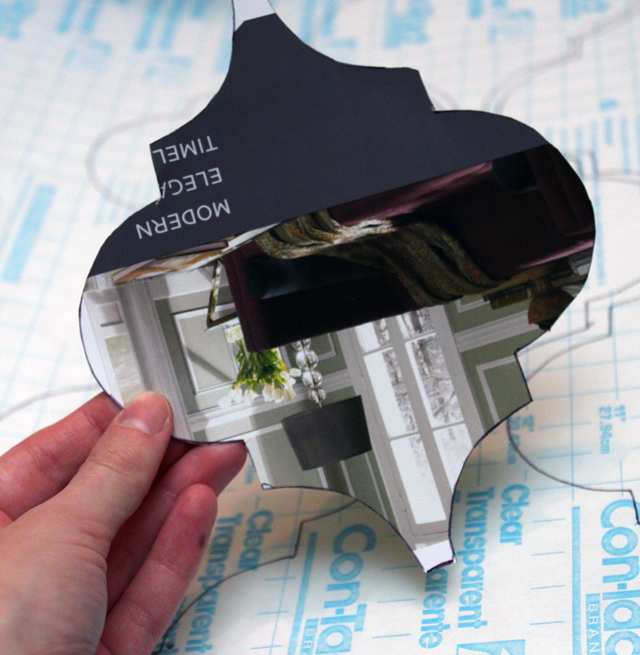
The best part about this, is that it’s only about $3 to create and it’s removable if you decide later on that you’d like to switch things up! It also adds a very classy touch to your home when viewing it from the outside. Thanks to the 7th House on the Left blog for inspiring us!

Happy Weekend!

Ways to Update your Mailbox

Curb Appeal, Outdoor Decor

Usually neglected and worn-down, mailboxes aren’t the first thing you think of improving when you think about curb appeal. Time to change that! We’ve searched high and low throughout the internet to provide ways you can easily improve the look of your mailbox.

Paint your Mailbox
A simple spray paint can go a long way to restore your mailbox on the outside. Also, ditch the traditional red flag and opt for another bolder color! Even if you have a mailbox that is attached to your house, a bold “hello” makes an entrance more welcome.


(Source: HGTV)

Cheerful Mailbox
(Source: Better Homes & Garden)

Add a House Number or Name Decal
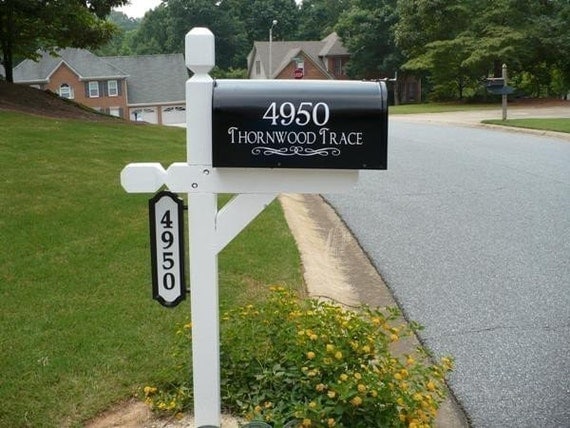
Add a personal touch to your mailbox by adding vinyl decals. You can do numerous things: your house numbers, street address, or your name. Places like Etsy allow you to customize the decal for an inexpensive upgrade.

SALE- Custom Mailbox Address Vinyl Decal with Your Choice of Font, Flourish, Text, and Color- Buy 2 Get 1 Free
(Source: Etsy)

Plant a Garden Around your Mailbox
Spring to Fall, there is plenty of beauty to surround your mailbox with. In spring, use tulips and daffodils, summer plant annuals annuals and fall should bring mums. Finish it up by adding mulch and a stone border around it.


(Source: Young House Love)

Add Flower Boxes
Give your mail some company! Install flower boxes next to the box, on each side, or behind it. Either you can rig your own or many stores sell boxes you can attach easily. Again with each season, be sure to swap out the flowers for color Spring until Fall.

Mailbox flowers(Source: Pinterest)

Update the Post
So now your mailbox looks great, but the actual post could also use some work? If so, tackle this DIY from FreshHomeIdeas on how to make your own decorative and functional mailbox post.


(Source: FreshHomeIdeas)

And if your mailbox is beyond updating and it needs an fresh start, you can usually find one at big box or local hardware stores for under or around $100 then add these personal touches for a greater improvement. One thing is certain, your mailman/woman will notice!

Before & After: Backyard Patio

Before & After, Curb Appeal, Gardening, Outdoor Decor, Pin Inspiration

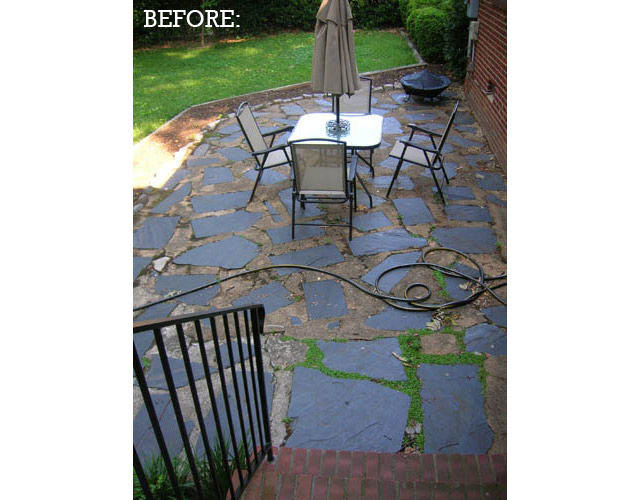
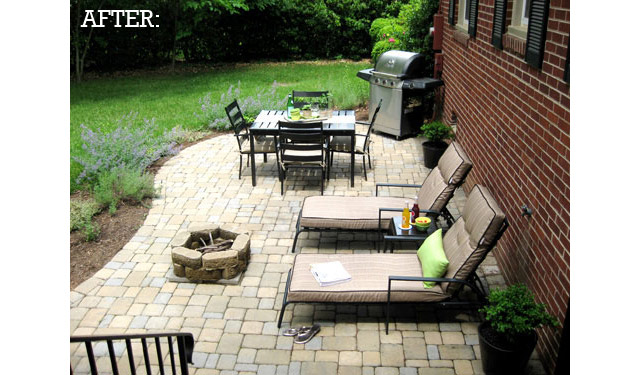
Don’t you just love a transformation – whether it be on those hgtv shows or extreme makeover? Sometimes it just takes a little effort to make a huge impact. The bloggers of Young House Love know all about diy transformation, and how updating just a few things can bring about a whole new life.

Check out their before & after of their backyard patio from their first house. The simple things such as redoing the stone, adding some soft landscaping, bringing new outdoor furnishings and adding a fire pit, made a huge makeover. Read even more about their backyard makeover on their blog.

young house love backyard makeover before
young house love backyard makeover after

Have a Before & After you’d like us to share? Let us know by leaving a comment below!

Inspire Me: Sheds

Curb Appeal, Pin Inspiration

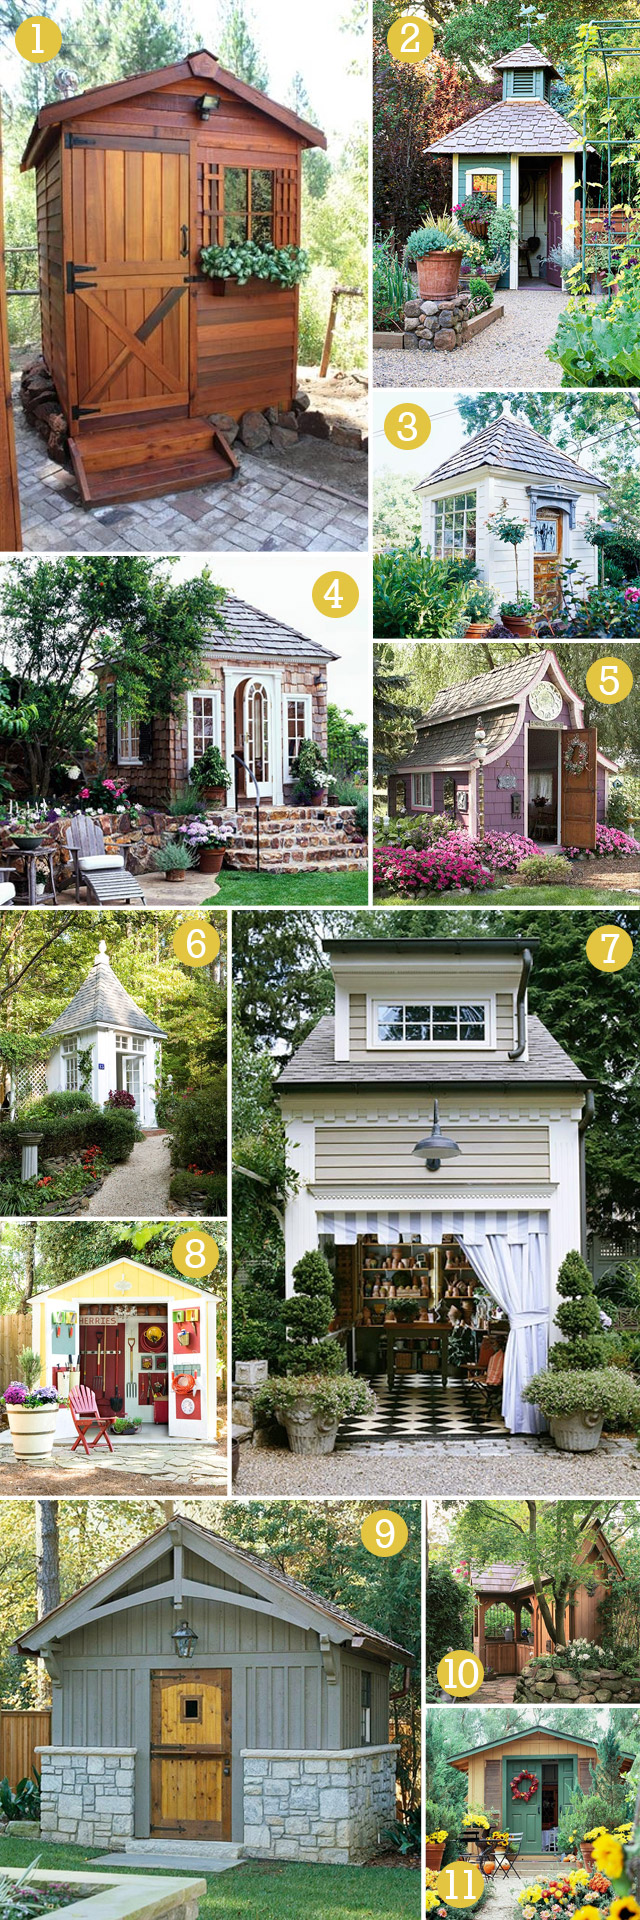
That eye-sore in the back of your yard that holds the mower, rake, garden tools and your kids’ toys – yeah, what people call a shed. When most people think of a shed, there unfortunately usually is not a pleasant association with them – usually your neighbor complains when a new one is put in or they complain that your current shed looks dumpy and unkempt. However, this doesn’t have to be the case anymore.

We’ve found some of the coolest sheds around and are sharing them with you to inspire you to make yours look more attractive. Improving the look of your shed may also increase your home value and curb appeal!

garden shed inspiration
(1. Pinterest 2.Better Homes & Gardens 3. Better Homes & Gardens 4. Better Homes & Gardens 5. Ana Rosa 6. Better Homes & Gardens 7. Better Homes & Gardens 8. Better Homes & Gardens 9. Better Homes & Gardens 10. Better Homes & Gardens 11. Better Homes and Gardens)

Do you have a photo of your shed you’d like to share? If so leave us a comment below!