Weekend DIY: Backyard Chalkboard

Weekend DIY

The days of chalkboards are back. Some of us at Willard & May grew up with chalkboards in the classroom, while some of us are more familiar with the whiteboard. While the whiteboard is less messy, it doesn’t have quite the same artistic vibe to it as a chalkboard. Even though I grew up with the whiteboard, I now have a love for chalkboards and even have a dream of painting an entire indoor wall with chalkboard paint someday.

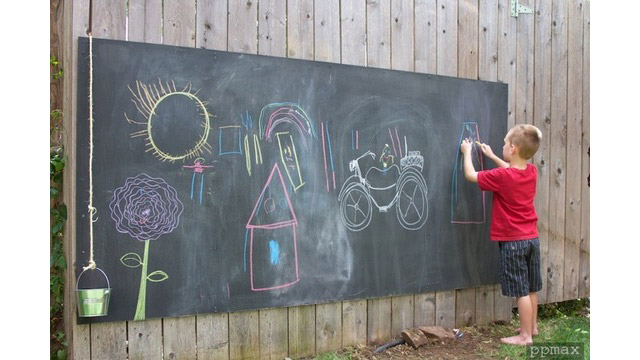
If you aren’t that adventurous or can’t even imagine the mess your kids would make indoors with a stick of chalk, why not try a backyard chalkboard? It’s a great activity for the kids that doesn’t involve sitting in front of a tv – and they’ll leave the mess outside!

diy chalkboard fence for the kids outside

We found this Outdoor Chalkboard DIY on Apartment Therapy and thought we’d share it with you. Here are the supplies you’ll need: 4×8 plywood sheet, outdoor paint (3 or 4 parts paint to 1 part unsanded grout – have the store mix it for you), nails to hang board to a fence or tree, and chalk.

The steps are easy! Find plywood, have the paint mixed at the store, paint the board, let the board dry, and hang. Your kids will be chalking-it-up in no time! Do you have a weekend DIY project to share with us? If so – let us know in the comments section below!

Happy Weekend!

Before & After: Backyard Patio

Before & After, Curb Appeal, Gardening, Outdoor Decor, Pin Inspiration

Don’t you just love a transformation – whether it be on those hgtv shows or extreme makeover? Sometimes it just takes a little effort to make a huge impact. The bloggers of Young House Love know all about diy transformation, and how updating just a few things can bring about a whole new life.

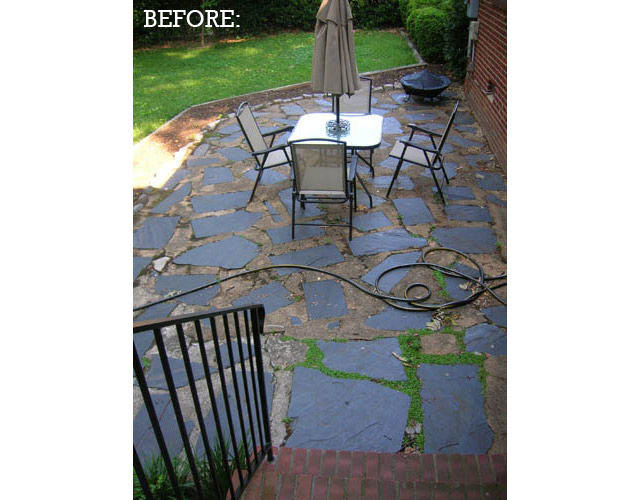
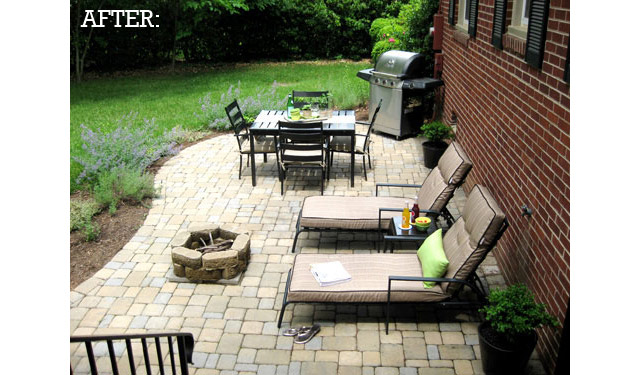
Check out their before & after of their backyard patio from their first house. The simple things such as redoing the stone, adding some soft landscaping, bringing new outdoor furnishings and adding a fire pit, made a huge makeover. Read even more about their backyard makeover on their blog.

young house love backyard makeover before
young house love backyard makeover after

Have a Before & After you’d like us to share? Let us know by leaving a comment below!

Weekend DIY: Backyard Movie

Outdoor Party, Weekend DIY

One of the best things in life are summer nights – whether it be sitting by a fire roasting s’mores, playing yard games with the neighbors, or looking at the stars on a hill. If you are looking for a new activity to add to your summer nights, consider creating an outdoor movie. We’ve found some great instructions for building the screen and also some recommendations on how you’d project the movie and add sound.

Why not create this DIY outdoor movie this weekend, and enjoy it this summer and for many summers to come?!
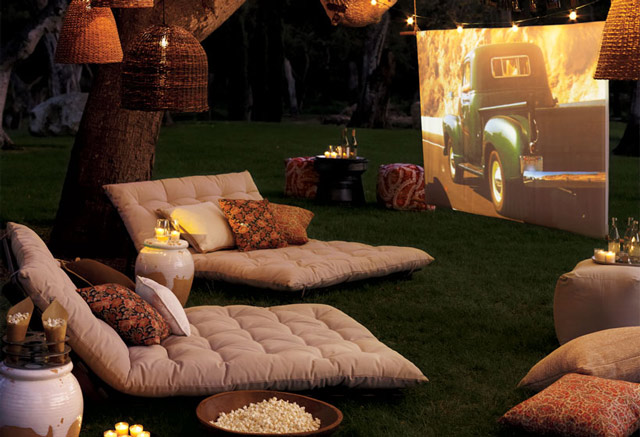
outdoor movie
(Image Source: PotteryBarn)

We found these instructions on how to build the screen from PotteryBarn. Here is what you’ll need to build the screen: (2) thick, white queen–size ironed flat sheets, a Top pole 1.5″ diameter x 10′ long, Bottom pole 3″ diameter x 10′ long, rope of two different thicknesses, (2) tent stakes, sewing machine, and an iron.

Here are their steps to assemble the screen: Step 1. Start with two queen–sized flat sheets which have been thoroughly ironed. Sew them together with white thread so the long sides are joined creating a tube. Step 2. Insert the 1.5–inch diameter pole and let the fabric hang down.  Step 3. Attach thicker rope to the ends of the top pole so that it can be attached to a tree. Step 4. Once attached to a tree, slide the thicker pole through the tube created by the sewn sheets so that it creates a weight at the bottom of the screen. Step 5. Attach thinner rope to the ends of the bottom pole.  Step 6. Insert two tent stakes directly beneath the bottom corners of the screen, tie the thinner rope to both of the tent stakes and pull taught. This will insure that the screen doesn’t sway in the wind.

As for the projector and other helpful tips, here is some advice we found from the blog, giverslog:

PROJECTOR. When choosing a projector, remember this: the bigger the screen, the better the resolution you need to be able to see the image. A High Definition Projector is your best bet. Look for something that has an HDMI input and you should be in good shape. Beyond that, as you increase the price of the projector what you generally find is the brightness level of the projector increases. That will allow you to start your movies earlier in the evening, which may or may not be worth the extra money to you.

AUDIO. This is where most people skimp. But this is the part that makes the most difference. It doesn’t do you much good to create a giant image and then force your guests to guess what the people are saying. That said, you don’t need to spend a lot of money to make a great sound system. This is not a place where you need surround sound or high quality speakers, volume is more important than clarity. I live in a place where no one cares if I am blasting my system at 11pm while watching The Bourne Identity (or Pride and Prejudice) but even if you have neighbors that don’t appreciate the volume, you still need something that can project the sound to your guests. Without walls to reflect the sound you typically need more than you would indoors.

I would suggest that you get a stereo receiver or old sound system that is around. People want surround sound in their homes so this is something you can pick up cheap on craigslist. You then want to find some speakers. Again, these do not need to be high quality speakers that you would use in your home theater in your home. I looked on craigslist for DJ speakers and went with some of the cheapest I could find.

BLURAY. If you can show your movies in bluray, do it. As your screen gets bigger the image quality is stretched. DVD’s produce about 500 lines of resolution, bluray gives you 1080 lines of resolution. That is twice as much picture that you are going to stretch. If you can’t get your copy of Anne of Green Gables on Bluray (they don’t make it, I have looked for AmberLee’s sake), at least pull out your bluray player to project the DVD. Most Bluray players try to convert the image and double the lines that are produced. You will still see a difference between that and Bluray, but it will be much better than just playing the disc on a laptop or old DVD player.

Don’t forget to add plush seating, bring out blankets and create a yummy popcorn snack to enjoy while you watch your movie! What a great way to end a summer day :)

Happy Weekend!

Father’s Day Gift Guide

Gardening, Gifts

Father’s Day is just a few days away! And when you notice that, you’ll probably panic and think, “What am I going to get Dad this year?” Before the panic begins, take a few minutes to think about your dad and remember some of the good times you had with him. We asked our team “What’s a favorite memory of you and your dad?” And here are some of their replies and a few photos for good measure :)
wm dad tribute

Jenny“Cleaning the refrigerator…no joke it was an annual tradition that me and my dad did! But we did have a lot of fun fishing together.”

Mel“My ‘Dadio’ (as I used to and sometimes still do call him) was really the first person who taught me to love listening to music. When my sister and I were little girls he used to dance with us in our play room or let us lay on his chest while we listened to music”.

Krista“We’d play our own mini Olympics in our yard!”

Nick“My dad and I always went hiking a lot (Kettle Moraine, Devil’s Lake, middle of nowhere Iowa, etc)…and odds are we’d end up finding a walnut tree with the big green husks, and start playing ‘dodgeball’. Everyone usually ended up with some bruises.”

Vanessa“Dad would always get me and my sisters roses for our birthdays. We always got the same number of roses for the number of years we were celebrating.”


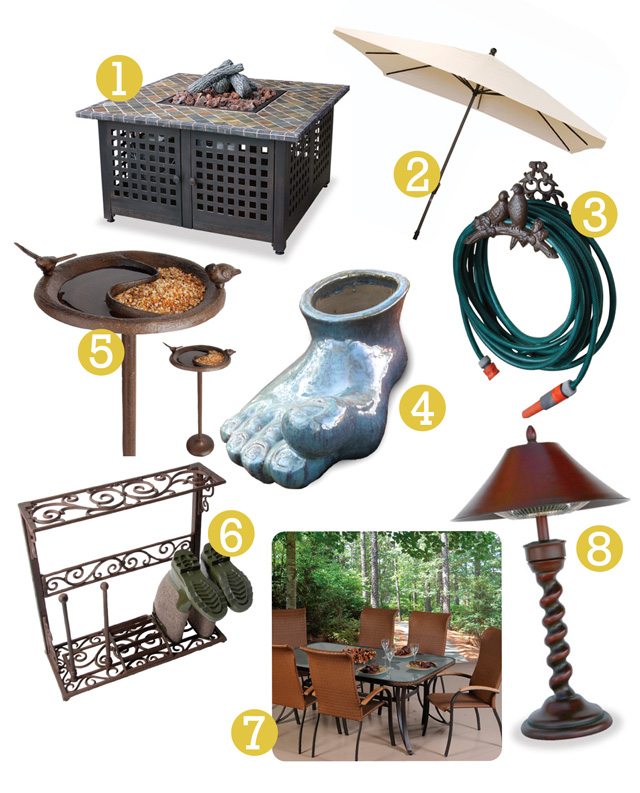
Bill Cosby describes fatherhood as “Pretending the present you love most is soap-on-a-rope.” We’ve all give our dads some interesting gift one time or another – whether it be the tie, the picture you colored or a pet rock. Hopefully you’ve wised up and are looking to get dad a great gift this year, something he can actually use and appreciate. To help you out, we’ve put together this list of outdoor-related Father’s Day gifts for you…
gift ideas for dads fathers day
(1. LP Gas Fireplace with Slate Mantel 2. Rectangle Premium Umbrella 3. Bird Hose Holder 4. Foot Planter 5. Cast Iron Bird Bath and Feeder 6. Boot Drying Rack 7. Belize Woven Dining Set 8. New Orleans Table Lamp Heater)

Weekend DIY: Rock Box

Before & After, Outdoor Decor, Outdoor Party, Weekend DIY

Remember those good ol’ summer days you’d spend as a kid in the sandbox, building castles, creating roads, and riding your toy dump trucks around? And if you didn’t have a sandbox, then you were missing out – don’t let your kids miss out either! It’s time to get out your tool belt and get to work! Many parents, mothers especially, cringe at the thought of sand because once you play in it for a whole minute, it is in every nook and cranny of your child – not to mention those outdoor cats that sometimes use your sandbox as a litter box (so gross!).

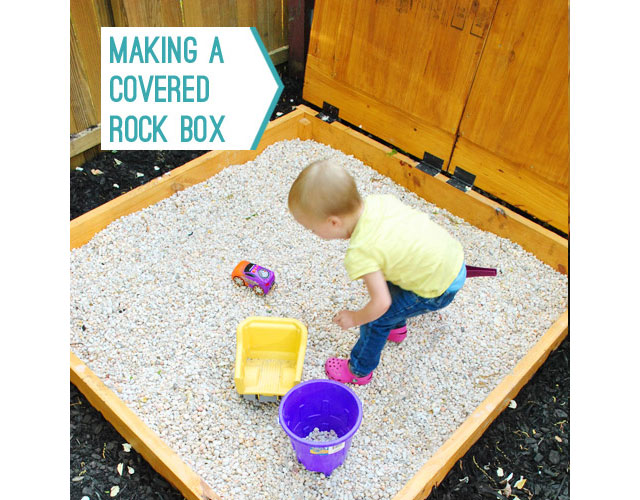
If those things concern you, why not try this unique idea of building a Rock Box to avoid the mess! This project comes from the blog Young House Love, in which a mom and dad duo write about DIY improving your home on the inside and out.

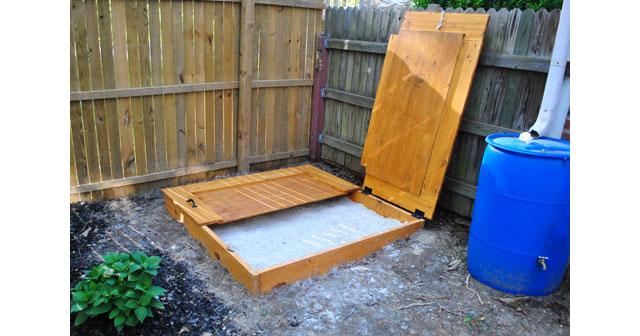
diy rock sand box

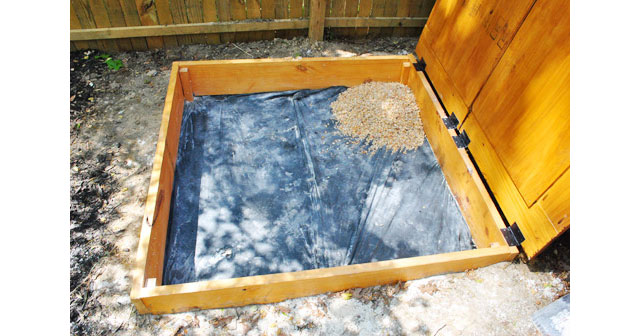
Their idea for this rock box came when they had just finished building a sandbox for their daughter – after doing so, they realized how messy it was, and were concerned with the materials within the sand that they used. To keep their daughter safe and mess-free, they replaced the sand with pea gravel rocks and now call it a rock box. Their little girl now loves the rockbox even more than the sand – who knew?

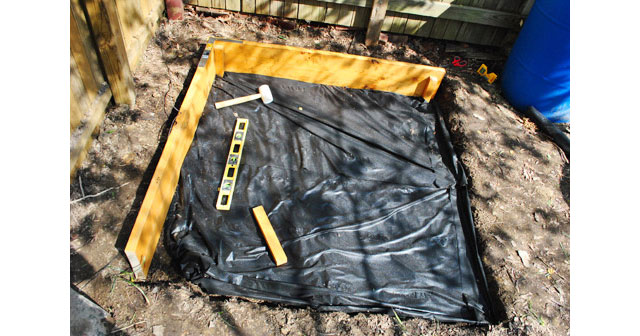
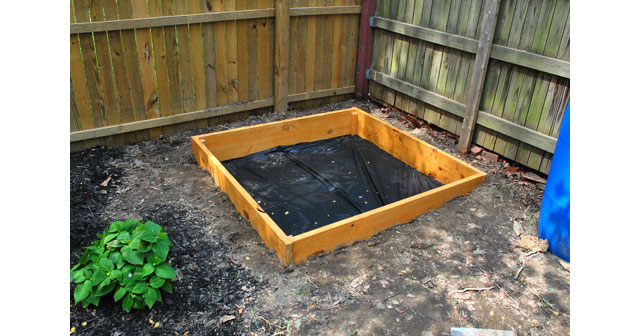
To make a rock box for your child(ren), here is what you’ll need: (2) 2×10 framing lumber (cut down to 5′ lengths – they can do this at the store for you), 4 smaller pieces of wood to use as stakes, waterproof deck stain, weed block, square ruler, shovel, pea gravel (20 bags), a drill and decking screws.

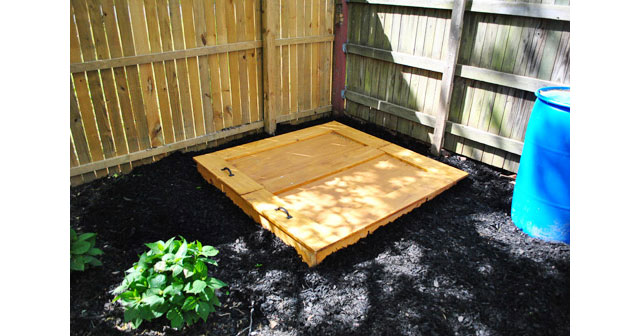
For the complete how-to and tips, read their “Sandbox Chronicles” on how to make the rock box. They also have a post on how to make a cover that securely attaches to their fence. Also, read their reasoning for replacing the sand with pea gravel. Here are a few photos from their blog on building the rock box:

make a sand rock box
make a sand rock box with a lid cover
rock box diy
rock box diy
(Photo Source: Young House Love)

Happy Weekend and happy rock box building!

Chimeneas – Outdoor Fireplace

Furniture, Garden Spaces, Outdoor Decor, Outdoor Party, Store

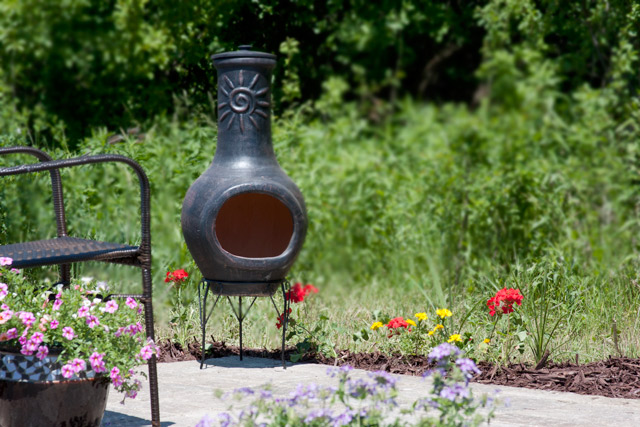
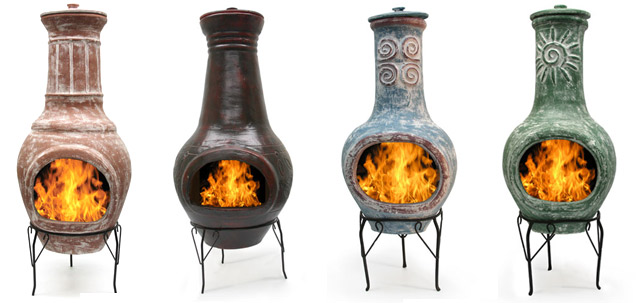
Create the neighborhood evening hot-spot in your own backyard by adding a Chimenea! You may ask, “A Chima-what?” I’m sure you’ve seen these patio ornaments during your last trip to Mexico or in western movies…the Chimenea actually originates from Mexican Tribesmen who developed a way to simultaneously keep their families warm and cook, all while keeping the rain off of their fires. Recently, these Chimeneas have gained popularity in the world of outdoor decor since they also make a wonderfully affordable fireplace/firepit. Also, unlike the Mexican Chimeneas, Chimeneas today are crafted out of durable deluxe clay and are made to last and use outdoors year-round – even in the northern areas.

mexican fireplace chimenea garden chiminea

Chimeneas are an easy way to add warmth, light, and comfort to your backyard space. The long-lasting Chimeneas from Willard & May can be enjoyed year-round when placed amongst your garden, on your patio or deck, in your pool area and even while camping. Use your wood burning outdoor fireplace to add an inviting ambiance, warm-crackling flames, and a delightful wood burning aroma to your backyard space. You can also burn pinion woods (a hardwood pine found in the mountains of the southwestern United States)  as a natural mosquito repellent!

CHIMENEA CARE TIPS
– Use the included metal stand as this helps to prevent the clay from retaining moisture. Your Chimenea will last longer if kept above the ground and allowed to breathe.
– Use a 2-3″ barrier of sand or pea gravel in the base of the wood burning area. Do not build a fire directly on the clay.
– Cure the Chimenea fire pit by building 2-3 small fires prior to regular, prolonged use. Allow the clay to cool completely between firings for at least 4-6 hours.
– Use newspaper or kindling to begin all fires. Never use starter fluid, charcoal, or artificial logs in your Chimenea.
– Keep your Chimenea free from water by protecting it during rain or freezing weather. If water does find its way inside, replace the sand and allow it to dry completely before starting another fire. Apply a non-flammable water-based sealer annually.
– Chimenea will get very hot during and after the burning process. Children should be supervised in the vicinity. Also, keep Chimenea away from roofs, overhangs, and branches and take care when using on a wood deck.

To properly see how you should care and handle your outdoor Chimenea, view the complete Chimenea Care Instructions here.

mexican fireplace chimenea garden chiminea from willard and may store

Included with our Willard & May ceramic Chimeneas are the powder coated stand, the cap, metal grate, and care instructions to get the best enjoyment from your Chimenea. There is no assembly required, just plain ol’ fun and easy! Check out all the different styles available for sale now!

Weekend DIY: Backyard Water Feature

Garden Spaces, Outdoor Decor, Weekend DIY

Everyone is familiar with the tranquil environment that a waterfall and stream creates – it’s so peaceful, yet most people don’t have the luxury of enjoying one in their own backyard. However, that can change within just two weekends! Even though it may seem like a daunting task, perhaps you’ve decided to be adventurous and create a water feature in your backyard. Great! We’ve found some great step-by-step instructions that will help you achieve a great looking waterfall and stream with only a little bit of elbow grease.

Here are the supplies you’ll need: Level, Wheelbarrow, Rubber mallet, Spade, Utility knife, Large waterfall pump, Hose kit and connections, PVC primer and cement, Ball valve and clamps, Sewage basin (18” x 30”) and lid, Two hole saw bits (2” and 1”), EPDM pond liner, Underlayment fabric, Waterfall foam sealant, Gravel, Field boulders, Decorative boulders, Hand tamper, Scissors, and a Ball cart (for moving boulders).

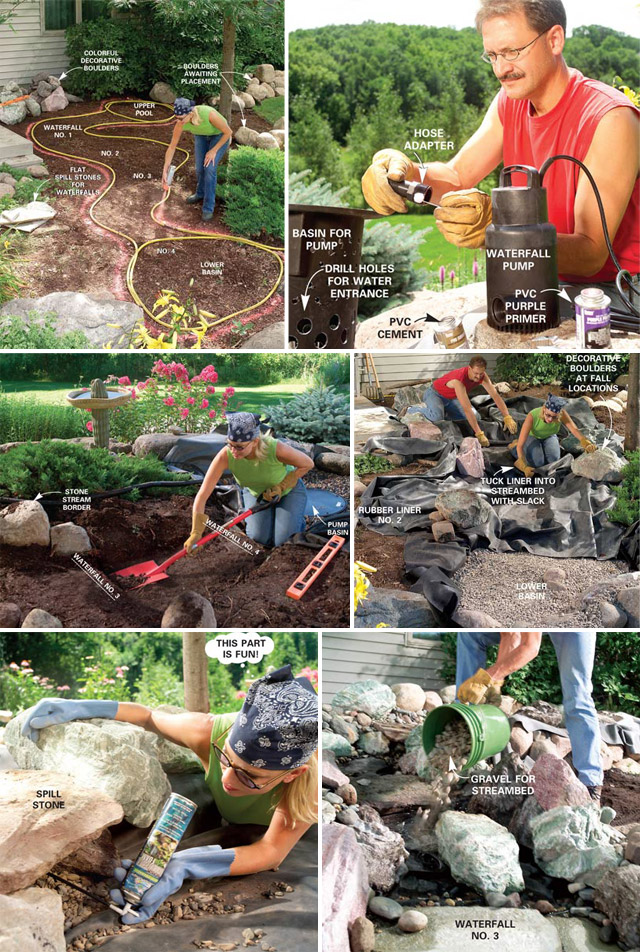
Here are the simplified steps, but refer to The Family Handyman for the complete step-by-step DIY waterfall instructions. Step 1: Understand how waterfalls work in a backyard setting. Step 2: Plan out your waterfall. Step 3: Purchase the stone materials. Step 4: Map the waterfall and stream and dig. Step 5: Complete the lower basin. Step 6: Dig out or build a long staircase. Step 7: Arrange liner and layout the stones. Step 8: Add additional stones and fill gaps. Step 9: Add gravel and clean the system. Step 10: Enjoy!

Here are a few photos of the process:
easy backyard waterfall diy(Photo Source: The Family Handyman)

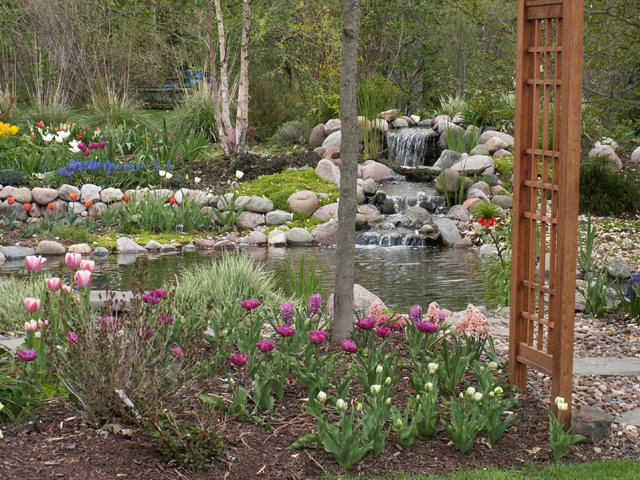
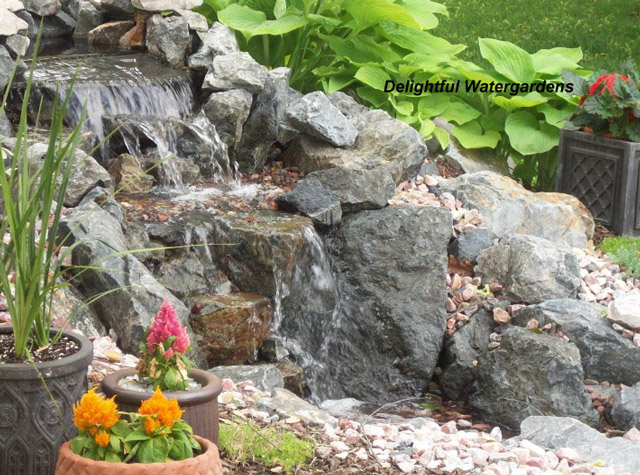
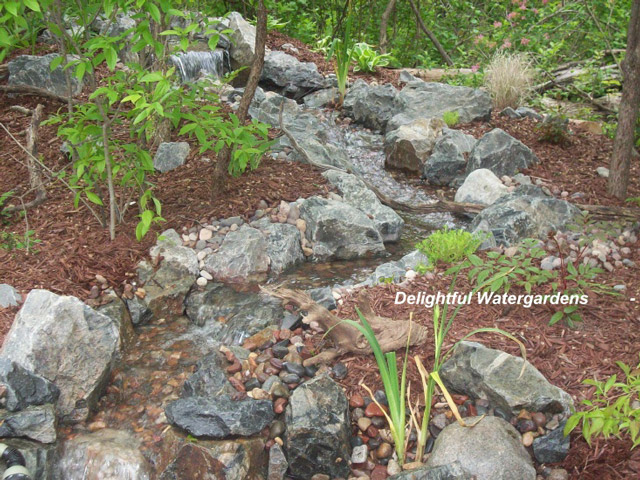
As additional inspiration, we’ve included some photos below from one of our very own team members. She has created many water features in others’ yards as well as her own! Here are a few of her tips to create your own backyard oasis:

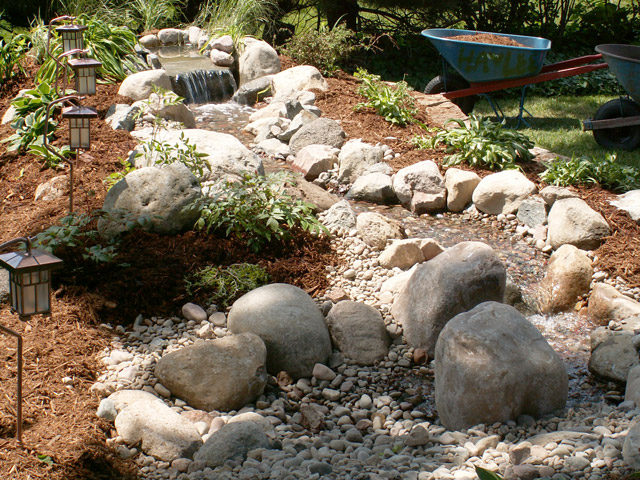
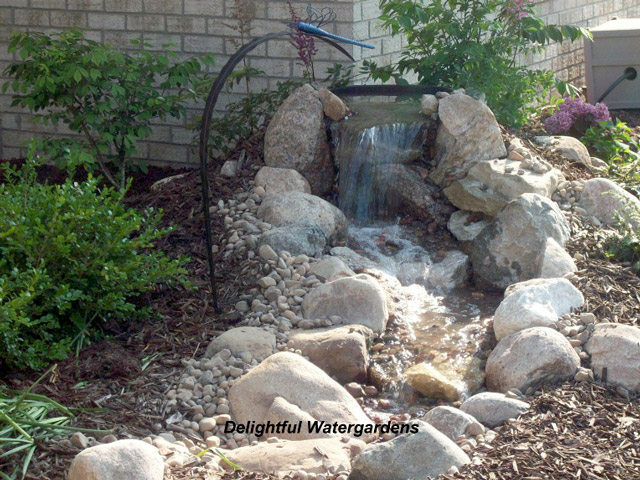
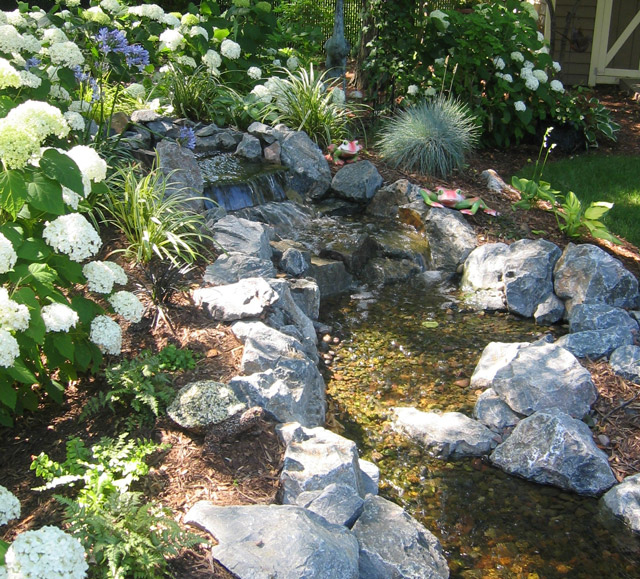
If you build it into the ground and lay layers of thick weed barrier under the liner, it will last a lifetime. Shade is helpful in keeping algae at a minimum. You may also want to purchase an algaecide to help. Maintenance will be less than a flower bed! Dig the width of the stream wider than your finished desired width as rocks will fill it in a lot. Also, purchase a waterfall pump that is designed for the height & width of your design (its more than just gph).

create a water stream in your backyard
how to create a waterfall in your backyard diy backyard waterfall diy backyard waterfall
diy backyard waterfalldiy backyard waterfall

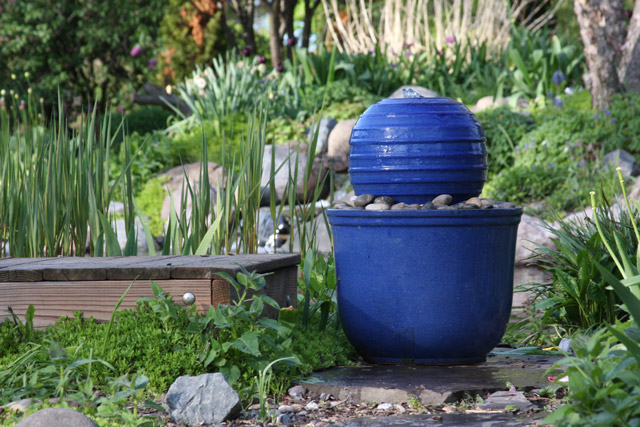
Maybe you don’t have two weekends to create a waterfall, but still love the serenity one creates? Why not try a small water fountain in your backyard like this from Willard & May:


Happy Weekend!

Weekend DIY: Outdoor Twister

Outdoor Party, Weekend DIY

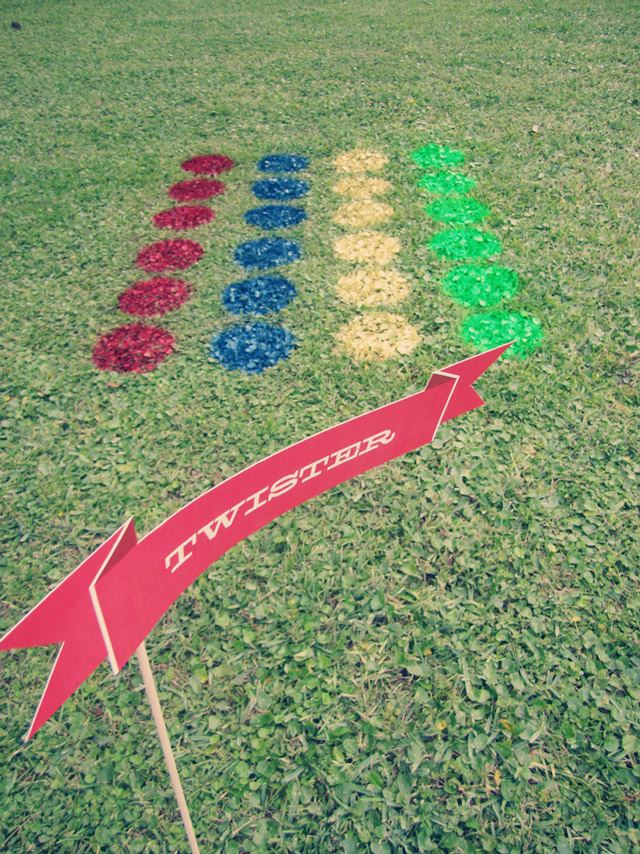
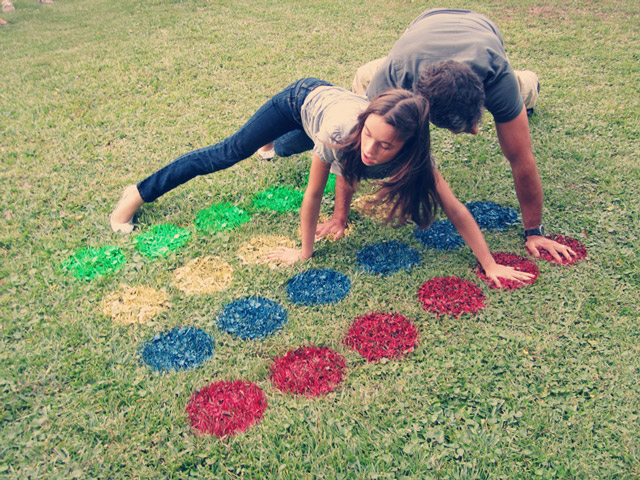
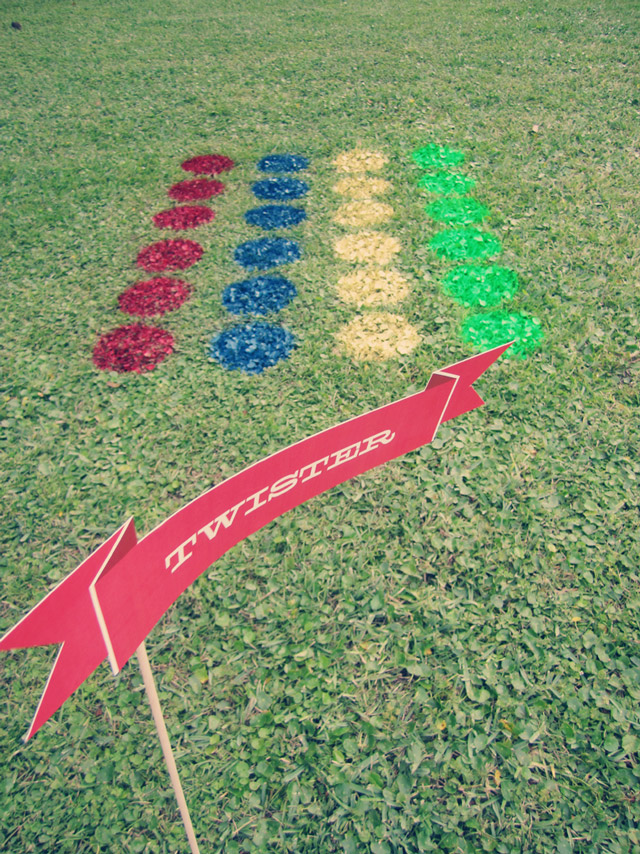
In our last post titled “Memorial Day Party Inspiration” we showcased a few great Memorial Day Party Ideas. Included in that post was a photo from the blog, You + Me of a twister game created right on the lawn – no need for the official game board! We found the original DIY post from another blog, Sassy Style and thought we’d share how to re-create this budget-friendly game!

backyard game twister how to

Here is what you’ll need: cardboard, craft knife, large bowl (or other round object), pen, red, blue, yellow and white spray paint, 1 piece of paper, scissors, and two containers or hats to hold the paper slips.

Step 1: Trace the large bowl onto the piece of cardboard. Then, cut out the circle on the cardboard, so what you have left is a stencil of the circle.

Step 2: Find a large enough space in your yard on the grass (the more level the better although a steep slope can add some extra fun!). You’ll need 1 row of 6 dots for each color (4 colors) – so measure out the 6 circles if you are unsure.

Step 3: Lay down the stencil and fill the area with spray paint. Make sure to spray enough so that it is dark enough to see. Then, move the stencil down, leaving enough space and spray paint another circle, and so forth, until you have 6 dots of each color in a row. (One note: many hardware stores will sell an outdoor “landscape” spray paint which washes off in just a few rainstorms! :)

Step 4: Instead of recreating a spin-board, make slips to draw out of the container or hat. Out of a piece of paper, make small slips that say: right hand, left hand, right foot, left foot, and you could get creative with other parts if you’d like! Then create slips for each color you spray painted.

Step 5: To play, just draw one slip for each container for each turn. Have fun!

Do you have a fun game you play outdoors with your family? If so, please share it with us below!

Memorial Day Party Inspiration

Outdoor Party

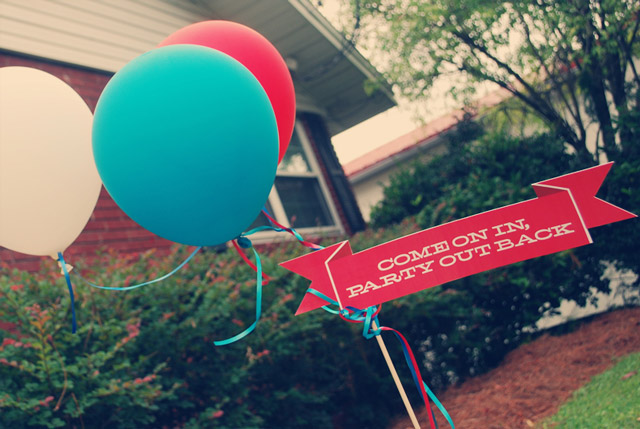
Hosting the traditional family and friends get-together on Memorial Day this year? If you are still looking for a few fun ideas to make it better than last year, we’ve got some patriotic decoration ideas for you! We recently came across a post from the blog, You + Me, in which a red, white and blue birthday party was documented. Check out some of these great ideas and we hope they inspire you this weekend!

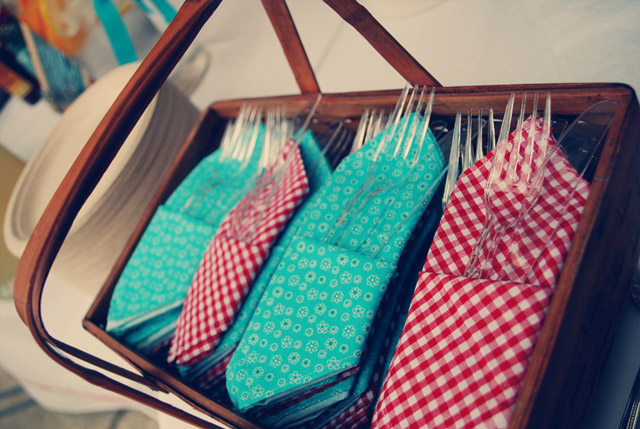
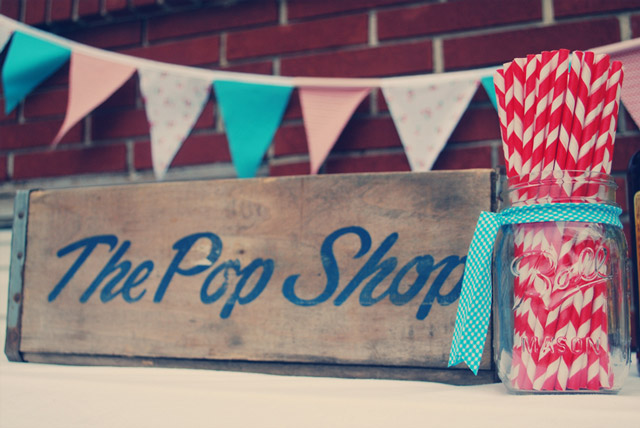
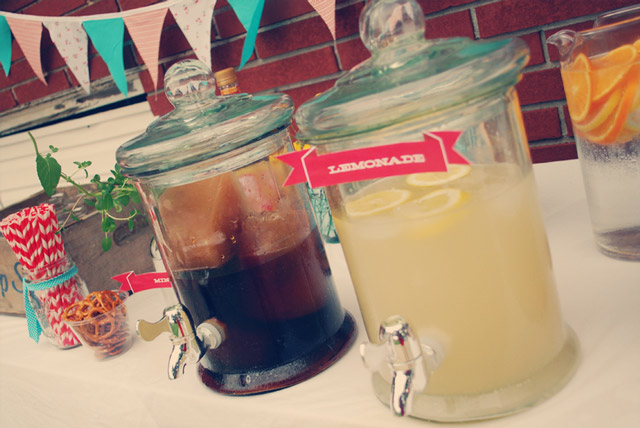
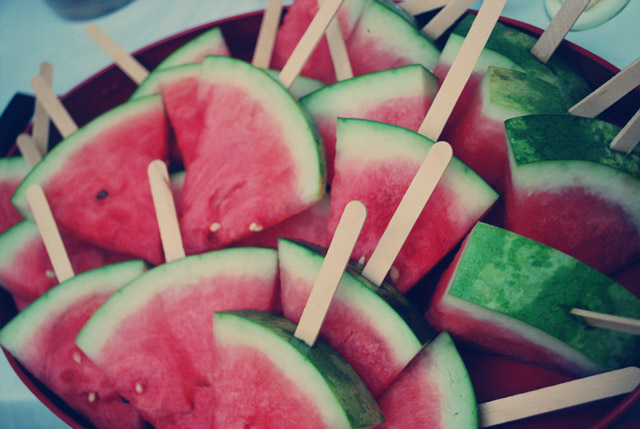
memorial day partypatriotic party ideaspatriotic party ideaspatriotic party ideaspatriotic party ideas
patriotic party ideaspatriotic party ideas
(Photo Source: You + Me)

Have outdoor party ideas you’d love to share? Let us know in the comment section below!