Weekend DIY: Easter!

Outdoor Decor, Pin Inspiration, Weekend DIY

Easter is THIS Sunday – and if you are like some of us here, you’re just now looking for a few ways to add an Easter vibe to your home. We’ve found a few of the best Easter DIY projects out there and put together this list for you! Check them out below and let us know which one you tried in the comments!

Easter Egg Garland – Honey & Fitz

Easter Terrarium – Honest to Nod

Easter Egg Balloons from Martha Stewart + More Easter Ideas from her

Robin’s Egg Blue Easter Wreath from Uncommon Design

Happy Weekend!


Weekend DIY: Bamboo Chime

Outdoor Decor, Weekend DIY

The sound of wind chimes are amazing… If you live in the city,  it helps to break up the traffic noise. And if you live in the country or suburbs, the chimes help relax you. At this time we don’t have any wind chimes for sale on Willard & May, so why not make your own? This is also a great project the kids can use their painting skills at.

We came across this unique “Summer Time Chime” made of bamboo, on the blog Michele Made Me. For this fun Weekend Do-It-Yourself project, you’ll need: bamboo stakes (1 or 2), a stick from a tree, a drill (with a small drill bit), a handsaw, string, needle, acrylic paint and paintbrushes, sharpie and varnish.

Here are the simplified steps: Saw the bamboo intro various sizes. Then you’ll paint it and seal with varnish, and drill holes for attaching to the stick. Then use the string to attach each piece and hang up where it can be viewed for all to see! *We thought this also might look good as a circular chime – for this you’d need to find a round piece that you can attach the bamboo to, like a wooden hoop.

For the complete tutorial, visit Michele Made Me.


(Source: Michele Made Me)

Don’t have bamboo but have other objects you think might work for a DIY wind chime? How about some old earrings, buttons, old keys, or tin cans? Check out these other wind chimes we found to help inspire you to create!


(1. Rebecca Sower 2. Ellen’s Creative Passage 3. Wallace Gardens)

Happy Weekend!

Weekend DIY: Outdoor Lighting

Lighting, Store, Weekend DIY

Nothing beats a beautiful night out on the patio, reading a good book, sitting around a fire, enjoying dinner and making s’mores. The key to a warm, romantic backyard patio at night is the lighting – whether it be by candle, fire, lanterns, or strings of lights.


(Source: Pocket Full of Dreams)

This Weekend Do-It-Yourself project from the blog, Pocket Full of Dreams, will be the the perfect addition to your outdoor space to add some color, as well as light to your outdoor evening. Here is what you’ll need to get started: twine (colored twine is better or use spray paint once you have completed the steps to add color), glue, cornflour, warm water, balloons, marker, Vaseline, old tray for the glue mixture, a broom or long piece of wood to hand the balloons from, set of white lights (the kind you use on your Christmas tree), and fishing wire.

To complete this project, just follow the six simple steps outlined in the complete DIY found here on Pocket Full of Dreams.


(Source: Pocket Full of Dreams)

Looking for other ways to bring light to your outdoor space? Check out these items from Willard & May to complete your outdoor scene.

(1. Hardwood Lantern 2. Rustic Lanterns 3. LP Gas Square Fireplace with Slate 4. Gazing Globe with Cutouts 5. Votive Candle Stakes)

Happy Weekend!


Weekend DIY: Kites

Outdoor Party, Weekend DIY

Aaahhh – Warmer weather is here and *fingers crossed* hopefully here to stay! Even if Spring is just teasing us, you might as well enjoy it while you can! Here is a fun and easy Do-It-Yourself project to tackle with the kids this weekend to make your own box kite from Fresh Home Ideas!

To get started, you’ll need to gather these materials: 1/4 inch pine dowels, Tyvek (house warp), nylon ribbon, strapping tape, string, 1/4 inch PVC tubing, markers for decorating, basic tools, handsaw and utility knife. Then follow these simple steps: 1. Cut the pieces. 2. Make the connectors 3. Position the Long Dowels. 4. Insert the Cross Pieces 5. Add the string and tail, and finally 6. Fly your kite! To read the complete DIY process and for other great tips along the way, check it out on Fresh Home Ideas.


(Source: Stuart Scott / Fresh Home Ideas)

If you want to make a kite, other than a box kite, here are some other Kite DIY tutorials we found for you, such as a butterfly kite, grocery bag kite, diamond kite, and fabric kite.

(1. Giddy Giddy 2. Rhythm of the Home 3. Fresh Home Ideas 4. Martha Stewart)

Happy Weekend!

Weekend DIY: House Numbers

Curb Appeal, Weekend DIY

Looking for an excuse to enjoy a bit of the warmer weather that has graced most of us over the past few days? How about spending some time this weekend improving your curb appeal by giving your house numbers a makeover? And what’s even better, this unique DIY is budget-friendly!

We came across this simple and classy Do-It-Yourself Nail House Numbers from the blog, StinkerPants. The blog’s writer, Sara, saw this tack artwork and then used the same idea with nails on her fence post. All you need to complete this project are: nails, hammer, needle-nose pliers and a print off of the numbers you’d like to transpose onto your location.  You could easily use this technique on a wooden mailbox post, a fence post, or if you have wood siding (basically anything you can hammer a nail into)! To read the entire DIY project, visit her blogpost.


Also, once you get the nails all hammered in, you could string thread around the nails for a different look, like Amanda did from the blog, Our Humble Abowed.

If you’re not good with a hammer and are still looking for ways to jazz up your house numbers, check out these other ideas we came across as well, such as house numbers made of turf, pumpkins, plates, pots, moss, and etched glass!


(1. Better Homes & Gardens  2. Firmly Planted 3. Sunset Magazine 4. Gluesticks 5. Country Living 6. Crafting a Green World)

Happy Weekend and DIY-ing!

Weekend DIY: Bird Feeder

Birds, Weekend DIY

Do you have a special place in your heart for the birds that visit your backyard? Many other animals that enter your backyard can quickly become pests. Like squirrels stealing your freshly planted bulbs, rabbits and deer that eat your hostas and trample through your garden – but birds, there’s not much that is pest-y about them, besides a little bird poop here and there.

If you are into feeding the birds, check out this great rainy-day or snowy-day do-it-yourself project. This easy to make Acorn Bird Feeder comes from DesignSponge, a super great blog for tons of DIY stuff and decorating ideas. Using just a few common objects – seeds, soda bottle, wooden bowl, gelatin and a couple other – you can make this great feeder that birds will love hanging from your tree or near your window.


(Source: DesignSponge)

We also found a few other bird-related projects on Pinterest for you to try out – a garden roof to a birdhouse, cookie cutter bird feeders, and a birdhouse chandelier. And if you are into creating a habitat for the birds in your backyard, check out Willard & May’s great selection of bird baths.


(1. Garden Therapy 2. Eighteen25 3. Pinterest)

Happy weekend and have fun with the birds!

Weekend DIY: Outdoor Rug

Outdoor Decor, Weekend DIY

The weather in our backyard has been very bi-polar lately. We wake up with an inch or two of snow on the ground, but by the afternoon it’s sunny, melted, and in the 40s! The sky has been playing tricks on us. But if you catch a glimpse of spring-like weather this weekend, or if your garage is warmer than usual for this time of year, try this fun DIY project of creating an outdoor rug.

A great way to bring color and comfort to your backyard patio is to put down a bold, colorful rug. Depending on where you shop, rugs can get pretty pricey, so this is where we can get creative! This DIY blogger from Design Share, found a great patterned table cloth at Target – but ended up using it as a rug instead! All she did was cover the table cloth with multiple layers of satin finish water-based polyurethane – which would protect it from dirt, spills, and stains. While she used this rug indoors, you could easily use it outdoors if you coated both sides! To read the whole Do-It-Yourself project, visit her blog.


(Source: Design Share)

Maybe you’re looking for a different type of outdoor rug or need more inspiration? If that is the case, we found a few other examples of DIY outdoor rugs on Pinterest you can view below!


(1. Tatertots & Jello Blog 2. MyHomeIdeas 3. MyHomeIdeas)

Happy rug-making weekend!

Weekend DIY: Boots

Weekend DIY

The countdown to spring is on, only 31 days left – which means you’ll be in your backyard in no time. While it’s still a bit chilly to get outside, get in the cheerful, almost-spring spirit and do something fun, like painting your boots! Not just any boots, but your rain/garden boots.

We found these creative boots on Pinterest and thought everyone deserves to have some fancy boots like these to use in their garden, backyard, or on a rainy (or snowy) day.

(Aiken House & Garden)

Look for a paint made specifically for use on plastics (it should say this somewhere on the container) as this paint will actually stick to the boots and won’t chip off or break as the boots are used. For a nice clean working surface, you could first spray paint the entire outside of the boots to a color of your liking (being careful not to spray the inside). Once dry, then use acrylic paint for your design. After everything is dry, either use a clear spray paint for plastics, or a textile medium (used for sealing artwork), as this will help seal in the paint and prevent chipping.

If you aren’t into painting boots, we have seen many fashionable rainboots out in stores or online. If you happen to have an old pair of garden boots lying around, try using them as a planter! We found this great DIY for a boot planter here from the blog Rosy Posy. Check out these great ideas below that involve boots…

garden boots, planters, wellies(1. LisLis 2. Brown Eyed Belle 3. Studiopatro 4. Rosy Posy )

No matter what you decide to do this weekend, get your boots ready so that when the snow is gone, you can get to your backyard without any hesitation!

Weekend DIY: Indoor Garden

Gardening, Weekend DIY

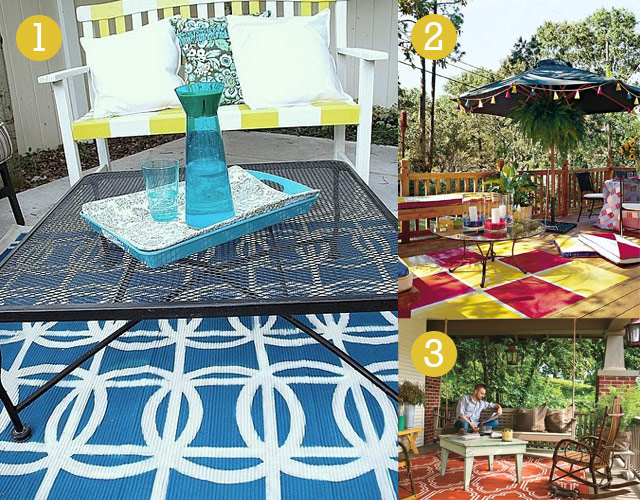
Each and every weekend is a chance to relax, kick-back and enjoy yourself – Just Kidding! When you have your own place to call home, you know very well all the projects that come along with it. Each week we’ll feature one Weekend Do-It-Yourself project in the hopes to inspire you to get outside and turn your backyard into your outdoor dream.

While it may be a bit too early to begin the projects you’ve been dreaming up for your backyard all winter, you could try bringing life indoors! We’re guessing you’ve seen one of the latest crazes of planting a succulent garden, as it has been featured in countless magazines and blogs.

We love succulent gardens because they are easy to grow, pretty hard to kill (bonus!) and have a whimsical feel – almost like you could find a little fairy floating around them. One of our designers thought she’d give a succulent garden a try, and we’re pretty impressed – now we’re all thinking of ways to incorporate them into our homes and offices!

succulent miniature garden
succulent miniature garden in bowl

Here is what she says about building her succulent garden:

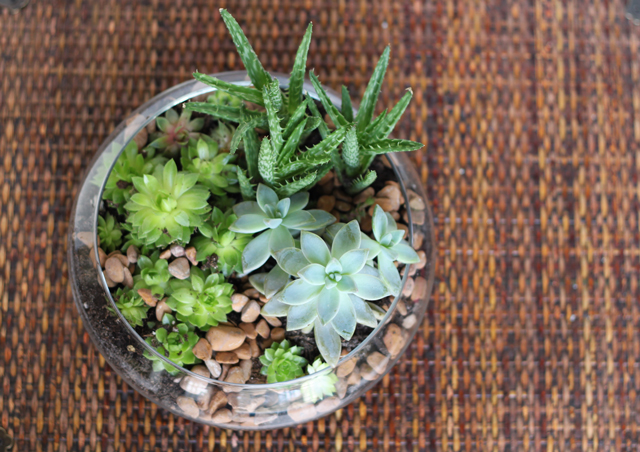
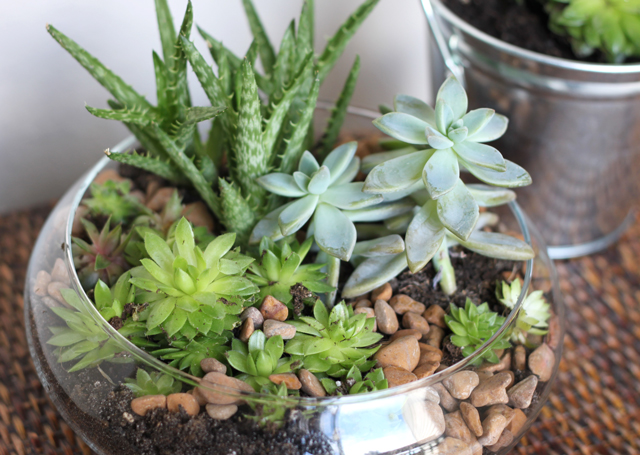
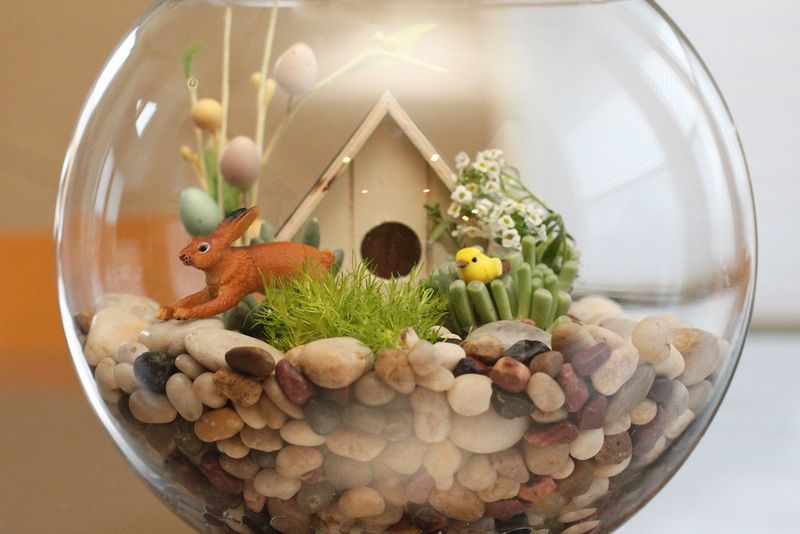
I wanted to create a mini succulent garden out of a glass bowl that I had found at a local craft store. Next, I began the hunt and research at our local garden center that had lots of greenhouse plants. There I found three different varieties of succulents. The three had different heights, textures, and shapes. I also picked up some rocks and cactus-succulent soil (as I learned it is very important they have well-drained soil).

I started with a layer of rocks at the bottom of the glass bowl to help with drainage. Then I added some soil, then grouped the two taller succulents in the back. The other succulent I picked was smaller in size, so I scattered them about in the front. Once I had them perfectly situated, I added more soil and placed a few rocks on top to complete the miniature garden.

I’m super happy and pretty excited with how it turned out! Lastly, here are a couple tips I picked up on the way: 1. Don’t overwater them!  2. They love the sun, but keep them away from direct sunlight and 3. Display for all to see! ~ Happy indoor gardening!

indoor gardening, succulent, forcing bulbs
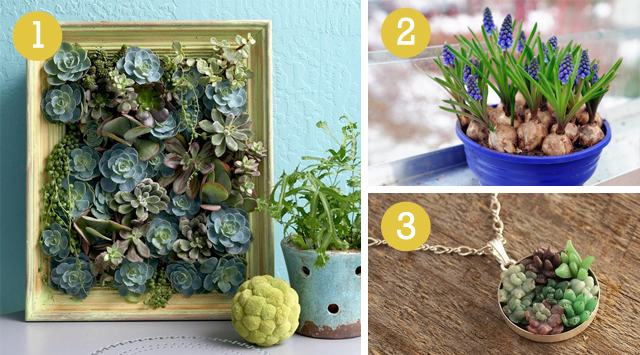
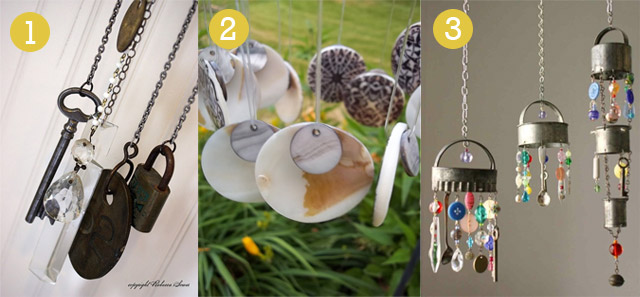
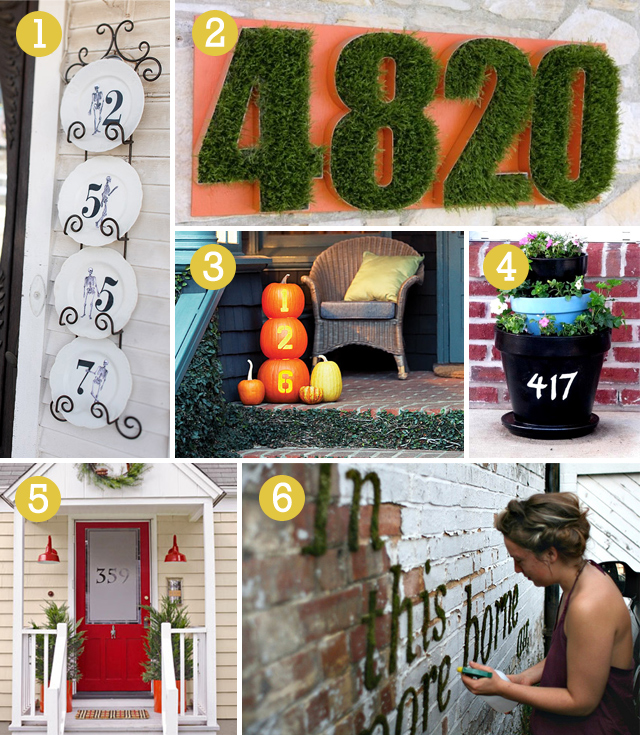
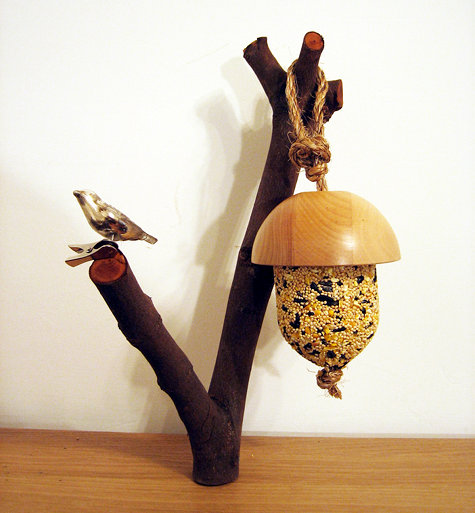
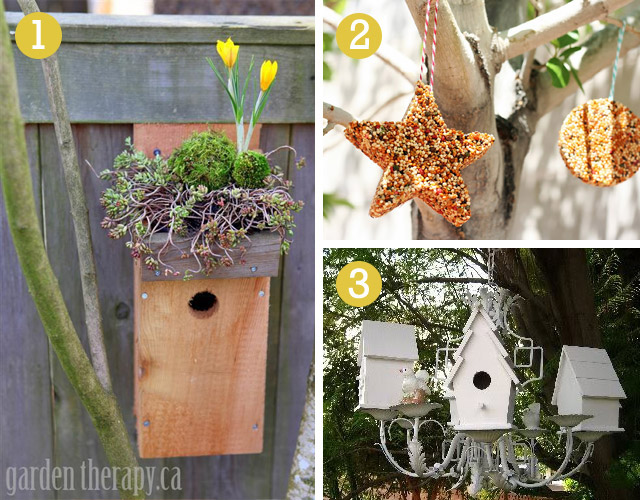
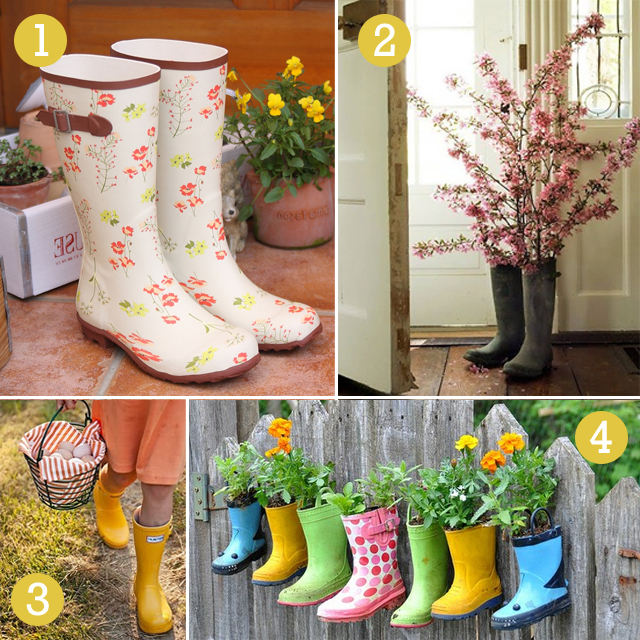
(1. Better Homes & Garden 2. BulbBlog.com 3. Woodland Belle on Etsy)

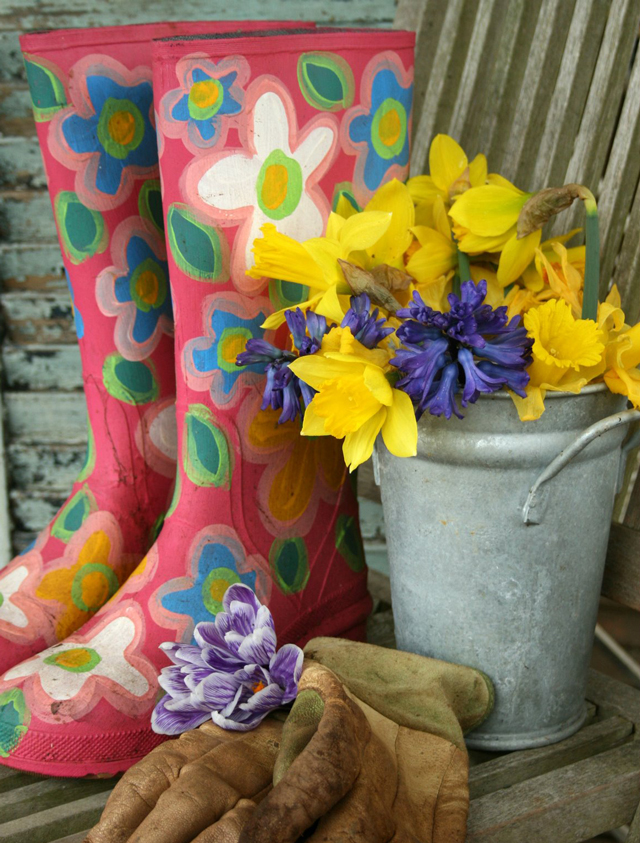
Another way to bringing gardening indoors during the winter is forcing flower bulbs, like Hyacinths, Daffodils, and Tulips. You’d have to have bought them this fall unfortunately, but instead of planting them in the ground, you try to replicate their natural growth cycle by storing them in a cool place (around 35-40 degrees) for a few months. After they’ve been stored, you can plant them in a pot or vase and watch them come to life indoors. As a nice bonus, many bulbs like hyacinths have a sweet smelling scent! For tips on forcing bulbs, check out our friend Bridget at the Bulb Blog.

Also, follow our Indoor Gardening Board we created on Pinterest for other great ideas for bringing life indoors this winter! When Willard & May launches, we’ll have lots of great products for indoor gardening to get you started. What indoor gardening projects have you been dreaming up? Let us know in the comment section below.