If you’ve ever thought your backyard was too small to use, think again! This inspiring backyard before and after (from Jones Design Company Blog) shows just what you can do with any amount of space – large and small. This yard used to be just a slab of concrete patio, a bit of grass fenced in with neighboring houses towering over them. Today (5 years later), it is now a place to relax, enjoy dinner, play on the swing set, and unwind with a bit of gardening.
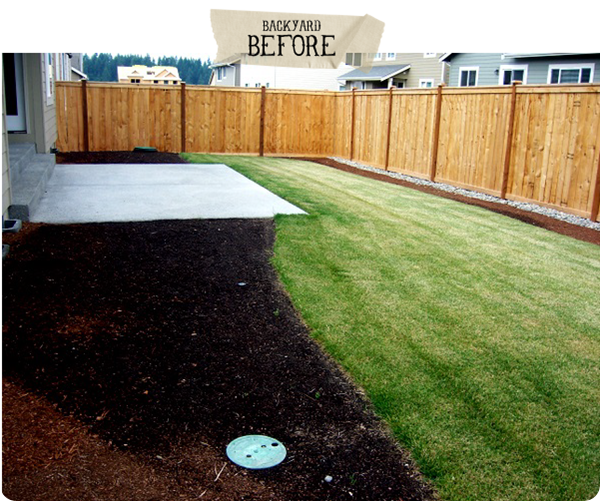
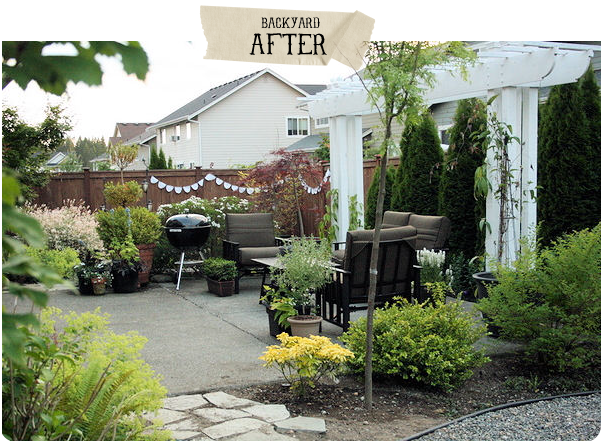
To see all the features they added to their backyard, head on over to the Jones Design Company Blog.

Weekend DIY: Decorative Ladder
Weekend DIYCan you believe that summer is half over already?? It’s so crazy to believe and I’m sure you just had a panic attack realizing that big backyard renovation project you dreamed of finishing this summer is not quite as far along as you hoped? Not to mention your backyard probably looks more like a desert with this whole lack-of-rain thing. Well now that it has officially rained for a couple days, your grass will slowly turn back to green. While you are waiting for that to happen this weekend, why not add some decorative touches to your patio or backyard space.
Do you have a space on your porch or in your backyard that needs a little decorative touch like Ashbee did? Check out this DIY Decorative Ladder she made one afternoon, that she featured on her blog. She designed it to fill a corner of her porch that needed to be lightened up. She also added hanging potted plants to add pops of yellow.
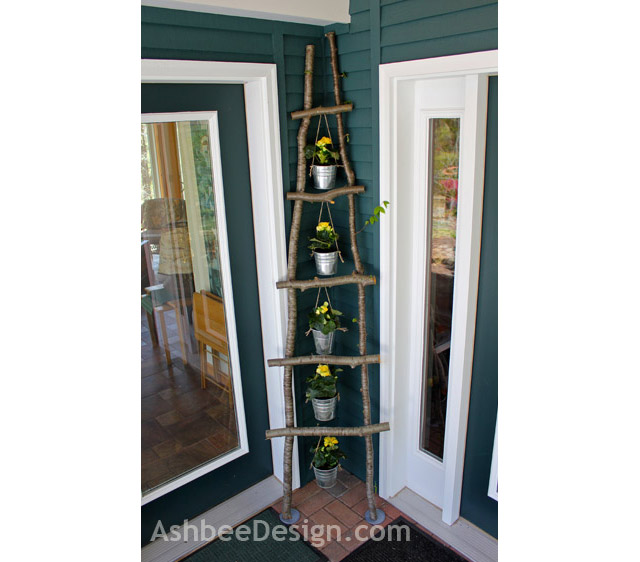
How-To: Here is what you’ll need to complete this project: a wooded area where you can find a few saplings, buck saw, branch clippers, screws, drill, metal pails, and plants as accessories.
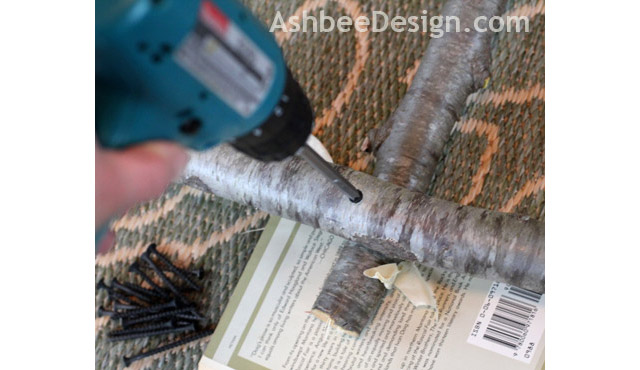
To begin this project, locate an area where you can find about three decent size saplings that you can cut up. Once located, bring a saw and branch clippers. Saw down the small tree and clip the branches off. Then you’ll need to cut down the trees for the correct size of your ladder. Then lay them out on the ground to see how it looks – then screw them together. Finally, add decroative potted flowers and display for all to see. If you want a more detailed run-down of the instructions, visit Ashbee’s blog.
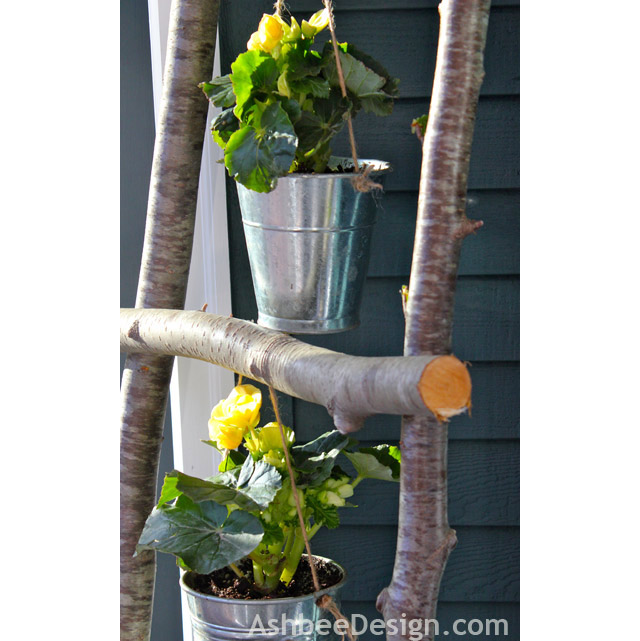
Also, Willard and May has a great selection of small planters you could utilize into your ladder design.
Happy Weekend!

Inspire Me: Sunrooms
Outdoor Decor, Pin InspirationSunrooms – who knew they’d actually be useful and can look good at the same time. I (Vanessa, a team member at Willard & May) have been touring some houses lately because my husband and I are looking to buy relatively soon. We visited an open house that featured a sunroom. The minute you walked in it was more like a sauna from the 80s. It had old carpet, white plastic-y walls, and skylights that needed a bit of elbow grease. I really didn’t think much of it and didn’t find it a great space until I did some exploring on Pinterest. After, I realized a sunroom can actually turn into quite useful square footage when you do it right – some new flooring, a fresh coat of paint, and a bit of decor can turn it into that summer haven.
Here are some sunrooms I fell in love with, which made me fall in love for that house. I immediately began picturing how I could turn that space into pure bliss.

(1. My Home Ideas 2. Country Living 3. Jenna Sue 4. Pinterest 5. House Beautiful 6. Pinterest )

Weekend DIY: Garden Stones
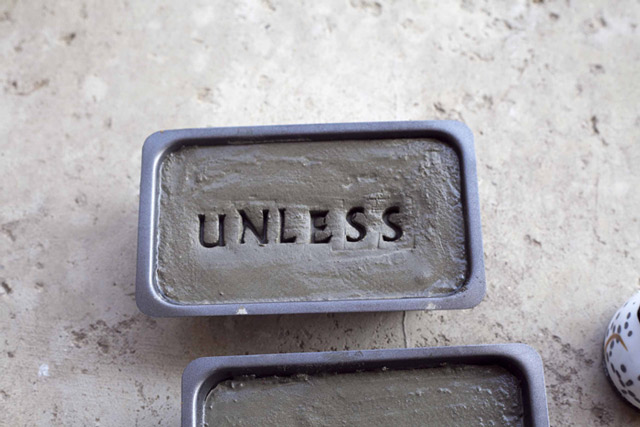
Garden Spaces, Outdoor Decor, Weekend DIYFor many, gardening is a way to relax, forget about life’s craziness and release some anger on those weeds! While you’re out in the garden, it’s can also be nice to reminisce about the things you planted and how they came to be. Maybe that hydrangea the with bright pink blooms was once your grandmother’s and reminds you of how sweet she was or the time you spent gardening with her when you were young. It’s great to bring memories into your garden – and with this fun and easy DIY project from the blog Prudent Baby, we’ll show you how to make a garden stone that will inspire you to continue to garden for years to come.
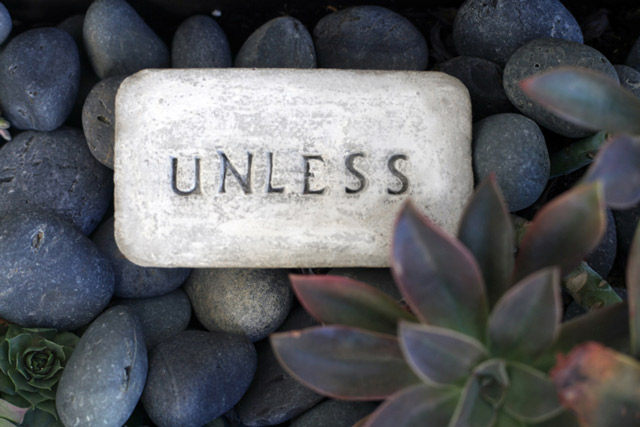
(Image Source: Prudent Baby Blog)
Here is what you’ll need to get started: a small amount of cement (or stepping stone kit from a craft store), a mold (a bread pan for example), oil, and stone stamps (can be found at a craft store). You could also get creative and use other tools to engrave your stone, such as pebbles or your children’s hand or foot prints.
Here are the basic instructions – (for more detailed instructions, refer to the blogpost from Prudent Baby.) Step 1: Mix your cement according to the directions on the kit or package. Step 2: Spray or spread oil into your mold. Step 3: Pour cement inside the mold, smooth the surface out, and tap the pan to remove air bubbles. Step 4: If you want to add objects to your stone, do so now. If you just want to engrave, wait 30 minutes before doing so. To see if the stone is ready for engraving, scratch the surface and if you get a “dry mark” you are ready to go. If it’s still a bit liquid-y, wait a little while longer. Step 5: Let stone dry for at least 24 hours before removing from the mold.
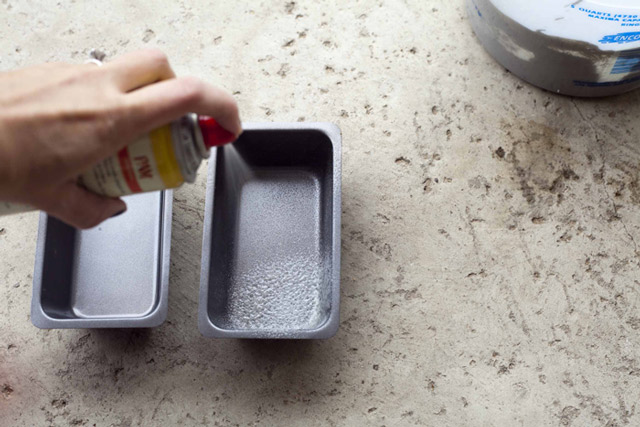
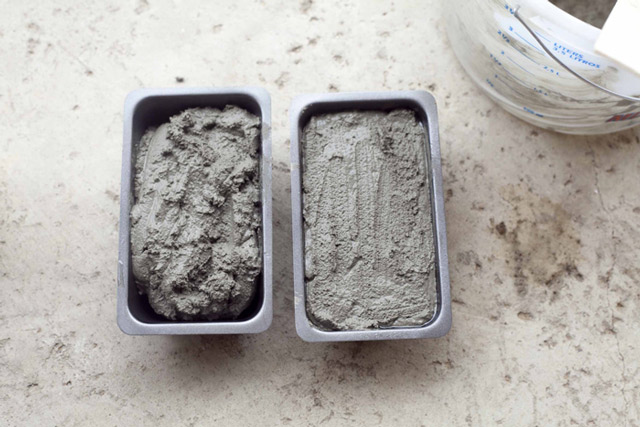
(Image Source: Prudent Baby Blog)
And there you have it! Display your stone for all to see – or make it a tradition to add something new to your garden each year.
Happy Weekend!

Is it Ever Going to Rain???
GardeningWow. What a summer! According to the NOAA (National Oceanic and Atmospheric Administration) more than 55 percent of the United States was classified as experiencing moderate to exception drought at the end of June. The NOAA also reports that the month of June was the 14th warmest and tenth driest June on record, based on data dating back to 1895. However, you don’t need statistics to know that things are dry. All one needs to do is look out his or her window at the once green-grass now resembling more of desert sand than anything else. Even well-established plants are beginning to wilt and rivers that were once flowing have now diminished to a near trickle. As much as we all have a right to lament the dry weather because of the effect its had on our landscape, no one has the right to complain more than the farmers whose livelihoods depends on the growth of their crops. Check out these photos from the Photography Blog in the Dallas News.

(Image Source: NASA)
So we all know it’s been dry and unfortunately, no version of a rain dance is going to change that fact. But there are a few things you can do to combat the drought and give your plants the best chance at survival that you can. Here are a few watering tips to help you through the dry spell:
- The best time of day to water, whether it be the lawn or other plants, is early in the morning before the heat rises. Watering in the middle of day is not only costly (much of the water evaporates before it has a chance to sink into the ground and therefore, results in having to water more) but can actually be harmful to your landscape. When water is allowed to sit on the leaves of plants or blades of grass, it actually magnifies the sunlight and in turn can have an almost “burning” effect on the foliage. If watering the morning is not possible, the next best option would be closer to dinnertime after the sunlight’s intensity has decreased but the temperatures have not started to fall quite as drastically as later in the evening.
- Water all plants (with the exception of lawn areas) as close to the root system as possible. Although overhead watering (such as with a sprinkler or hose nozzle) is usually the quickest way to get the job done, it isn’t always the best. Allowing the water to sit on the foliage of a plant can be detrimental not only for the reasons listed above but also because it can encourage mildew to form on some plants if it does not evaporate quickly enough. Use a watering can to water the base of the plant or a watering wand which can be held at the base whenever possible. If overhead watering is necessary, be sure to adhere to the early morning watering guidelines to avoid possible issues.
- Aim to give all of your established plants (including trees and shrubs) one inch of water per week. During typical weather patterns, the plants in your landscape will naturally receive this recommendation of moisture through precipitation as well as dew. Since this obviously is not the case during a drought, it may be necessary for you to provide this water for them. When watering established trees with a hose, be sure to use a slow trickle for approximately 20-30 minutes on each tree. This will allow the water to sink deep into the ground, reaching the majority of the roots. Watering with too high of a water pressure will only cause the water to run along the surface of the ground to a lower point, especially if the ground is extremely hard and dry.
- Explore different possibilities and methods for saving time. There are a few quite ingenious methods which have been development for saving both time and money when keeping your landscape well-watered. One of them is that of a “water reservoir” for your container plants which was featured here on Dabbletree. Or click through this slide show from Provident Living for even more ideas!
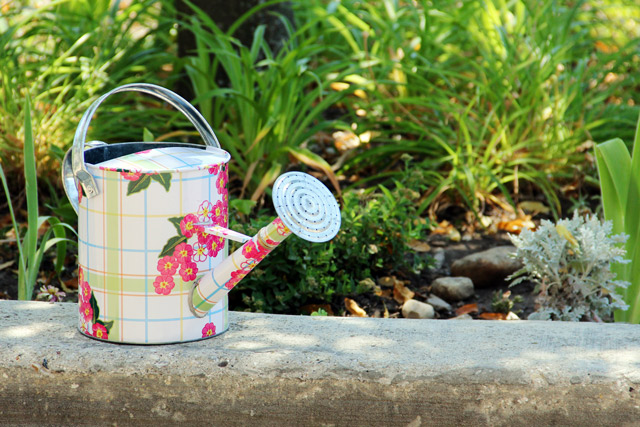
However you choose to water, be sure you check with your local municipality for any watering bans which may be in effect. If you are able to water and want to do it in style, check out some of these great watering accessories from Willard & May!
Happy Watering!

Weekend DIY: Rake Repurpose
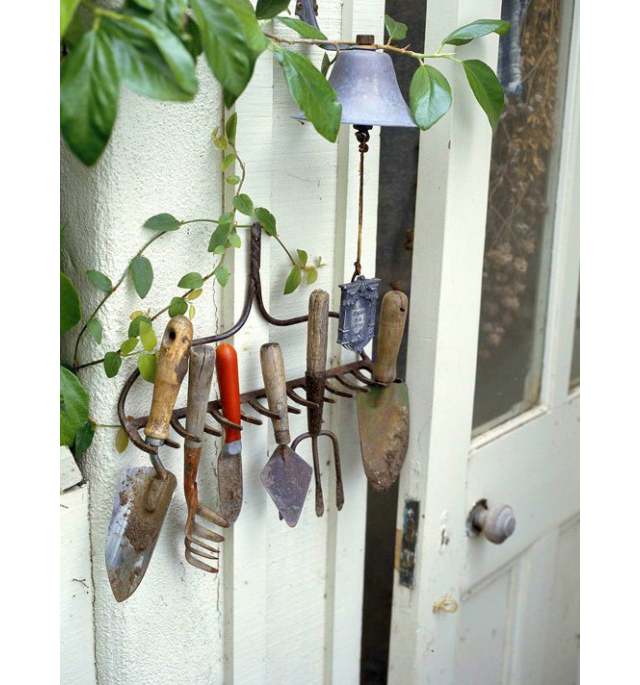
Gardening, Weekend DIYThe summer may be half way done, but is your summer to-do list? Organization is always at the top of many people’s to-do lists, especially if they have an unorganized garden area or tell shed! Why not cross one more thing of that list with this creative organization idea, found on the blog Two Doors Down Directory, from Better Homes and Gardens.
(Photo Source: Better Homes and Gardens)
Here’s what you need: One rake head, 1-2 screws.
Here’s how you do it: Decide where you want to hang your rake organizer: on a wall, a door, window sill? The location is important for understanding the type of support your project will need. If you plan to hang it on a wall, be sure to find wall studs or use anchors to secure your screws. After you’ve chosen your location, find the center of balance for your rake. This will be the locations near the edge of the rake that you will place the screws to hang and balance your rake. Or, simply use a single screw to balance your rake using the top crook, where the metal would join the wood handle. Now just put your screws in the wall, hang your rake, and organize!
Happy Weekend!

Rain Chains: Cool & Functional Art
Gardening, Outdoor Decor, Store
Rain chains are a unique yet still functional way to add style to your gutters and yard. The Japanese have been using rain chains for hundreds of years, which makes them a critical part of any Japanese garden. The original rain chains were simply links of chains that would hang from the roof to the ground. Even these primitive versions provided a calming and pleasant sound, however were not nearly as decorative as the new and improved ones we enjoy today. Originally, rain chains were used primarily for functional purposes, such as catching the water as it ran off a roof and collecting into a large barrel for use later for various household purposes.
The design of rain chains has come a long way since they were first introduced. Present-day rain chains feature a series of cups that work to funnel the water, creating less splash while still guiding the water down the chain to the basin. Rain chains can actually be used in place of a traditional downspout to incorporate great style and uniqueness into the landscape. Most rain chain cups and links are constructed from copper, adding a classy and distinct look whether the copper is new and shiny or weathered showing a bit of patina. Another feature that we love about rain chains is that the cup styles vary, so you can match them to the look of your house, garden and personality. While style is always important in terms of accessories for your house, your home should also primarily be a place of enjoyment and relaxation. A rain chain can add a wonderful sense of relaxation on a rainy day. The soothing sounds of raindrops slowly trickling or abruptly splashing through the chains and links can add extremely pleasant sounds and sights to your outdoor room . Enjoying these little things in life and being able to appreciate something as simple as rain flowing through a copper chain can really help to clear the mind.
Besides the many style choices, rain chains also offer many choices for where to direct the water to after it has made it down the chain. You may choose to catch the water in a large decorative pot with no drainage holes…you could even add water plants such as Water lilies or Umbrella Palms to the pot for added color and flair! Another option would be to place a rain barrel or other type of basin at the base of the chain. Then use this water on your garden plants! They’ll love being watered by the water that collects in this barrel as it contains minerals essential for healthy plant growth and your pocket book will also appreciate it since you will be using less water from the hose! If you are thinking of installing a rain chain and would like to keep it simple, it isn’t even necessary to catch the water in any kind of container. The rain can be funneled down the chain and go directly into your garden! Simply be sure to select water-loving plants that are good for your climate such as Ligularia, or Sambucus under the chain so they can benefit from the additional water.
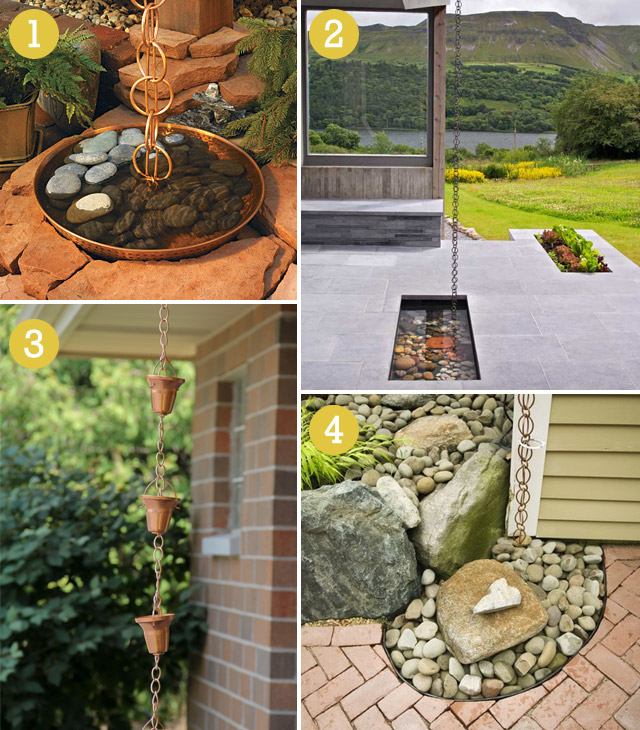
(Photo Source: 1. WorkBench 2. Trendir 3. Willard & May 4. Houzz)
Rain chains can be hung from the gutters in the front of your house, near a patio, by the garden shed or even incorporated into the garden. The best part is that these stylish copper “downspouts” are easy to install. First, remove the existing downspout. Second, insert the rain chain into the gutter. The rain chain will come with a large “V” on top of the chain that rests on each of the gutters at the opening of the downspout. Complete the look with your decorative pot, rain barrel, rocks or just leave it to empty into the garden! Now, just wait for that perfect rainy day to enjoy the soothing and tranquil sounds of your newly installed and beautiful copper rain chain!
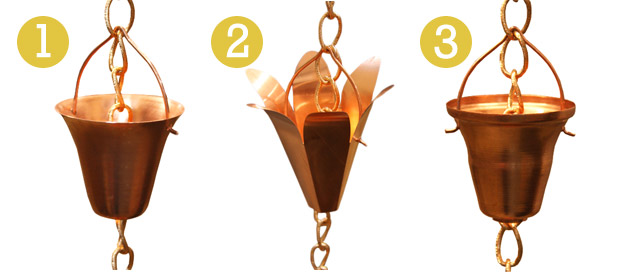
You can find 3 styles of Copper Rain Chains and some fun large pottery to get you going on your new simple water feature at WillardandMay.com (1. Cute Cup Rain Chain 2. Flower Petal Rain Chain 3. Widelip Rain Chain)

Weekend DIY: Sprinkler
Weekend DIYThis past week has set record highs here in Wisconsin, reaching over 100 degrees in some places! Along with of all this heat comes dry, brown grass. For a way to help your garden grow while helping the environment at the same time, try this creative DIY project. This water bottle and pen sprinkler, found on Curbly DIY blog, will help you go green, and green your garden at the same time!
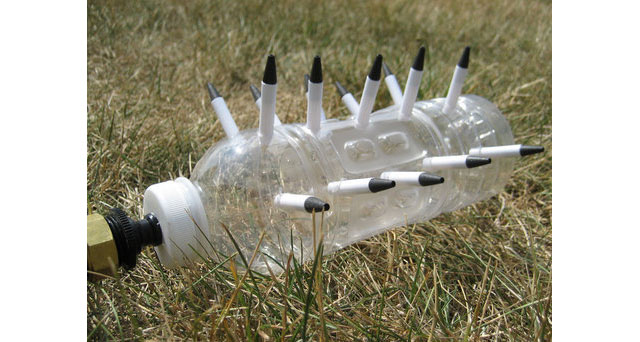
(Photo Source: Curbly)
Here’s what you’ll need: 1 plastic water bottle with cap, 1 male hose attachment, 15 pens with ink removed, Water sealant adhesive, Electric drill with appropriate drill bits, Measuring tape, Exacto knife, and Glue.
Here’s you do it: Drill a hole slightly smaller than the widest part of the male hose attachment into the bottle cap. Drill appropriate sized holes for the inkless pens into the bottle, three rows each with five holes. For an easier grip on the bottle, try filling the bottle with water and freezing it before you start drilling. Cut the pens to a two inch length, and insert half of the pen into the bottle. Use the water sealant to secure the pens in place, and seal the holes. Glue the hose attachment to the bottle cap, using glue on both sides to prevent leakage. Twist on the cap and seal with glue.
Not a DIY-er? Try these adorable watering cans from Willard & May: (1. Herb Pattern Watering Can, 2. Blue Blossom Watering Can, 3. Russian Teatowel Watering Can, 4. Elm Water Can)

Happy Weekend!

Spotted: Cloche Terrariums
Gardening, Spotted, StoreNew feature! Every time we see someone using an outdoor living product from Willard & May, out on the web or in real life – we’ll post it on our blog in a new category called Spotted. This way you can see how others use our everyday products and become inspired.
Last week, while perusing the blog, Young House Love,looking at all of their great DIY projects for outside and inside, we noticed a Cloche Terrarium featured on their kitchen counter, protecting a little plant. In the past, this indoor garden tool was merely functional as it was used to accelerate the growth of young plants. Now are they not only used for the same purpose and also to protect the plants from extreme weather, but they’re also decorative and unique !
!
(Source: Young House Love)

Weekend DIY: Door Mat
Outdoor Decor, Store, Weekend DIYNot only does the color of your front door give your guests a first impression of your style and personality but so does a welcoming door mat! Door mats have a tough life, getting stepped on all the time and you may think, “Who cares? It’s just going to get dirty anyways!” But that is no reason to go without one or put a less attractive one out for they serve a very important purpose and can add to the look and feel of your entryway.
Do yourself, your home and your future guests a favor and create a unique and vibrant DIY door mat! This do-it-yourself door mat comes from Lowe’s Creative Ideas, a site which features an abundance projects and ideas to improve your home inside and out. Visit their website for the low-down on all the supplies, instructions, and helpful tips to create this unique door mat.
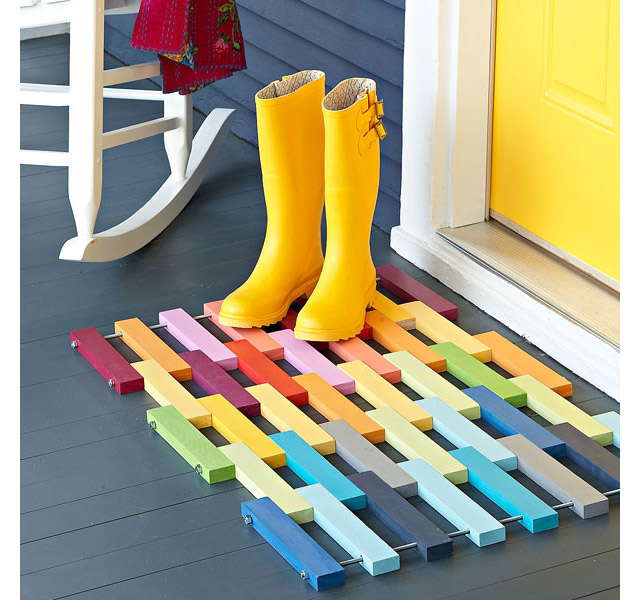 (Photo Source: Lowe’s Creative Ideas)
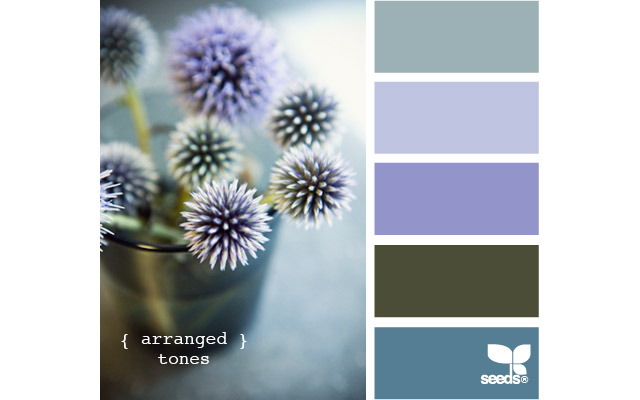
To put our own spin on it, we’d suggest not using the entire rainbow of colors (unless that fits the style of your home), but instead pick a color scheme that matches well with your home. For color scheme ideas, visit this helpful website: design seeds. There are hundreds of options! We picked out the following:
And if you are not a DIY-type of person, check out the new Door Mats that are available at Willard & May. (1. Blue Blossom Door Mat 2. Scroll Rubber Door Mat 3. Tulips Door Mat)

Happy Weekend!


