Weekend DIY: Hanging Basket Succulents

Gardening, Weekend DIY

Back in February, we did a Weekend DIY post on building an indoor succulent garden. Now that it’s almost summer time, you can try using succulents outdoors within your rock gardens, or if you don’t have the space, try making a hanging succulent garden with a hanging basket. We browsed Pinterest for some ideas and thought we’d share the steps on how to make this succulent hanging basket, inspired by Better Homes and Gardens and Canadian Gardening. This hanging basket also works well for those that live in dry areas or often forget to water!
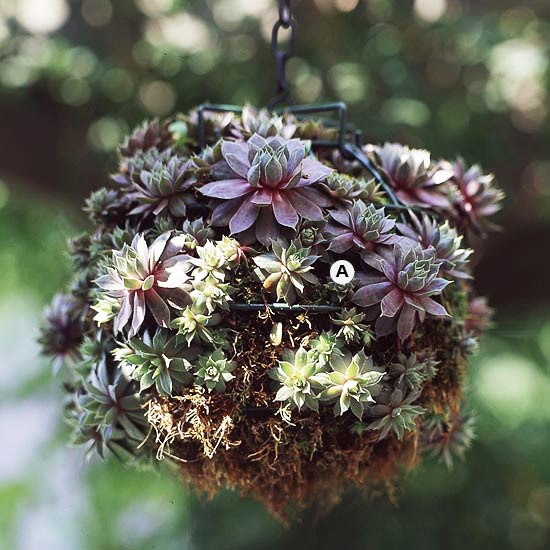
succulent hanging basket diy  (Photo Source: Better Homes and Gardens)

Here are the supplies you’ll need to re-create this look: a hanging basket, a variety of shorter succulents, coir or coconut lining to line the outside of the pot (sold at your local garden store), and landscape fabric to line the inside of the basket.

To get started, line your hanging basket with the coir lining (or use sphagnum moss to create an even more natural look) and line the inside of the basket with landscape fabric to keep the plants/soil from falling through the moss. Next, add the soil, being careful to leave enough room for the succulents. Plant the succulents on the top of the soil, but also on the sides as well, so that their roots grow into the moss. Give the basket a good drink of water, but then allow the basket to dry out completely before the next watering.

It is a good idea to allow the succulent roots time to establish if they are hanging on the outer sides, so that gravity does not win them over. Does this by treating them extra gentle during the first few waterings. For other succulent planting and growing tips, refer to our blog on growing an indoor succulent garden.

Plus, check out the selection of hanging baskets which each come with their own coir lining from Willard & May below:
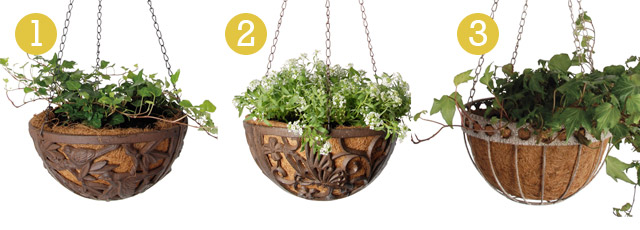
hanging baskets online
(1. Bird Hanging Basket 2. Butterfly Hanging Basket 3. Rustic Hanging Basket)

Happy Weekend!

Inspire Me: Sheds

Curb Appeal, Pin Inspiration

That eye-sore in the back of your yard that holds the mower, rake, garden tools and your kids’ toys – yeah, what people call a shed. When most people think of a shed, there unfortunately usually is not a pleasant association with them – usually your neighbor complains when a new one is put in or they complain that your current shed looks dumpy and unkempt. However, this doesn’t have to be the case anymore.

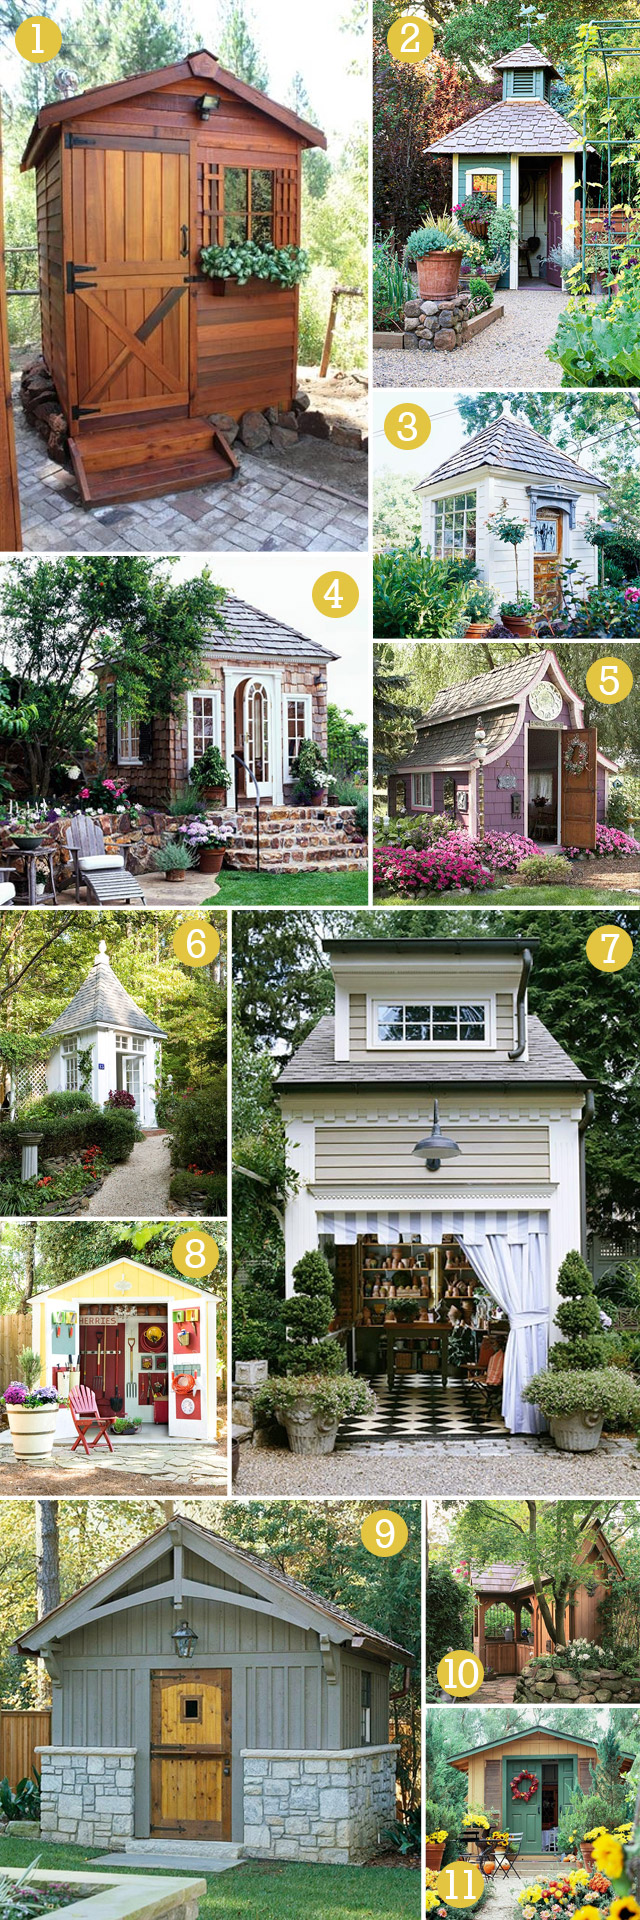
We’ve found some of the coolest sheds around and are sharing them with you to inspire you to make yours look more attractive. Improving the look of your shed may also increase your home value and curb appeal!

garden shed inspiration
(1. Pinterest 2.Better Homes & Gardens 3. Better Homes & Gardens 4. Better Homes & Gardens 5. Ana Rosa 6. Better Homes & Gardens 7. Better Homes & Gardens 8. Better Homes & Gardens 9. Better Homes & Gardens 10. Better Homes & Gardens 11. Better Homes and Gardens)

Do you have a photo of your shed you’d like to share? If so leave us a comment below!

Weekend DIY: Mosquito Repelling Plants

Outdoor Party, Weekend DIY

It’s official: the days are becoming warmer and longer which means summer is almost here! However, that also means the insects are again making an appearance in our backyards. Bugs, including mosquitoes, can threaten us from truly enjoying our backyards. But before you think about grabbing the bug spray, candles, and lighting up the torches, why not try using mosquito repelling plants?

By adding groups or cluster of these plants around your patio, seating areas, or entrances to your home, you can create a barrier between the bugs and yourself. Plus, all of these plants can be found at your local garden center. And just think: you won’t worry about that awful deet smell following you everywhere!

mosquito-repelling-plants 1. Citronella
This grassy-like plant is a great repellent of mosquitoes. Citronella oil, which comes from this plant,  is a very commonly-used mosquito repellent and can be found in all sorts of mosquito repelling products. However, the actual plant itself has a stronger scent which works even better than the products you can find in the store. Plant this in the back of a border, or try planting in a pot with colorful annuals. Plant in a sunny area with well-drained soil for best results.

2. Catnip
Even though your cat may love it, mosquitoes hate the smell of catnip. This easy-to-grow perennial can be grown as a weed or plant. In recent studies, Catnip has been proven to be 10 times more effective in keeping the pests away. You can also crush the leaves and rub on your skin – but be careful for cats which you may attract! Plant in a sunny area.

3. Marigolds
Can’t believe something so colorful and beautiful can keep mosquitoes away? This annual comes in a variety of colors and can be added to containers near your front door to keep mosquitoes from entering your home. These flowers also emit a smell that mosquitoes dislike. An extra bonus: if you are having a hard time keeping pesky insects away from your tomatoes, try planting Marigolds near them as well to ward them off. Plant in a sunny area.

4. Horsemint (aka Bee Balm)
This fast growing perennial is grown to attract butterflies and hummingbirds, but it also repels mosquitoes. This emits an odor that confuses the mosquitoes and keeps them away. Horsemint can be easily grown in both a garden and in pots to move and rearrange as you host different backyard events. Horsemint is shade tolerant and drought resistant.

5. Ageratum (aka Floss Flower)
Use Floss Flower in your rock and border gardens to add color, texture and also keep mosquitoes from biting. The mosquito repelling ingredient found in this plant is called coumarin, which is also used in other mosquito repelling products. It is not advised to crush the leaves of this plant, because it can cause irritation. Plant in full or partial sun.

Read more about these mosquito repelling plants here at Earth Easy.

Happy weekend!

(Photo Source: 1. Wikipedia 2. Wikipedia 3. BioSurvey OU 4. Patrick Ahles 5. Wikipedia)

Weekend DIY: Modern Fence

Curb Appeal, Gardening, Pin Inspiration, Weekend DIY

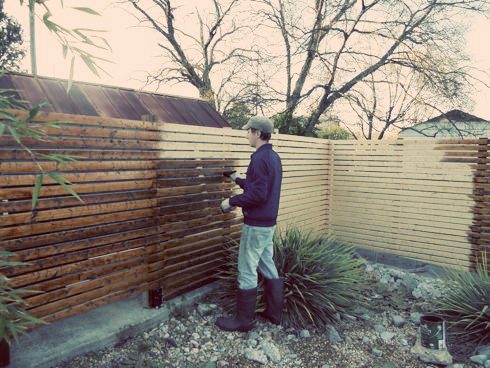
Neighbors – You either love ’em or hate ’em. If you love them, celebrate that fact and invite them over for a bbq this weekend and realize that you are lucky. But, if you hate ’em we’ve also got a project just for you! This DIY project is all about building a fence, to either block out the neighbors or because it looks really awesome if you are into the whole modern look.

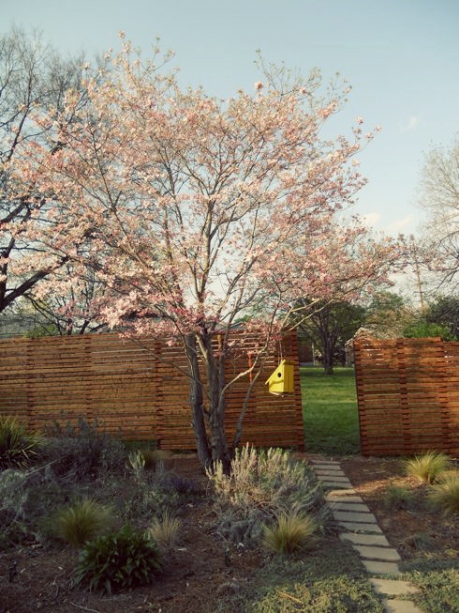
mid century modern fence
modern fence how to (Photo Source: My Mid-Century Modern Life)

We came across this awesome Modern DIY Fence from the blog, My Mid-Century Modern Life thanks to pinterest. I’m sure you’re looking at this photo and thinking, this is no way just a weekend project, and you are correct – this may take a few weekends, but we think this would be well worth your time in the end!

While we’d love to hash out the details of building this amazing fence, but we figured you could just hop on over to the original blog posts from My Mid-Century Modern Life and discover how they build this fence from scratch.

Step 1: Plan – Here is the post where they wrote about how to plan out the fence
backyard fence layout (Photo Source: My Mid-Century Modern Life)

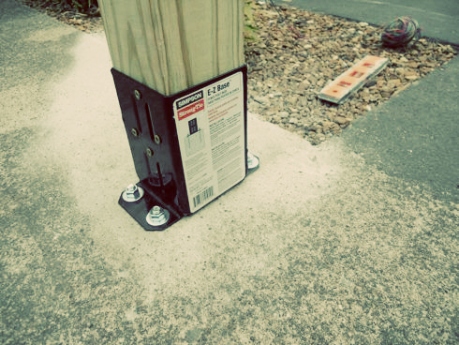
Step 2: Posts – Here is the blog post where they explained about creating the posts
diy posts (Photo Source: My Mid-Century Modern Life)

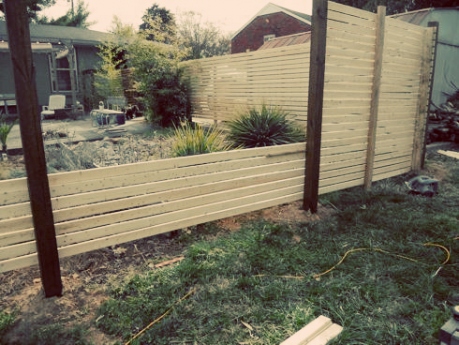
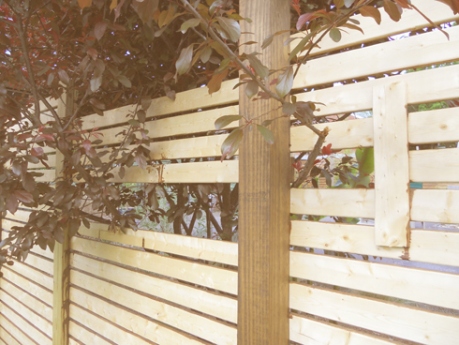
Step 3: Progress – Here is the post where they explain how to space the planks, attach them, stain them, and more
how to build a modern fence (Photo Source: My Mid-Century Modern Life)

Step 4: Stain & Seal – This post they talk about finishing up the fence
staining a fence (Photo Source: My Mid-Century Modern Life)

Step 5: Windows (optional) – Here is the post where they explained they added some windows to the fence to allow for a tree to grow properly
fence holes for trees (Photo Source: My Mid-Century Modern Life)

And maybe if this project scares you to death, you can hopefully get inspired to build a fence to add some privacy to your backyard. We also created a board on Pinterest with other fence/privacy ideas for you to check out!

Happy Weekend!

Mother’s Day Gift Guide

Gardening, Gifts, Outdoor Decor

Mother’s Day is coming up – and we have a question for you! What do you love most about your mother? Maybe it is the way she loves you unconditionally or that she will always support your decisions. Or is it that she’s your best friend? What about that sixth sense of her’s – that she knows everything? Throughout the many seasons of life, the reasons why you love your mother may change but one thing remains the same: no matter how old you are, mother’s still love to feel appreciated – and you should never stop showing her how much you care.

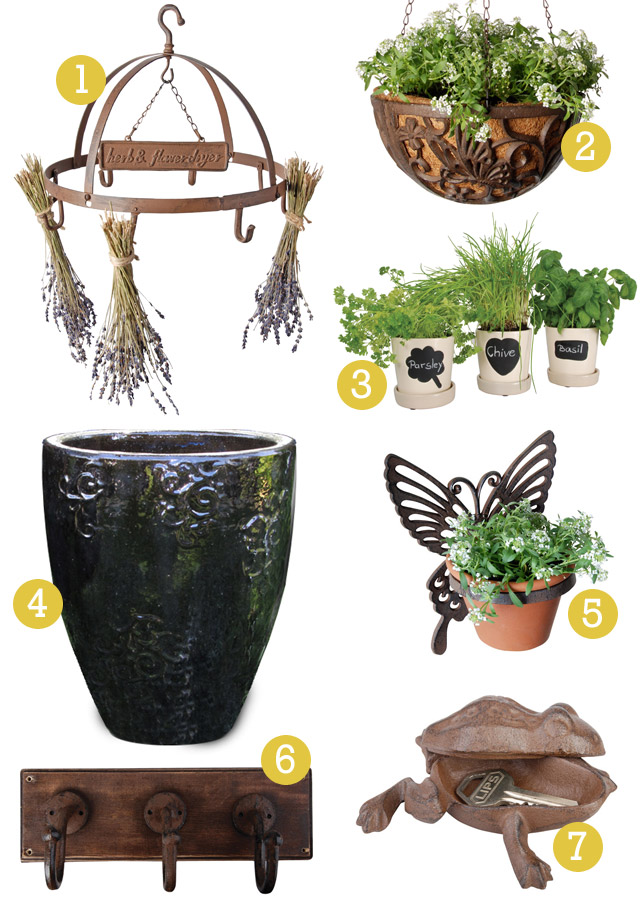
We’ve put together this handy Mother’s Day Gift Guide for you to make shopping for her a bit easier this year! Whether she likes to garden, host outdoor parties, or just enjoy a quiet evening on the patio, we’ve got some great gift ideas for that special lady in your life.

(1. Herb Dryer Rack 2. Butterfly Hanging Basket 3. Chalkboard Herb Pots 4. Vine Planter 5. Butterfly Pot Holder 6. Outdoor Hook 7. Key Hinder)

Pin Love: Tiny Backyard

Garden Spaces, Pin Inspiration

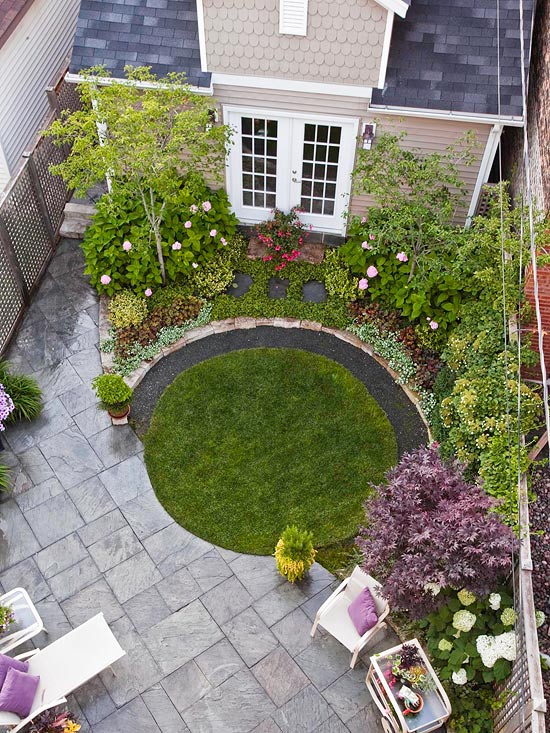
Do you have a tiny backyard that you tend to think: what’s the use, there is not enough space to make it look great? Well, we think this pin we came across today proves you wrong. Even with a tiny backyard, you can make it look great. Just try adding all the bits and pieces of a large yard: grass, garden, trees, patio, and decor – but at a smaller scale.


(Photo Source: Better Homes and Gardens)

How do you make your small backyard work?

Weekend DIY: Outdoor Centerpieces

Outdoor Party, Weekend DIY

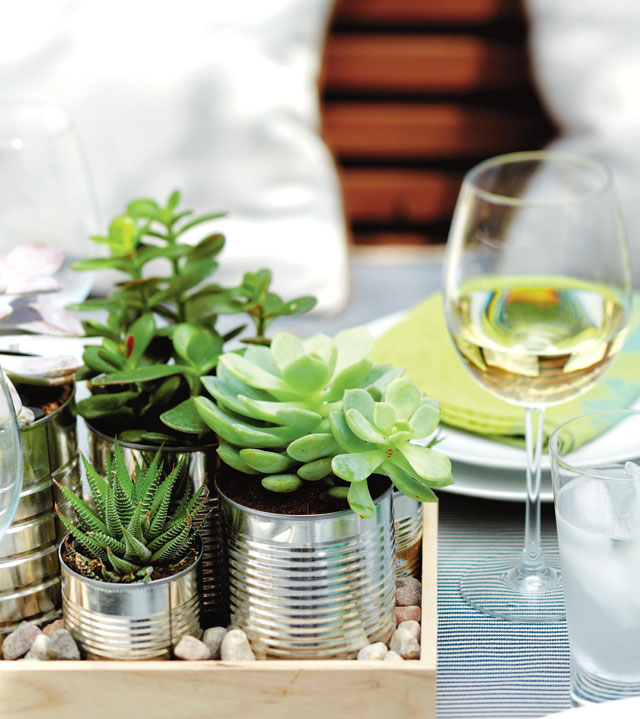
It’s just a few days away until May begins – and that means: Mother’s Day, Weddings, Graduation Parties, and plain ol’ outdoor get-togethers! There’s usually lots of planning involved for these events, such as food or catering, activities, invitations, guest lists, decor and more. Hopefully we can save you one of those steps by showing you this great and easy outdoor DIY centerpiece we found on the blog for Chatelaine, a Canadian Magazine.

This quick ten minute project will add a natural touch to your event. Here is what you need for one centerpiece: one small wooden tray, six cans of varying sizes (use aluminum soup cans w/ the label removed), one handful of rocks, and six succulents (two of each variety). If you need more than one centerpiece, multiply these supplies by the number needed.


(Photo Source: Roberto Caruso / Chatelaine)

Here are some simple steps: 1.) Find old aluminum cans and remove their labels. 2.) Pick out succulents from a local garden center, making sure to get a variety for best results. Also make sure they aren’t too large for fitting into the cans you’ve prepared. 3.) Plant each succulent in a can. 4.) Arrange the cans on the wooden tray. 5.) Scatter rocks in between and around the cans in the wooden tray.

To add more color, you could spray-paint the cans any color you’d like!

Happy Weekend!

Pin Love: Paint the Floor

Outdoor Decor, Pin Inspiration

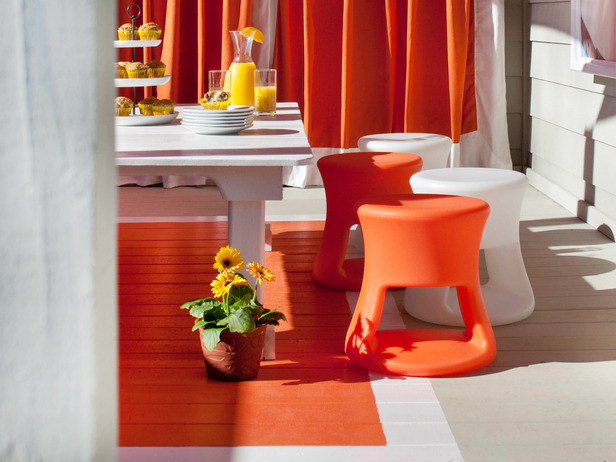
Calling all Low-Maintenance-Lovers: We have an idea just for you! We came across this pin on pinterest today from HGTV for painting the floor (deck, wood, cement, etc) to add the look of a rug to your outdoor space without actually having a rug! We love that they used a bright, bold color too.
(Photo Source: HGTV)

Do you have any out-of-the-box outdoor ideas? If so, share them below!

Weekend DIY: Tiered Planters

Curb Appeal, Gardening, Weekend DIY

After getting an unusual dose of summer weather this spring and if you are anything like us – you are itching to plant some fun annuals to bring some color into your life! Though for us in Wisconsin it is a little bold to go to a nursery and pick out some plants due to our crazy weather, it may be perfectly fine in your area to plant away! For us who have to wait for that fun step, we can prepare for that day with this project!

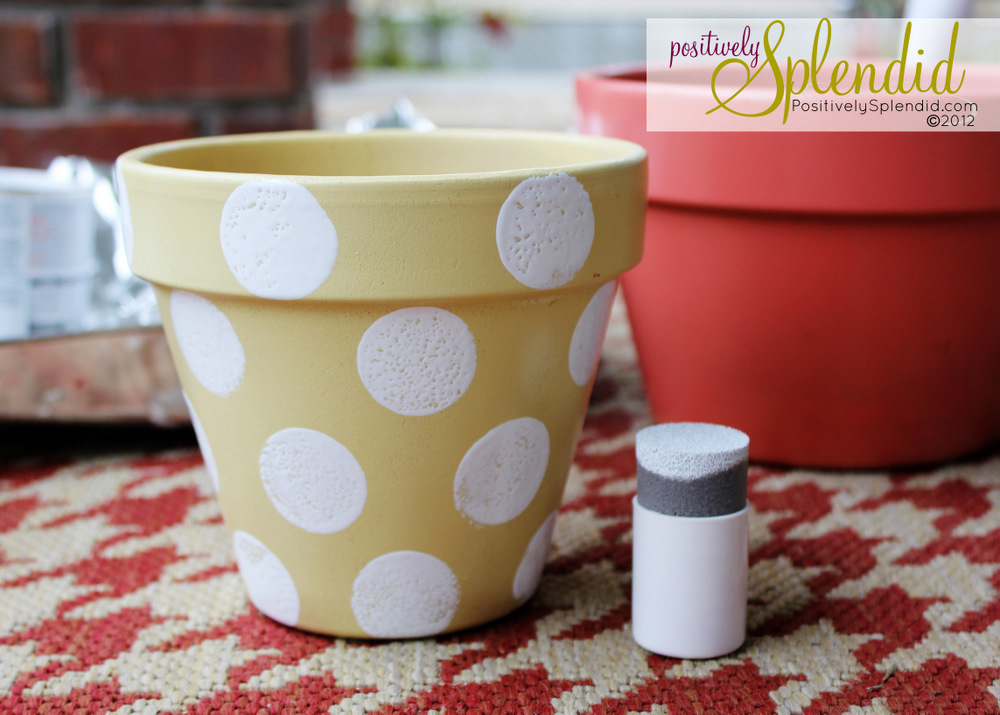
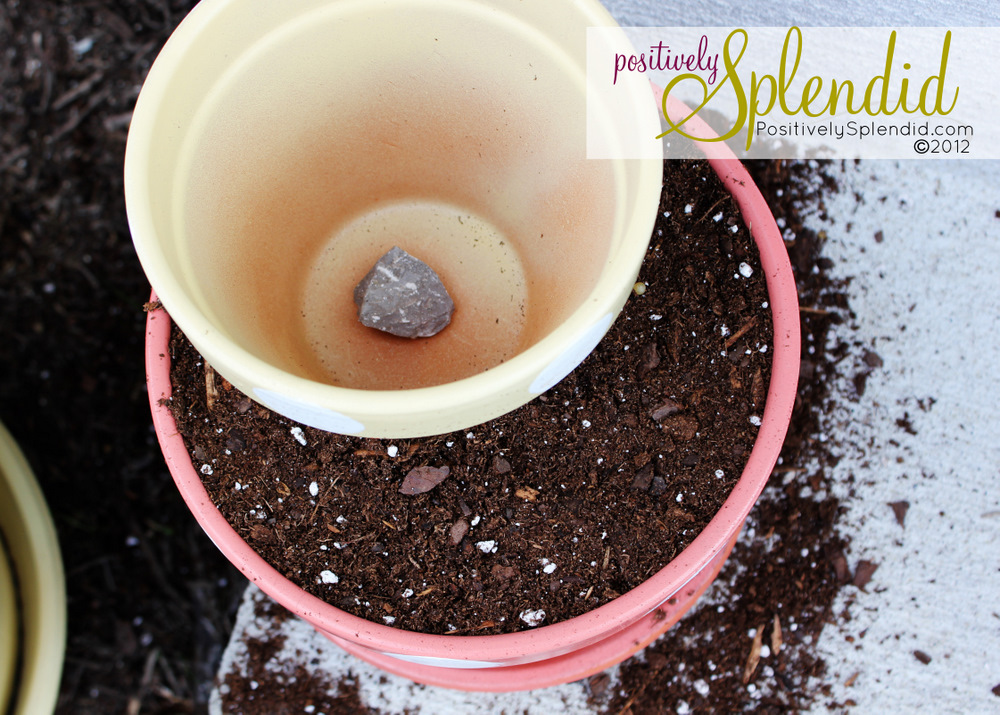
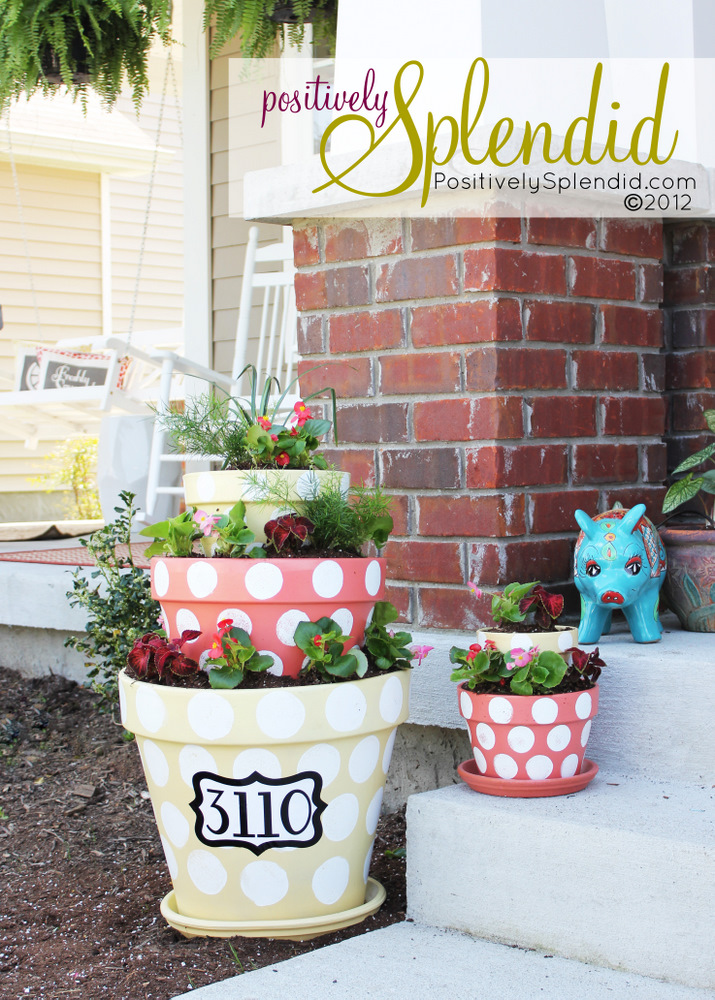
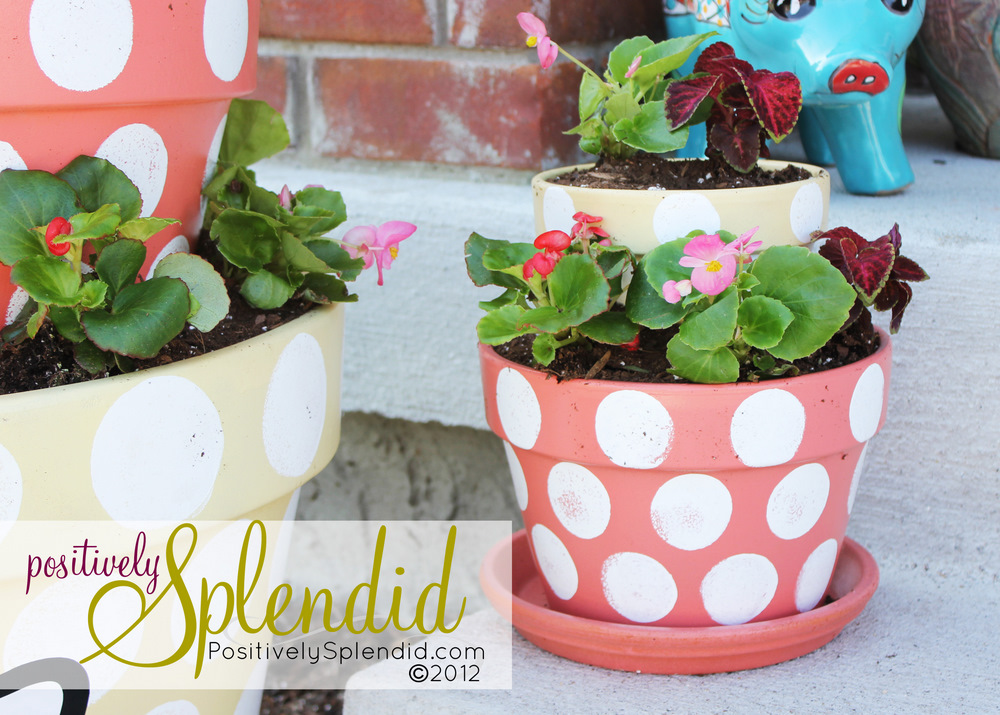
We found this fun DIY Tiered Planters from the blog Positively Splendid – the possibilities to create are endless, especially when it comes to painting colors, patterns, and what you plant in them. For this project you’ll need a few terra cotta planters (in 2-3 sizes), A terra cotta saucer for the largest pot, spray paint (1 or 2 colors), a polyurethane sealer, stencil (if you want to add house numbers), bricks, soil, and plants of your choosing. The steps are pretty simple, paint your pots how you’d like then apply a sealer. Then pick out your flowers. Stack the pots using the bricks, then fill in with dirt and the plants! For a step-by-step detailed instructions, refer to Positively Splendid’s blog post.

Here are a few photos to show the steps:


And if your house numbers are like some of ours in Wisconsin (a crazy 9 digits), you can skip the numbers, or make a cute mini version! We love the colors that were chosen for this example too:

(Photo Source: Positively Splendid)

Happy Weekend – if you have DIY you’d like to share, feel free to leave us a word in the comment section below!

Pin Love: Dino Planter

Gardening, Pin Inspiration

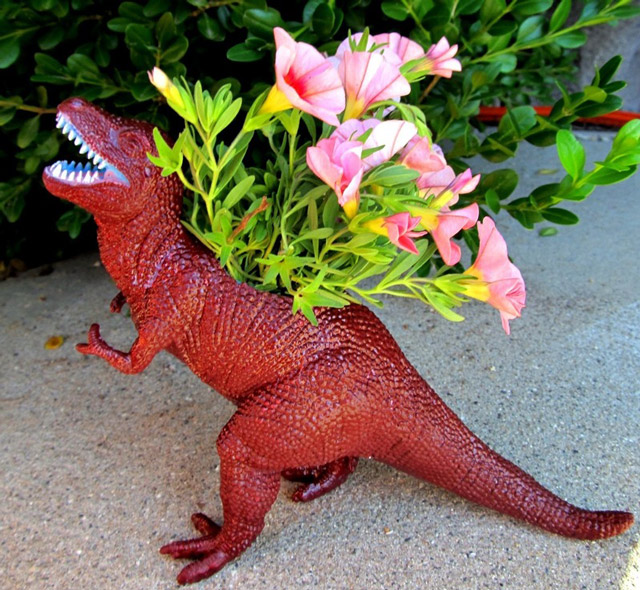
We just wanted to share a quick pin we saw on Pinterest the other day and absolutely love! It’s pretty dino-mite (clever bunch we are)! Check out this creative Dinosaur Planter that is very easy to make. We love the contrast you see from the dainty flowers with such a beast of a creature.

To read the full tutorial on how to create this planter, read this post from Cut Out & Keep. And if you ever have a tutorial you’d like to share, feel free to drop us a line, we’d love to feature it!


(Source: Cut Out & Keep)