Weekend DIY: Pallet Table

Furniture, Outdoor Decor, Weekend DIY

A growing trend over the past few years has been to recycle and re-use in an attempt to become more eco-friendly. This philosophy, no matter where you stand on the whole eco-friendly issue, is that we should do our best to keep our environment clean for future generations. Everyone can do their part in achieving this goal be either taking it to the extreme or simply do your best to recycle when you are able. This week we have a simple recycled diy project: We’re going to take something that could have been waste and re-purpose it using wooden pallets!
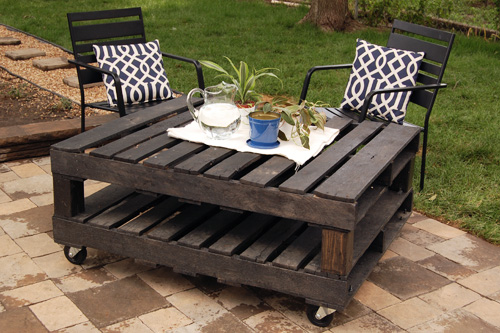
coffeetable_diy2 (Photo: Joy Ever After)

This DIY project comes from Amanda at the Joy Ever After blog. Here she takes two old wooden pallets and brings them back to life by turning them into an outdoor table. This table is more of in the realm of a coffee or sitting table, not a dining table. For the complete DIY instructions read through her blog post and comments for helpful tips.

Finding wooden pallets is easy. First, you can check Craigslist: many companies will post that they are free for the taking on a first come, first serve basis. You could also contact a local warehouse in your area that may have some extras laying around. If do happen come across a gold mine of wooden pallets, Pinterest has endless ideas for you to try!

Happy Weekend!

Weekend DIY: Crane Garland

Outdoor Decor, Outdoor Party, Weekend DIY

Summer’s almost over, but don’t let that stop you from celebrating outdoors while it’s still amazingly nice out! So now you are asking what you can celebrate… here are a few ideas:  kids going back to school, back to semi-normal routines, football season, new episodes of your favorite shows starting back up – really you can find a number of reasons to just celebrate the good ol’ life you have.

So now that you will be celebrating something this weekend, here is a quick way to spruce up the decor on your patio. Check out these cute little ombre cranes that float along garland that we came across from the blog Camille Styles. She includes easy diy instructions on how to craft up these little beauties and you don’t need an art major to do so!

You’ll need these few basic supplies to get going, but head on over to her blog for the complete step by step instructions and helpful photo! Supplies:Origami Paper, scissors, needle, clear wire, crimp beads, and a pliers.

(Photo Source: Camille Styles)

Let us know what you’ll be celebrating in the comments below – Happy Weekend!

Weekend DIY: Planter Wall

Gardening, Outdoor Decor, Weekend DIY

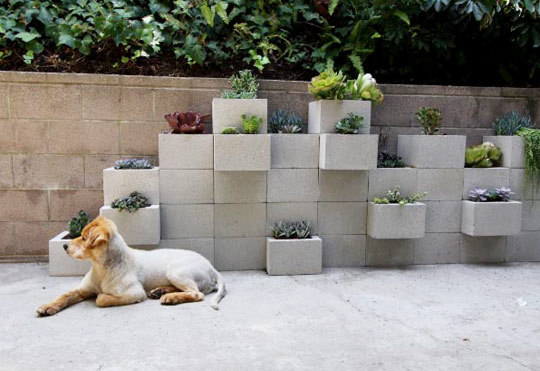
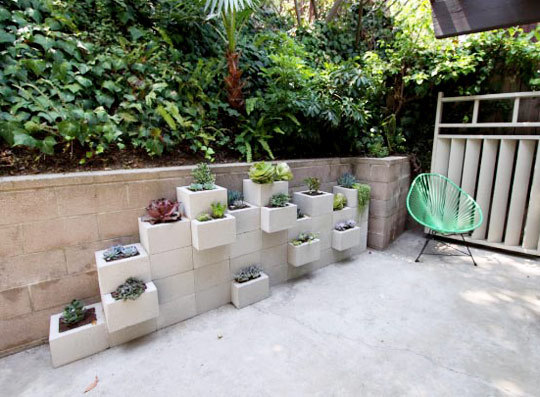
So you have this empty spot along a retaining wall that you just don’t know what to do with anymore. You probably think there is nothing a landscaper, let alone you, could do to make this spot shine in your yard. Well think again! How about an easy-peasy-do-it-yourself project this weekend where you transform it into a giant wall-planter! Now we’re talking…

diy planter fence diy planter fence
(Images: Annette Guttierez)

So those photos probably have got you hooked – now you want to make this project a reality this weekend? Go for it and check out this budget-friendly DIY planter project made of cinderblocks courtesy of Apartment Therapy and Pot-Ted – and prepare for your mind to be blown and your yard transformed!

Have a DIY project you’d like to share? Just let us know in the comment section below! Happy Weekend!

Weekend DIY: Shell Candles

Lighting, Weekend DIY

Light. It’s a beautiful thing, yet it is fading fast now that fall is approaching! Did I really just say that? How sad. Each night the sun sets a tiny bit earlier than the previous day, meaning dark dinners if you planning on dining outdoors. Put don’t head inside just yet! You can add light and a romantic mood in the dark with light either from a fire or candles.

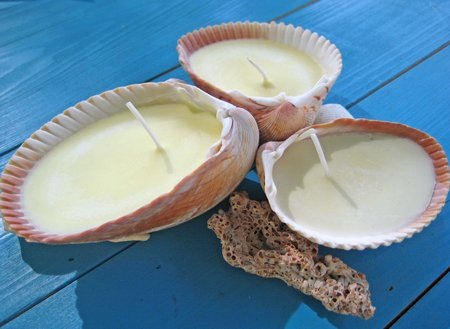
Ever wanted to make your own candles? Well you’ve now got your chance with these simple directions from the Everything Etsy blog. This easy project can be completed in a day, and you’ll need just a few supplies from a craft store. Head on over to her blog to read the entire how-to steps.

There are endless ways to make candles – just take a quick look around your house for some jars or containers! You could also try filling your candles with the citronella scent which works wonders for keeping those pests away while you enjoy your evening outside.

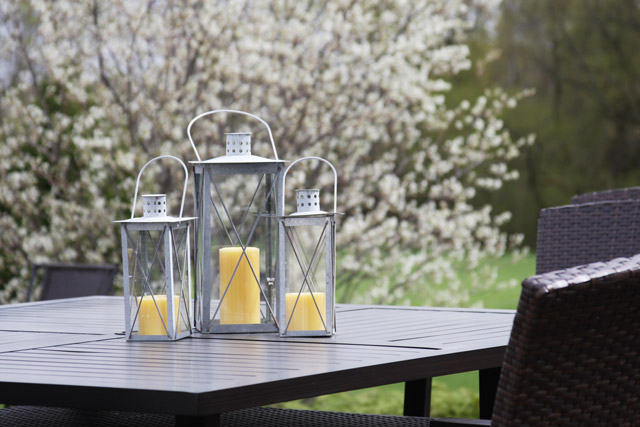
Also, while we are speaking about lighting – Willard & May has great lighting accessories such as lanterns and gazing balls with holes cut out. Go on and check them out – they don’t bite, we promise!

metal-outdoor-lanterns

Weekend DIY: Decorative Ladder

Weekend DIY

Can you believe that summer is half over already?? It’s so crazy to believe and I’m sure you just had a panic attack realizing that big backyard renovation project you dreamed of finishing this summer is not quite as far along as you hoped? Not to mention your backyard probably looks more like a desert with this whole lack-of-rain thing. Well now that it has officially rained for a couple days, your grass will slowly turn back to green. While you are waiting for that to happen this weekend, why not add some decorative touches to your patio or backyard space.

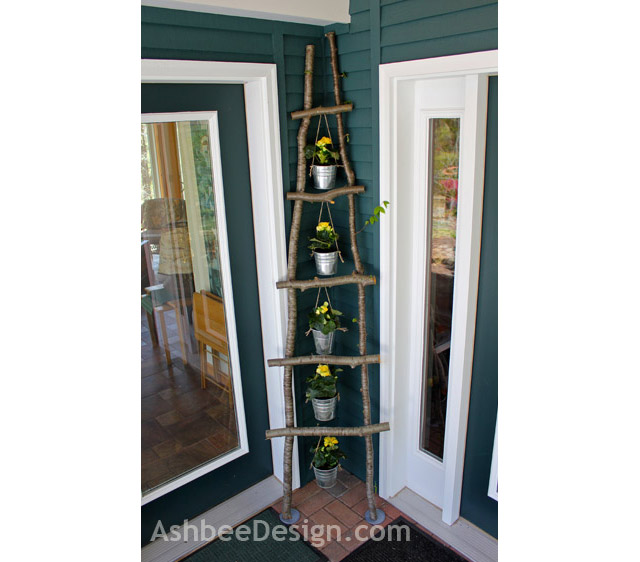
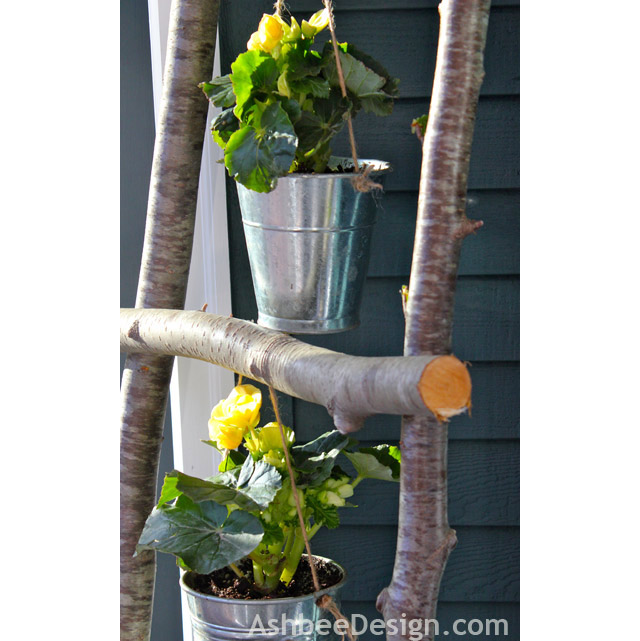
Do you have a space on your porch or in your backyard that needs a little decorative touch like Ashbee did? Check out this DIY Decorative Ladder she made one afternoon, that she featured on her blog. She designed it to fill a corner of her porch that needed to be lightened up. She also added hanging potted plants to add pops of yellow.

decorative ladder

How-To: Here is what you’ll need to complete this project: a wooded area where you can find a few saplings, buck saw, branch clippers, screws, drill, metal pails, and plants as accessories.

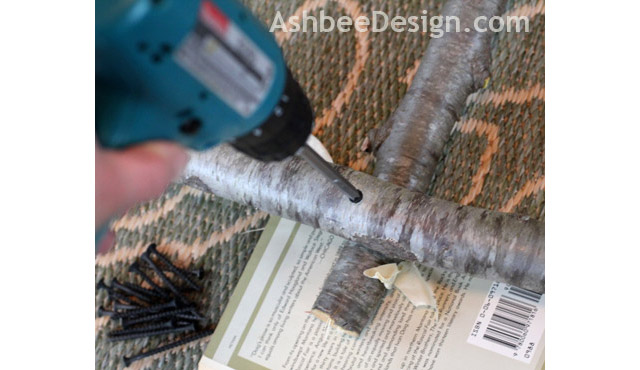
To begin this project, locate an area where you can find about three decent size saplings that you can cut up. Once located, bring a saw and branch clippers. Saw down the small tree and clip the branches off. Then you’ll need to cut down the trees for the correct size of your ladder. Then lay them out on the ground to see how it looks – then screw them together. Finally, add decroative potted flowers and display for all to see. If you want a more detailed run-down of the instructions, visit Ashbee’s blog.

decorative ladder

decorative ladder

Also, Willard and May has a great selection of small planters you could utilize into your ladder design.

Happy Weekend!

Weekend DIY: Garden Stones

Garden Spaces, Outdoor Decor, Weekend DIY

For many, gardening is a way to relax, forget about life’s craziness and release some anger on those weeds! While you’re out in the garden, it’s can also be nice to reminisce about the things you planted and how they came to be. Maybe that hydrangea the with bright pink blooms was once your grandmother’s and reminds you of how sweet she was or the time you spent gardening with her when you were young. It’s great to bring memories into your garden – and with this fun and easy DIY project from the blog Prudent Baby, we’ll show you how to make a garden stone that will inspire you to continue to garden for years to come.

diy garden stone
(Image Source: Prudent Baby Blog)

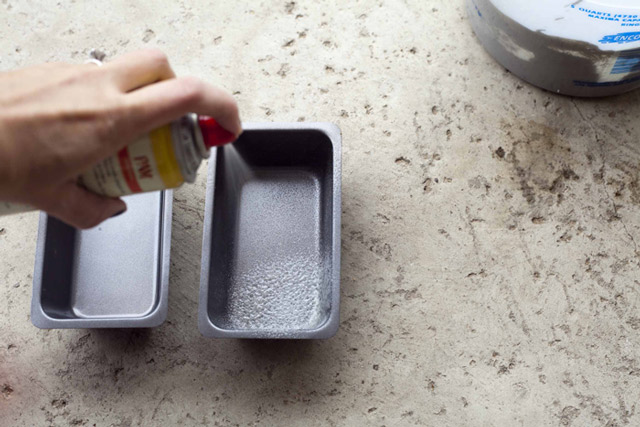
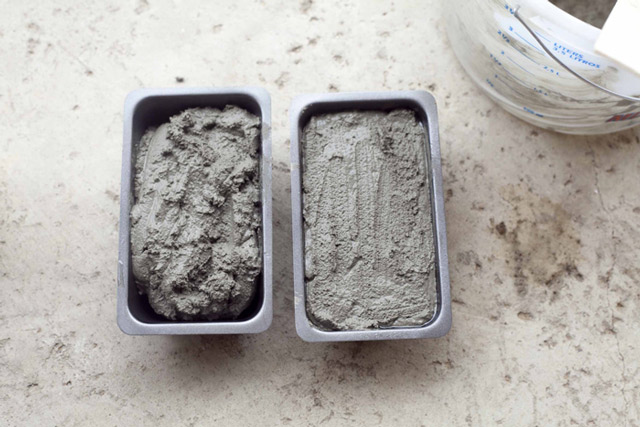
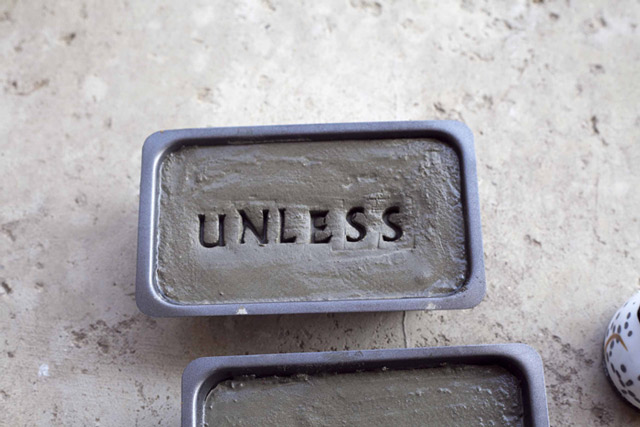
Here is what you’ll need to get started: a small amount of cement (or stepping stone kit from a craft store), a mold (a bread pan for example), oil, and stone stamps (can be found at a craft store). You could also get creative and use other tools to engrave your stone, such as pebbles or your children’s hand or foot prints.

Here are the basic instructions – (for more detailed instructions, refer to the blogpost from Prudent Baby.) Step 1: Mix your cement according to the directions on the kit or package. Step 2: Spray or spread oil into your mold. Step 3: Pour cement inside the mold, smooth the surface out, and tap the pan to remove air bubbles. Step 4: If you want to add objects to your stone, do so now. If you just want to engrave, wait 30 minutes before doing so. To see if the stone is ready for engraving, scratch the surface and if you get a “dry mark” you are ready to go. If it’s still a bit liquid-y, wait a little while longer. Step 5: Let stone dry for at least 24 hours before removing from the mold.

diy stepping stone garden ston

diy stepping stone garden ston

diy stepping stone garden ston
(Image Source: Prudent Baby Blog)

And there you have it! Display your stone for all to see – or make it a tradition to add something new to your garden each year.

Happy Weekend!

Weekend DIY: Rake Repurpose

Gardening, Weekend DIY

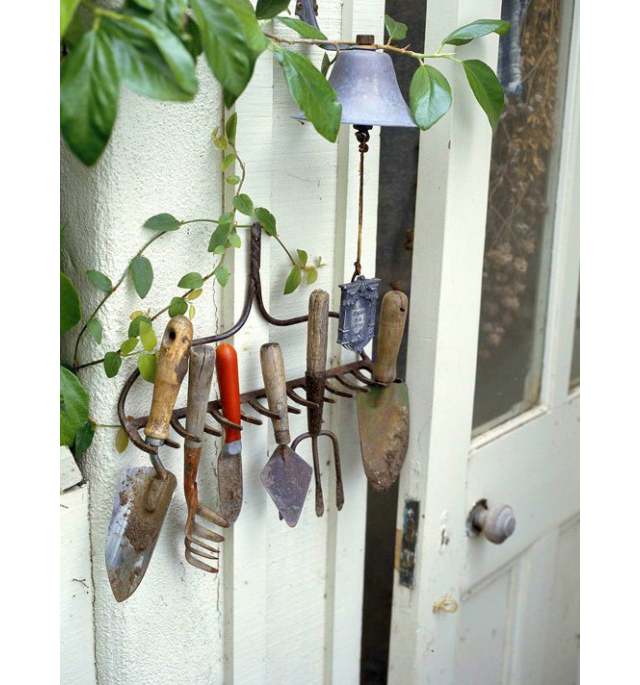
The summer may be half way done, but is your summer to-do list?  Organization is always at the top of many people’s to-do lists, especially if they have an unorganized garden area or tell shed!  Why not cross one more thing of that list with this creative organization idea, found on the blog Two Doors Down Directory, from Better Homes and Gardens.

Garden Rake Repurpose
(Photo Source: Better Homes and Gardens)

Here’s what you need: One rake head, 1-2 screws.

Here’s how you do it: Decide where you want to hang your rake organizer: on a wall, a door, window sill?  The location is important for understanding the type of support your project will need.  If you plan to hang it on a wall, be sure to find wall studs or use anchors to secure your screws.  After you’ve chosen your location, find the center of balance for your rake.  This will be the locations near the edge of the rake that you will place the screws to hang and balance your rake.  Or, simply use a single screw to balance your rake using the top crook, where the metal would join the wood handle.  Now just put your screws in the wall, hang your rake, and organize!

Happy Weekend!

Weekend DIY: Sprinkler

Weekend DIY

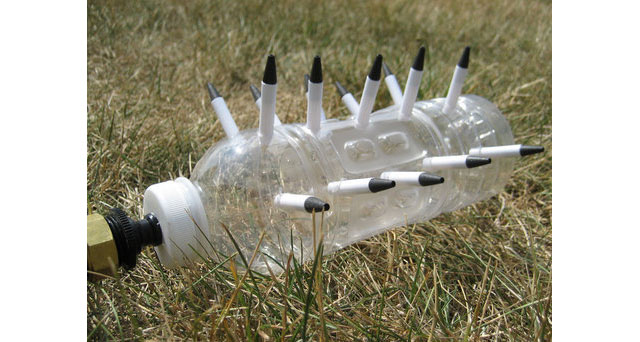
This past week has set record highs here in Wisconsin, reaching over 100 degrees in some places!  Along with of all this heat comes dry, brown grass. For a way to help your garden grow while helping the environment at the same time, try this creative DIY project. This water bottle and pen sprinkler, found on Curbly DIY blog, will help you go green, and green your garden at the same time!

diy sprinkler green recycled sprinkler

 (Photo Source: Curbly)

Here’s what you’ll need: 1 plastic water bottle with cap, 1 male hose attachment, 15 pens with ink removed, Water sealant adhesive, Electric drill with appropriate drill bits, Measuring tape, Exacto knife, and Glue.

Here’s you do it: Drill a hole slightly smaller than the widest part of the male hose attachment into the bottle cap. Drill appropriate sized holes for the inkless pens into the bottle, three rows each with five holes. For an easier grip on the bottle, try filling the bottle with water and freezing it before you start drilling.  Cut the pens to a two inch length, and insert half of the pen into the bottle. Use the water sealant to secure the pens in place, and seal the holes. Glue the hose attachment to the bottle cap, using glue on both sides to prevent leakage. Twist on the cap and seal with glue.

Not a DIY-er?  Try these adorable watering cans from Willard & May: (1. Herb Pattern Watering Can, 2. Blue Blossom Watering Can, 3. Russian Teatowel Watering Can, 4. Elm Water Can)

Happy Weekend!

Weekend DIY: Door Mat

Outdoor Decor, Store, Weekend DIY

Not only does the color of your front door give your guests a first impression of your style and personality but so does a welcoming door mat! Door mats have a tough life, getting stepped on all the time and you may think, “Who cares? It’s just going to get dirty anyways!” But that is no reason to go without one or put a less attractive one out for they serve a very important purpose and can add to the look and feel of your entryway.

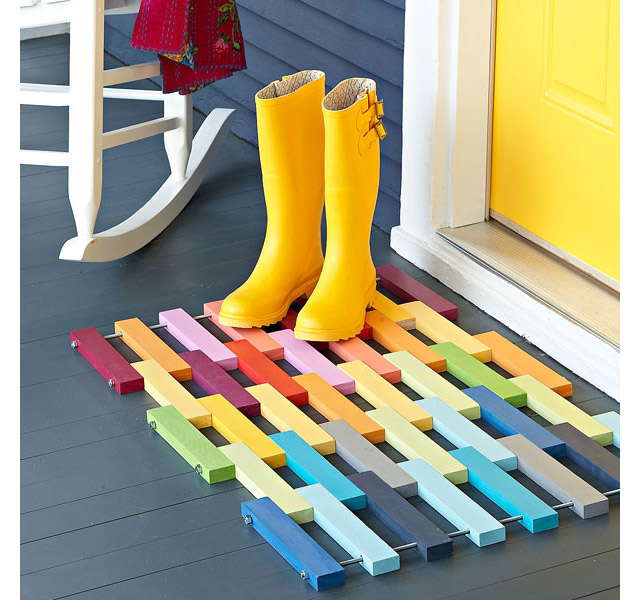
Do yourself, your home and your future guests a favor and create a unique and vibrant DIY door mat! This do-it-yourself door mat comes from Lowe’s Creative Ideas, a site which features an abundance projects and ideas to improve your home inside and out. Visit their website for the low-down on all the supplies, instructions, and helpful tips to create this unique door mat.

diy door mat(Photo Source: Lowe’s Creative Ideas)

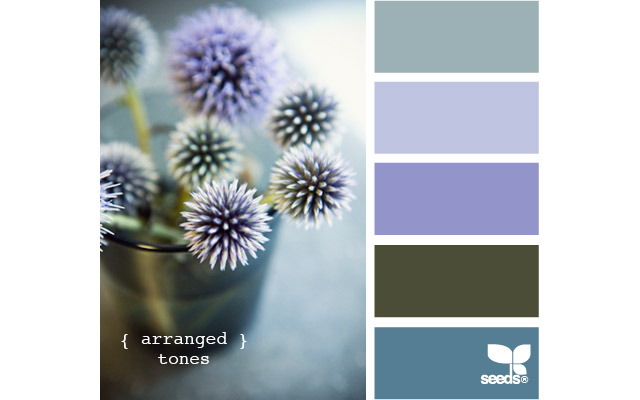
To put our own spin on it, we’d suggest not using the entire rainbow of colors (unless that fits the style of your home), but instead pick a color scheme that matches well with your home. For color scheme ideas, visit this helpful website: design seeds. There are hundreds of options! We picked out the following:

And if you are not a DIY-type of person, check out the new Door Mats that are available at Willard & May. (1. Blue Blossom Door Mat 2. Scroll Rubber Door Mat 3. Tulips Door Mat)
willard and may outdoor rug door mats
Happy Weekend!

Weekend DIY: Backyard Chalkboard

Weekend DIY

The days of chalkboards are back. Some of us at Willard & May grew up with chalkboards in the classroom, while some of us are more familiar with the whiteboard. While the whiteboard is less messy, it doesn’t have quite the same artistic vibe to it as a chalkboard. Even though I grew up with the whiteboard, I now have a love for chalkboards and even have a dream of painting an entire indoor wall with chalkboard paint someday.

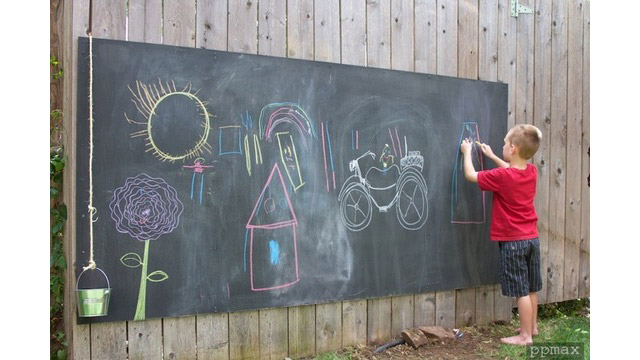
If you aren’t that adventurous or can’t even imagine the mess your kids would make indoors with a stick of chalk, why not try a backyard chalkboard? It’s a great activity for the kids that doesn’t involve sitting in front of a tv – and they’ll leave the mess outside!

diy chalkboard fence for the kids outside

We found this Outdoor Chalkboard DIY on Apartment Therapy and thought we’d share it with you. Here are the supplies you’ll need: 4×8 plywood sheet, outdoor paint (3 or 4 parts paint to 1 part unsanded grout – have the store mix it for you), nails to hang board to a fence or tree, and chalk.

The steps are easy! Find plywood, have the paint mixed at the store, paint the board, let the board dry, and hang. Your kids will be chalking-it-up in no time! Do you have a weekend DIY project to share with us? If so – let us know in the comments section below!

Happy Weekend!