Weekend DIY: Potting an Amaryllis

Gardening, Gifts, Weekend DIY

With Halloween done and over, everyone seems to be in the holiday mood, dreaming of Thanksgiving and Christmas. I’ve heard countless people say how they can’t wait until they can listen to Christmas music, watch their favorite holiday movie, and enjoy a nice holiday latte in their holiday cups at their favorite coffee shops. So, why hold back? Let’s jump on the bandwagon and get into the holiday mood this weekend!

Now is the perfect time to pot an amaryllis bulb and get it growing for blooms in time for the holidays. These gorgeous flowers create the perfect centerpieces for your family get-togethers, and even make great gifts! Not sure what an Amaryllis is? Amaryllis bulbs are one of the best flower bulbs for indoor forcing and are typically used for this purpose. Bulbs typically begin to sprout within two weeks of planting in soil without requiring any pre-chilling. The blooms of these large bulbs range in color from white, pink, red, or orange and resemble multiple trumpets in shape. The blooms typically appear within 4-8 weeks of planting and can adorn your house for as long as four weeks!


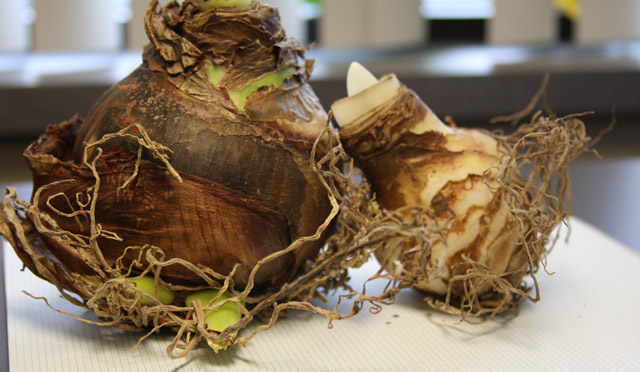
First, you’ll need to pick-up an Amaryllis bulb. Right now you can find them everywhere… online, local retail stores and even at Willard & May. You can buy them just as a bulb and use your own pot and soil, otherwise there are many kits out there that include a nice pot and soil.  Always plant your amaryllis within 2 weeks of purchasing them in order to assure quality (not dried out or not mushy). Also, buy the biggest bulb you can find! The bigger the bulb, the bigger and more numerous the blooms! Take a look at this comparison of two different size bulbs:
Here are the details on how to pot them…

  1. If purchased as part of a kit, place soil disk in the provided pot along with warm water. Allow disk to sit in water for approximately five minutes. The disk will begin to expand as it soaks up the water. As it expands, the soil can be “fluffed” with a fork to fill the pot.
  2. If no soil disk is provided, simply use a nutrient-rich potting soil in any desired pot which is approximately 2″ wider and 2″ deeper than the diameter of the bulb. Be sure that whichever container is used has adequate drainage as these bulbs do not like to sit wet.
  3. Plant the bulb so that the pointed end is up and just protruding from the surface of the soil.
  4. Water well and place in an area of your home which stays warm and receives indirect sunlight.
  5. Continue to provide water on a weekly basis to keep soil slightly moist but not wet.
  6. Set these beautiful blooms out in a spot where everyone can enjoy them – like the counter or an entry way!
Finally, once your amaryllis bulb has bloomed and faded, here are some tips (from the Bulb Blog) in order to get more blooms the following year!


Happy Weekend!


Weekend DIY: Preparing your Grill for Winter

Outdoor Party, Weekend DIY

Many people don’t want to face reality that it might be time to hang up your grilling tools for the winter. But your grill will appreciate the extra time you spend to prepare it for winter before it’s covered in snow. And come that first semi-warm day your grill will greet you all shiny and new-looking in spring!


(Image Source: Lowes)

Here is what you’ll need to winterize your grill: cooking oil spray, tape, plastic bags and household cleaning supplies.

1. Cook your final grilling meal (we’re doing shish-ka-bobs this weekend) to mentally prepare yourself!

2. Give your grill a good cleaning using general household cleaners. Make sure you get in all the nooks and tight areas and scrape away food and grease. If you have stubborn stains, try a foaming oven cleaner spray.

3. Shut off the gas (if you use a gas grill). Unscrew the burners and remove the gas tubes from the gas line. Refer to your manual if you are unsure how to do this step. Keep the shut-off propane tank outside (not inside!), you should also cover it. Also, cover the gas opening with a plastic bag.

4. Coat the burners and other metal parts with cooking oil spray to repel moisture, build-up and to help prevent rusting. Cover the burner with a plastic bag to prevent insects from creeping in. That problem can cause uneven flames in the spring.

What if you have a Charcoal Grill? Well, you do almost the same. Follow steps 1 and 2 while also dumping the used charcoal. Grease from food can build-up in the charcoal creating a cement like layer at the bottom of the grill. Overtime it will build up and be less efficient so it is important to clean that out each fall. You also can store your grill in your garage since there is not flammable gas to worry about.

For detailed photo steps of this process, head over to The Family Handyman.

Happy weekend! What are you going to grill?


Weekend DIY: Preparing the Ground for Winter

Gardening, Weekend DIY

Winter is just around the corner, and as scary as it sounds, you’ve only got a few weekends to get your lawn in tip-top shape before the snow flies. Unfortunately, due to the sun setting early, most people don’t have time to do yard-work after work – besides who wants to work ALL day long? Not sure where to begin with the little amount of time you have? Take a look at this list of common things you can do to improve your lawn this fall for next spring and follow the links for more how-to’s and tips.

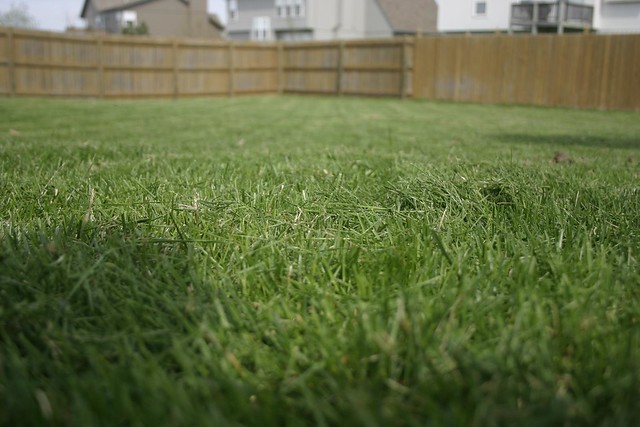
A mowed lawn(Photo Source: ishane)

Give the Lawn a Final, Shorter Mow
Drop the height of your mower’s blade one notch to cut the grass shorter as you prepare for fall. Having shorter grass will prevent the buildup of dead grass come spring.
Read more here

Add Seed
If your lawn has thin or dead grass spots (in the north) or has rye grass (in the south), be sure to overseed this fall. Be sure to spread the seed evenly and keep the areas moist at first and eventually fade out watering. Roots will grow deeper into the soil that way. Read more here

Fertilize
Grass is a huge fan of the fall – it loves the cooler nights, adequate rainfall and the morning dew. Because of the summer damage your lawn endured with the scorching heat, it is best to feed your lawn nutrients before winter. By fertilizing in the fall, you’ll strengthen its roots and increase the nitrogen it stores for the early spring. Read more here…

Clover(Photo Source: WI DNR)

Spray Weeds that are Perennial
Now’s the time to kill those weeds that you know will come back around in the spring! Fall is the best time to spray them, provided they are still green. As they prepare for winter, they will absorb herbicides easier – so by providing a fall application, you take advantage of this by getting those weeds under control. Read more here…

Remove Thatch and Aerate 
Thatch is a layer of dead grass and weeds that threatens the health of your grass. Use a power rake or vertical mower to remove thatch and then use another rake to pick up the thatch and dispose of it. By removing thatch, you can prevent disease and insect problems for your lawn. To cut down on the amount of thatch that develops, make sure to aerate your lawn every few years. It will also improve the drainage and loosen the soil. Read more here…

Red Orange & Pink Leaves on Grass(Photo Source: M. Markus)

Remove Fallen Leaves
Once the leaves have fallen from the trees that stand in your yard, be sure to rake them and set aside for disposal. Allowing fallen leaves to remain on your lawn can ultimately kill grasses or aid in insect and disease problems. Many cities will host leaf pick-ups where all you have to do is leave them in clumps near the street! Contact your city or village of residence to find out more about fall leaf clean-up in your area. PS, don’t forget to remove the leaves from your gutters too! Read more here… 

Drain Hoses and Irrigation Systems
And when winter is about to come knocking at your door, be sure to drain your hoses and irrigation systems and turn off the water if it will freeze in your area. Read more here… 

Happy Weekend!

Weekend DIY: The Perfect Bonfire

Outdoor Party, Weekend DIY

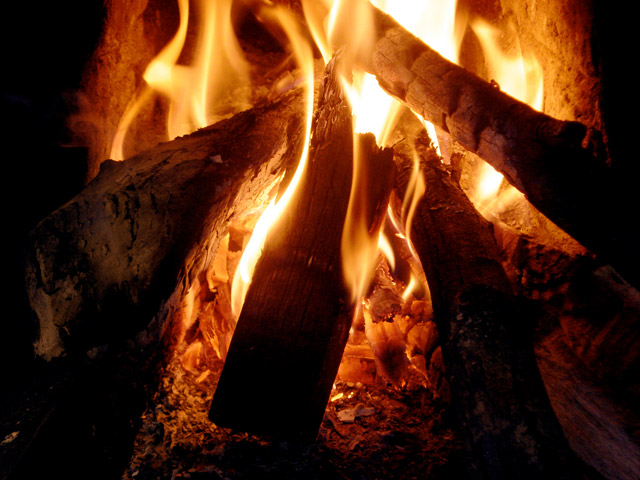
Nothing is better than a fall evening – sitting next to a bonfire keeping warm. Hmmm…The smell of wood and leaves is better than any candle you could purchase. Not to mention the wonderful scent remains on your clothes reminding you of the good times. Add a few friends, some supplies for s’mores and you’ve got yourself a great ol’ time!

It is true: you don’t have to be a boy scout in order to successfully make a bonfire, but to help upgrade your bonfire experience, use these helpful tips below.

Tips for Making the Perfect Bonfire:

  • Use wood logs, kindling (small sticks), and tinder (wood chips, bark, or newspaper). Gather lots of tinder, for this is what will get the fire started – you’ll also want to make sure you keep it going until it lights the logs. For the complete 411 on building the structure, see this article from eHow.
  • To make your bonfire last longer, use woods such as hickory, oak, mesquite or pecan as these hardwoods burn longer than pine.
  • You can purchase technical grade chemicals online or from fire specialty stores to have your bonfire turn colors. Please remember to take precaution when using chemicals near flames. Learn more about adding color to your flames here.
  • S’mores are a necessity! Purchase graham crackers, marshmallows and chocolate.  Also, be sure to find poles long enough for roasting. Yum!
  • Turn your bonfire into a party – invite your neighbors and friends. Play bonfire games, sing favorite songs, and make sure you have lots of food!
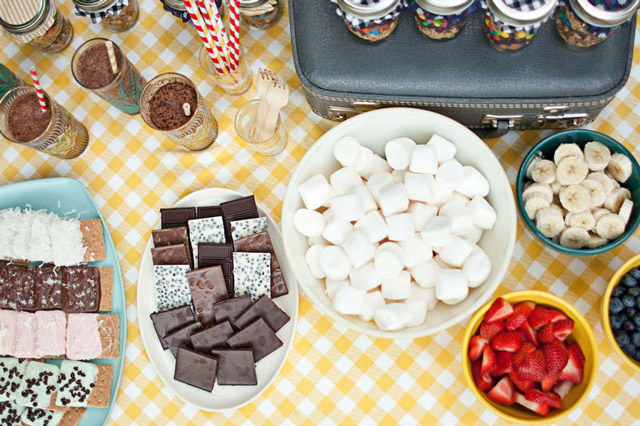
  • Want to have a fancy-smancy bonfire get-together? Check out these ideas from A Beautiful Mess blog. They went all out for their bonfire and included a variety of chocolates, pre-dipped graham crackers and added fruit to their s’mores.

(Source: A Beautiful Mess)

Need a firepit or chimenea to save you the work and time of digging out a spot for a bonfire? Check out what’s available from Willard & May in our Outdoor Heating products.

Happy Weekend!

Weekend DIY: Dividing Perennials

Gardening, Weekend DIY

With every dropping leaf, we are reminded fall is here. And as you shed a tear at each fading bloom in your garden, don’t forget – those bountiful perennials that provide summer-long color will be back before you know it next spring. But before you hang up your shovel and gardening gloves, keep them out a weekend or two longer. You’ve got some perennials to divide (and fall bulbs to plant)!

dividing perennials


If you’re looking for more bang for your buck when it comes to gardening, than perennials are a great investment. Overtime perennials should to be divided to allow for proper growth of the existing plant, but once you divide them, you magically have more to plant elsewhere in your garden and enjoy. As perennials get more compact, they fight for nutrients and water, so don’t skip this simple and rewarding step.

Check out these Instructions from the blog, FlowerBulbCrazy:

  1. Make sure you do not divide perennials while they are flowering. Save those to divide in spring
  2. Cloudy days work best, so you can work as slow as you like. Then the roots will not dry out.
  3. Cut back perennials before digging them out.
  4. When diving perennials dig up the entire root ball and then split it with shovel or sharp spade. If needed, use a hose to remove dirt so you can better see which roots can be easily divided.
  5. Now you are ready to replant your perennials, plant at the proper depth in well-draining soil and after re-planting be sure to provide enough water until it thoroughly soaks through the soil.
  6. Keep the new and old perennials well-watered over the next few weeks to ensure great establishment in their new location.

Here are a few other tips we came across for successfully dividing perennials:

  • If you can, plan to divide perennials just a few days before a rain shower
  • Use organic soil and add nutrients to new soil to help promote healthy growth
  • In many perennials, one stem likely triples or quadruples itself each year, so don’t be too strict in dividing
  • Don’t replant parts of the perennials that don’t look healthy
  • Spread out the roots in a starburst pattern i the hole you’ve dug to promote healthy roots and to prevent them from getting too compact again too fast

A few other fall gardening chores to include in your weekend outside: bringing your container plants indoors to avoid being swallowed by the cold, planting flower bulbs, and harvesting seeds from perennials and flowers, and again you’ll have more to grow.

Weekend DIY: Renew your Wooden Fence

Weekend DIY

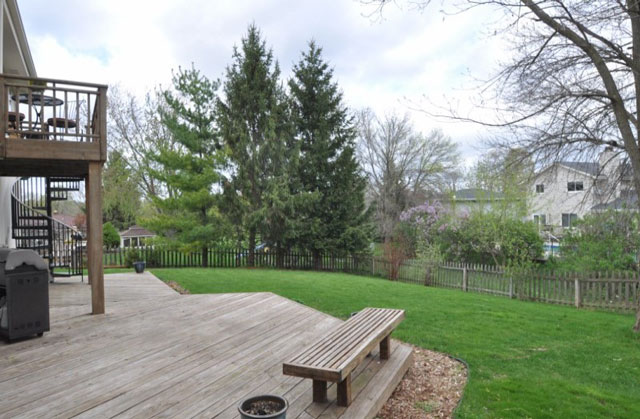
Has your wooden deck or fence seen better days? Mine too – I (Vanessa – a team member at Willard & May) recently purchased a home (2 days ago!) that came with a great deck for entertaining and a wonderful fence around the perimeter of the yard – however, along with all the entertaining we dreamed of, we also realized the maintenance and up keep it would require. One of our tasks before winter comes is to improve the look of the deck. We had originally planned on restaining it – however, after doing some research, we think we’ll try power-washing it first to bring back the wood’s natural beauty.

Here is our deck in its current state – needing some TLC

Renewing the look of your worn wooden fence or deck isn’t as hard as you may think – many times what seems to need replacing can just be given a little TLC and will show a huge improvement. The Family Handyman explains how power-washing your wooden deck or fence will renew the wood that is hiding underneath a layer of faded, gray wood – who knew?! Within one weekend, the wood will show through and will be looking just about brand new!  This would also be an excellent time to restain and seal the wood!

Here is what you’ll need: power-washer (you can rent this from stores like Home Depot), Hose, Wood preservative, Paint roller/Paintbrush, and Safety glasses. Head on over to The Family Handyman to read the complete step-by-step instructions on how to transform your deck or fence this weekend!

Happy Weekend!

Weekend DIY: Tailgating Game

Outdoor Party, Weekend DIY

Football season kicked off a few weeks ago and that means a few things: 1. Sunday afternoon watching your favorite teams battle it out 2. Fantasy Football anyone? and 3. Tailgating before heading into the stadium!

While Corn-hole Toss has become a popular favorite amongst tailgaters, we think we may have found their competitor! Have you ever tried to Irish Bowl? The idea of the game is this: knock down numbered blocks (called standers) out of a ring by lobbing round pieces (called pelters) at them. Lowes Creative Ideas explains how to make this game as well as where to score all of the lumber pieces for tailgating fun. Check out their site for the complete Irish Bowling DIY.

Here is what you’ll need:  (1) 2″x4′ poplar round dowel,  (5) 3″ black vinyl numbers, 1 through 5, (1) 3″x3″x36″ square poplar, 12-ounce Valspar spray paint: yellow and gloss white, Green Top Sail Turf, Utility scissors, String, Nail, Permanent marker, and Saw.

Block_Dowels_Target_Models(Source: Lowes)

Are you a die-hard Tailgater? Check out Lowe’s other tailgating ideas here.

Happy Weekend!

Weekend DIY: Log Path

Garden Spaces, Gardening, Outdoor Decor, Weekend DIY

Now is the time to begin cleaning up your yard. This includes removing plants which may have died over the course of the summer and making room for new bulbs to be planted. While normally having to cut down a failing tree in your yard may make you sad, at least you can use the wood in a creative way! Why not make a Log Path inspired by this photo from the Sherwsbury Flower Show?

Log path at Shrewsbury Flower show

Thanks to our friend Pinterest, we were able to find a post on how to re-create this masterpiece. Also, since the blog author wrote the post a bit ago, she has some new learned tips to pass on! Here is what you’ll need to complete this project: an old tree (or a variety for different size steps), a saw, and a sealant that provides UV projection (think deck stain).

(Photo Source: Domesticated Nomad)

Step 1: You’ll first need to create a solid, relatively flat surface of dirt. This may mean stripping the existing sod and removing or adding soil in certain areas. You’ll also want to make sure the remaining soil is well compacted and level to prevent the steps from sinking. Step 2: Determine the width and length of your space and cut the wood about 3-4″ thick to prevent splitting when stepped on. Step 3: Apply the stain to the logs and allow for proper drying time. Step 4: Finally, arrange pattern on the ground and fill sand, gravel, or dirt around and between logs for a level walkway to assure no tripping :)

We think this would look amazing along a garden path! It creates just the perfect touch of wood without dishing out the money and time required for a complete wooden walkway made of 2x4s. Another great idea was to add groundcover plants in between. Like most home projects, the possibilities are endless!

Happy Weekend!

Weekend DIY: Stained Concrete

Weekend DIY

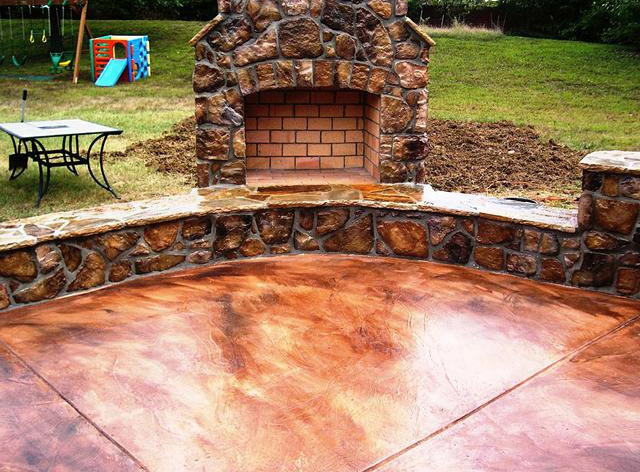
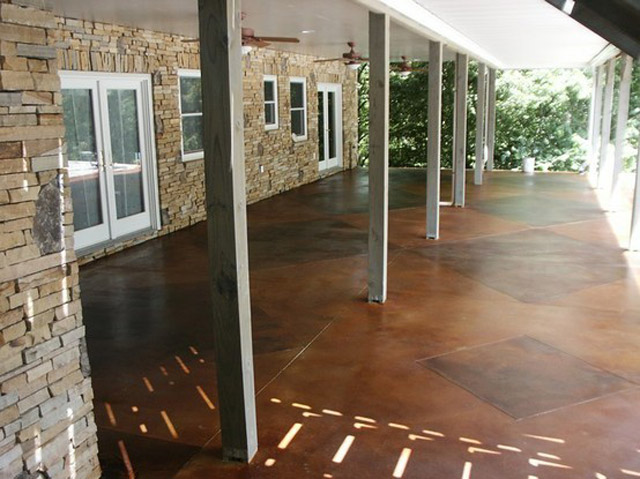
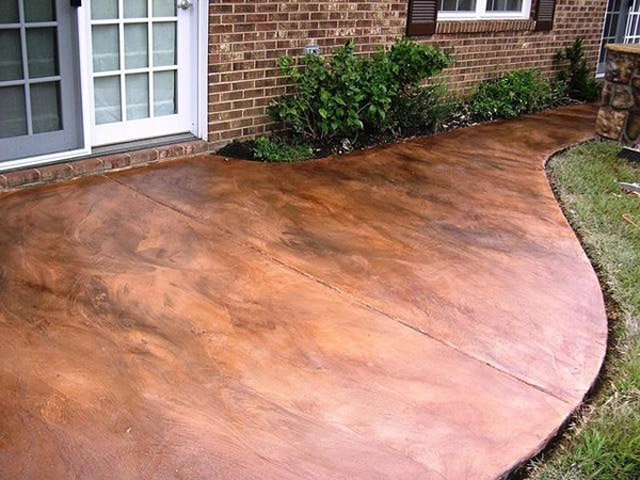
This weekend you’ll officially realize summer is over :( But while it’s still warm out, put your pouty face away and why not get your slab of concrete from looking drab to fab? That sounds pretty cheesy, and we know it – but seriously, with just a little bit of elbow grease and stain this weekend, you can get your front porch or back patio looking like never before!

Follow these step-by-step DIY Concrete Staining instructions from The Family Handyman to quickly and in-expensively transform your backyard. What you’ll need: a weekend, stain of your choice, sealer, cardboard for overspray, chalk line, straightedge, paint roller, roller tray and paintbrush. Now hop on over to The Family Handyman to see their DIY project for the complete how-to!

We also sought out pinterest for some pretty neat concrete staining ideas to inspire you:
stained-concrete-1


Happy Weekend!

Weekend DIY: Backyard Zipline

Outdoor Party, Weekend DIY

We having a feeling that after you build this DIY project your yard will become the neighborhood kids’ favorite backyard – whether that’s a good thing or bad thing, your kids will totally love you!

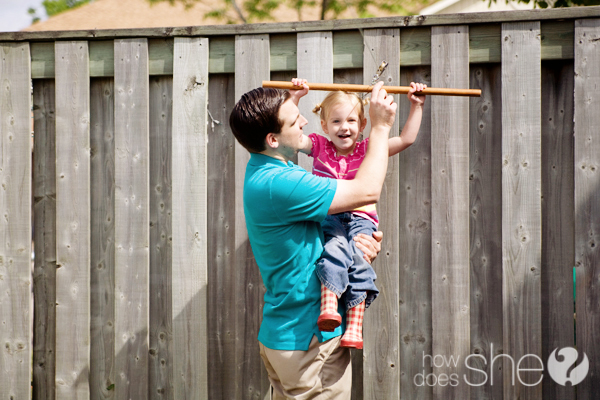
Now you’re probably sweating trying to figure out what this project is, and you may just sweat while doing this too. Your weekend project is… *drumroll* creating a Backyard Zipline – from the blog How Does She. Seriously, how cool would that be. It’s like your little sliver of Hawaii in your own backyard! Not only will your kids love you for making this, this would totally be fun for you to try out as well :)

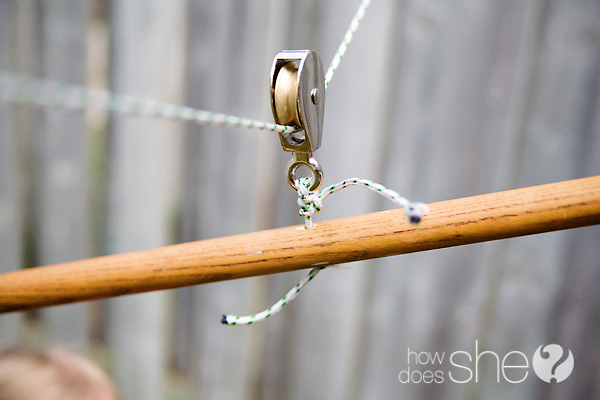
(Photos: How Does She)

Here is what you’ll need to complete this project: Dowel for the handle, a pulley, and a rope. The instructions for this are very simple and easy, but we’ll let you head on over to the How Does She blog for all the details!

Happy Weekend and Happy Labor Day!