Weekend DIY: Backyard Movie

Outdoor Party, Weekend DIY

One of the best things in life are summer nights – whether it be sitting by a fire roasting s’mores, playing yard games with the neighbors, or looking at the stars on a hill. If you are looking for a new activity to add to your summer nights, consider creating an outdoor movie. We’ve found some great instructions for building the screen and also some recommendations on how you’d project the movie and add sound.

Why not create this DIY outdoor movie this weekend, and enjoy it this summer and for many summers to come?!
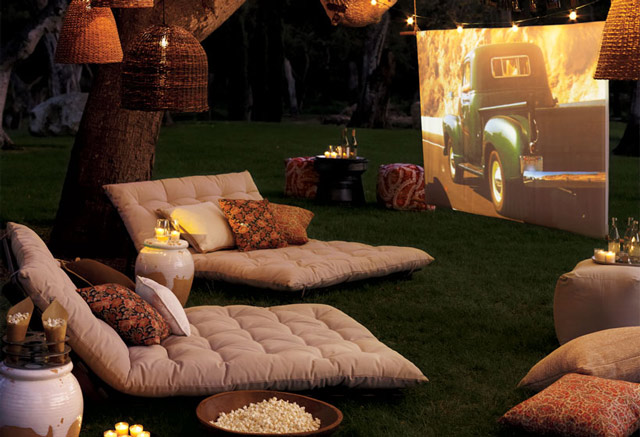
outdoor movie
(Image Source: PotteryBarn)

We found these instructions on how to build the screen from PotteryBarn. Here is what you’ll need to build the screen: (2) thick, white queen–size ironed flat sheets, a Top pole 1.5″ diameter x 10′ long, Bottom pole 3″ diameter x 10′ long, rope of two different thicknesses, (2) tent stakes, sewing machine, and an iron.

Here are their steps to assemble the screen: Step 1. Start with two queen–sized flat sheets which have been thoroughly ironed. Sew them together with white thread so the long sides are joined creating a tube. Step 2. Insert the 1.5–inch diameter pole and let the fabric hang down.  Step 3. Attach thicker rope to the ends of the top pole so that it can be attached to a tree. Step 4. Once attached to a tree, slide the thicker pole through the tube created by the sewn sheets so that it creates a weight at the bottom of the screen. Step 5. Attach thinner rope to the ends of the bottom pole.  Step 6. Insert two tent stakes directly beneath the bottom corners of the screen, tie the thinner rope to both of the tent stakes and pull taught. This will insure that the screen doesn’t sway in the wind.

As for the projector and other helpful tips, here is some advice we found from the blog, giverslog:

PROJECTOR. When choosing a projector, remember this: the bigger the screen, the better the resolution you need to be able to see the image. A High Definition Projector is your best bet. Look for something that has an HDMI input and you should be in good shape. Beyond that, as you increase the price of the projector what you generally find is the brightness level of the projector increases. That will allow you to start your movies earlier in the evening, which may or may not be worth the extra money to you.

AUDIO. This is where most people skimp. But this is the part that makes the most difference. It doesn’t do you much good to create a giant image and then force your guests to guess what the people are saying. That said, you don’t need to spend a lot of money to make a great sound system. This is not a place where you need surround sound or high quality speakers, volume is more important than clarity. I live in a place where no one cares if I am blasting my system at 11pm while watching The Bourne Identity (or Pride and Prejudice) but even if you have neighbors that don’t appreciate the volume, you still need something that can project the sound to your guests. Without walls to reflect the sound you typically need more than you would indoors.

I would suggest that you get a stereo receiver or old sound system that is around. People want surround sound in their homes so this is something you can pick up cheap on craigslist. You then want to find some speakers. Again, these do not need to be high quality speakers that you would use in your home theater in your home. I looked on craigslist for DJ speakers and went with some of the cheapest I could find.

BLURAY. If you can show your movies in bluray, do it. As your screen gets bigger the image quality is stretched. DVD’s produce about 500 lines of resolution, bluray gives you 1080 lines of resolution. That is twice as much picture that you are going to stretch. If you can’t get your copy of Anne of Green Gables on Bluray (they don’t make it, I have looked for AmberLee’s sake), at least pull out your bluray player to project the DVD. Most Bluray players try to convert the image and double the lines that are produced. You will still see a difference between that and Bluray, but it will be much better than just playing the disc on a laptop or old DVD player.

Don’t forget to add plush seating, bring out blankets and create a yummy popcorn snack to enjoy while you watch your movie! What a great way to end a summer day :)

Happy Weekend!

Weekend DIY: Rock Box

Before & After, Outdoor Decor, Outdoor Party, Weekend DIY

Remember those good ol’ summer days you’d spend as a kid in the sandbox, building castles, creating roads, and riding your toy dump trucks around? And if you didn’t have a sandbox, then you were missing out – don’t let your kids miss out either! It’s time to get out your tool belt and get to work! Many parents, mothers especially, cringe at the thought of sand because once you play in it for a whole minute, it is in every nook and cranny of your child – not to mention those outdoor cats that sometimes use your sandbox as a litter box (so gross!).

If those things concern you, why not try this unique idea of building a Rock Box to avoid the mess! This project comes from the blog Young House Love, in which a mom and dad duo write about DIY improving your home on the inside and out.

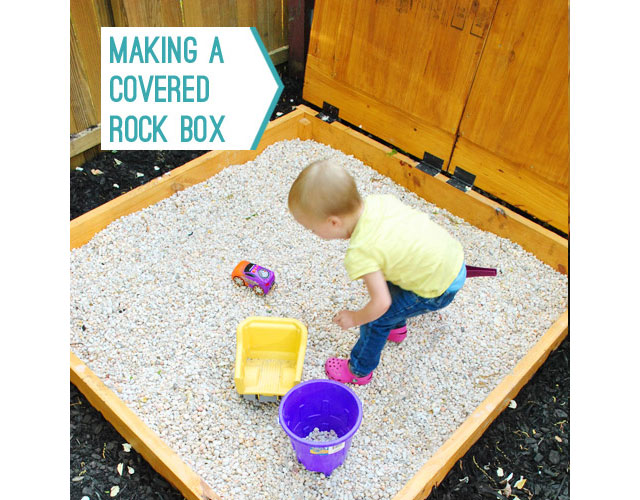
diy rock sand box

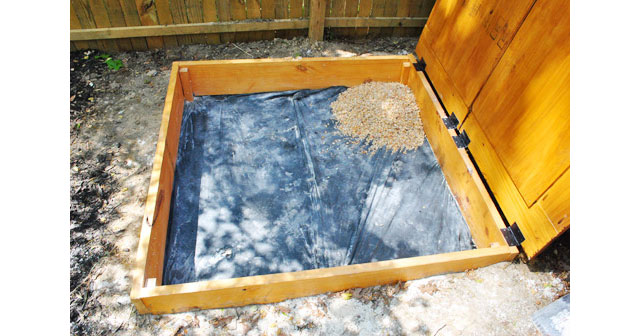
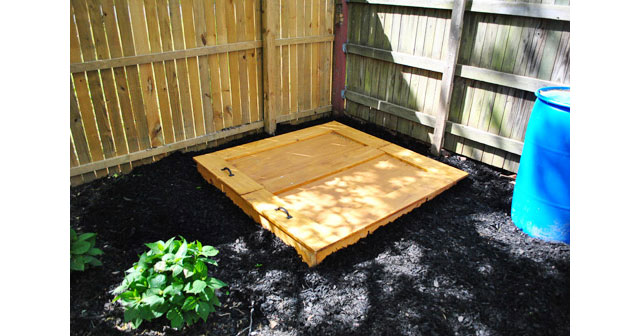
Their idea for this rock box came when they had just finished building a sandbox for their daughter – after doing so, they realized how messy it was, and were concerned with the materials within the sand that they used. To keep their daughter safe and mess-free, they replaced the sand with pea gravel rocks and now call it a rock box. Their little girl now loves the rockbox even more than the sand – who knew?

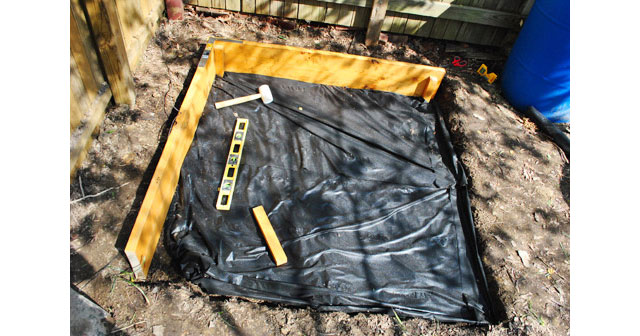
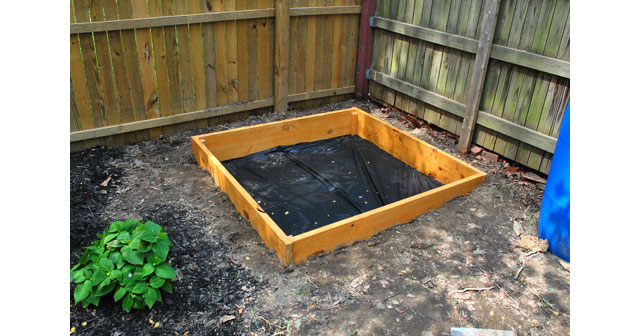
To make a rock box for your child(ren), here is what you’ll need: (2) 2×10 framing lumber (cut down to 5′ lengths – they can do this at the store for you), 4 smaller pieces of wood to use as stakes, waterproof deck stain, weed block, square ruler, shovel, pea gravel (20 bags), a drill and decking screws.

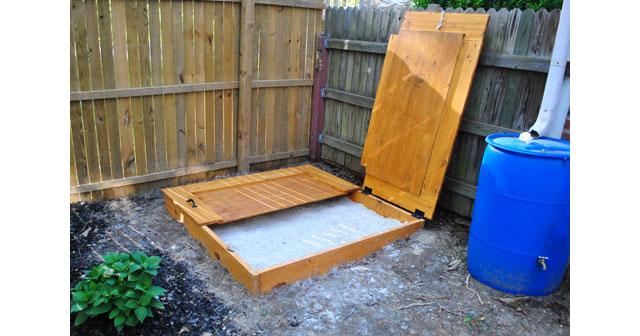
For the complete how-to and tips, read their “Sandbox Chronicles” on how to make the rock box. They also have a post on how to make a cover that securely attaches to their fence. Also, read their reasoning for replacing the sand with pea gravel. Here are a few photos from their blog on building the rock box:

make a sand rock box
make a sand rock box with a lid cover
rock box diy
rock box diy
(Photo Source: Young House Love)

Happy Weekend and happy rock box building!

Weekend DIY: Backyard Water Feature

Garden Spaces, Outdoor Decor, Weekend DIY

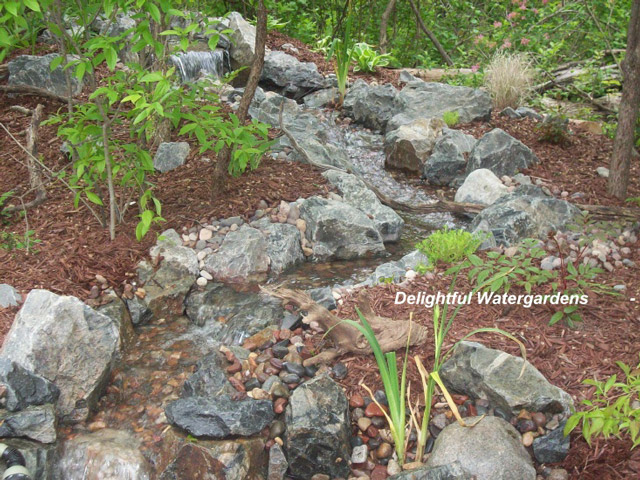
Everyone is familiar with the tranquil environment that a waterfall and stream creates – it’s so peaceful, yet most people don’t have the luxury of enjoying one in their own backyard. However, that can change within just two weekends! Even though it may seem like a daunting task, perhaps you’ve decided to be adventurous and create a water feature in your backyard. Great! We’ve found some great step-by-step instructions that will help you achieve a great looking waterfall and stream with only a little bit of elbow grease.

Here are the supplies you’ll need: Level, Wheelbarrow, Rubber mallet, Spade, Utility knife, Large waterfall pump, Hose kit and connections, PVC primer and cement, Ball valve and clamps, Sewage basin (18” x 30”) and lid, Two hole saw bits (2” and 1”), EPDM pond liner, Underlayment fabric, Waterfall foam sealant, Gravel, Field boulders, Decorative boulders, Hand tamper, Scissors, and a Ball cart (for moving boulders).

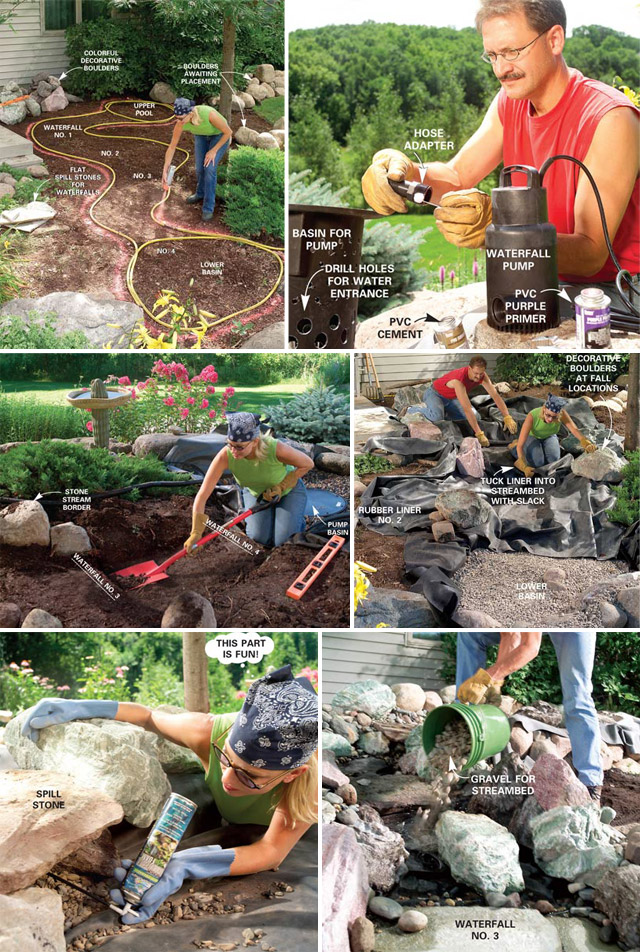
Here are the simplified steps, but refer to The Family Handyman for the complete step-by-step DIY waterfall instructions. Step 1: Understand how waterfalls work in a backyard setting. Step 2: Plan out your waterfall. Step 3: Purchase the stone materials. Step 4: Map the waterfall and stream and dig. Step 5: Complete the lower basin. Step 6: Dig out or build a long staircase. Step 7: Arrange liner and layout the stones. Step 8: Add additional stones and fill gaps. Step 9: Add gravel and clean the system. Step 10: Enjoy!

Here are a few photos of the process:
easy backyard waterfall diy(Photo Source: The Family Handyman)

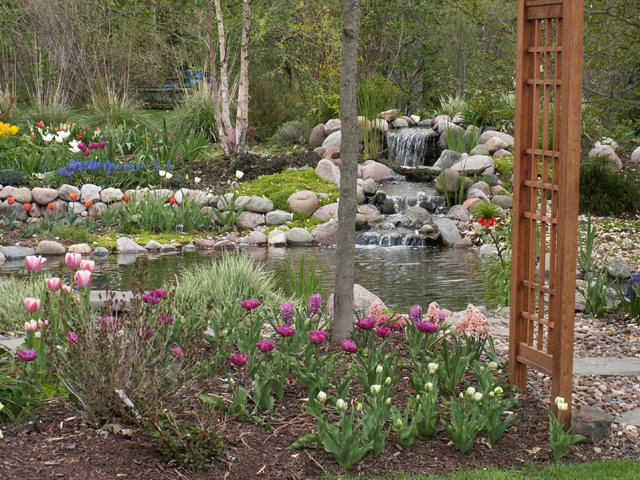
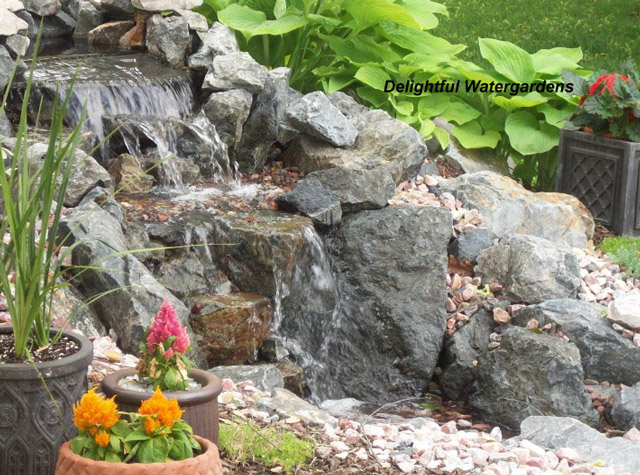
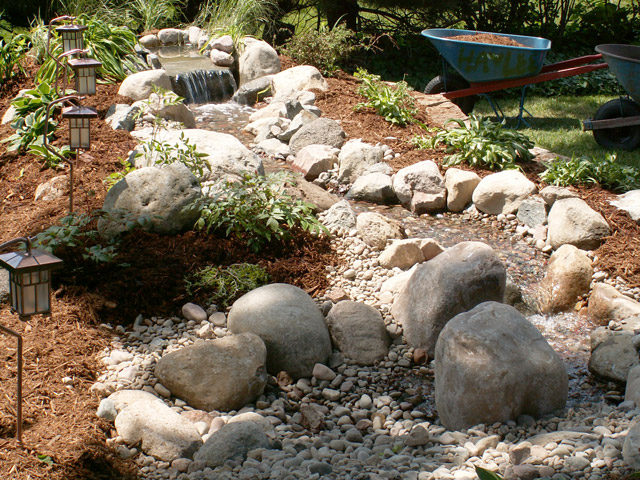
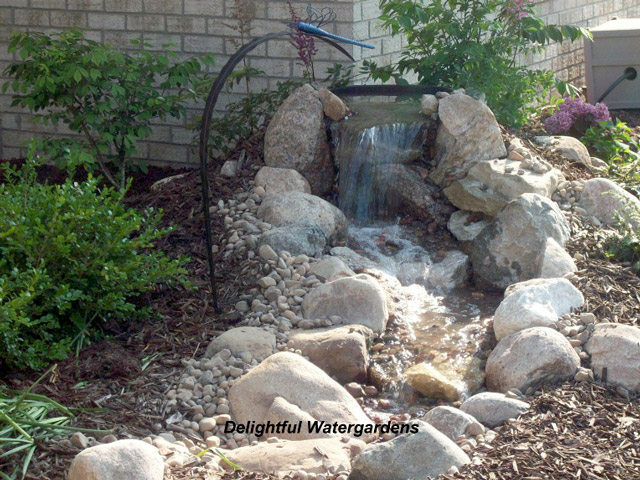
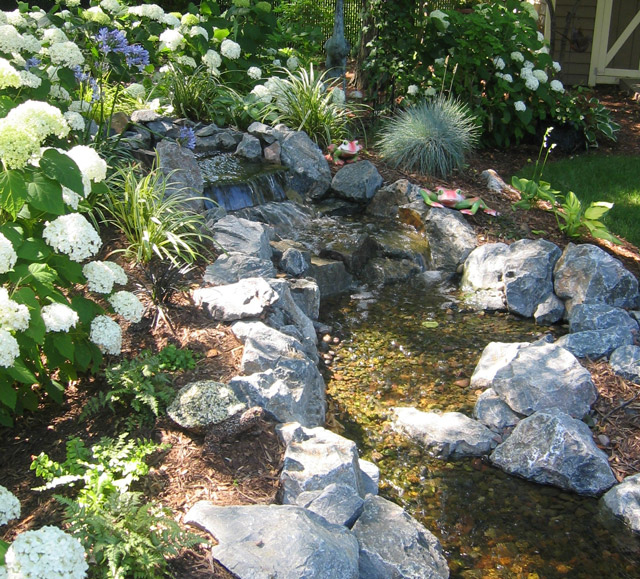
As additional inspiration, we’ve included some photos below from one of our very own team members. She has created many water features in others’ yards as well as her own! Here are a few of her tips to create your own backyard oasis:

If you build it into the ground and lay layers of thick weed barrier under the liner, it will last a lifetime. Shade is helpful in keeping algae at a minimum. You may also want to purchase an algaecide to help. Maintenance will be less than a flower bed! Dig the width of the stream wider than your finished desired width as rocks will fill it in a lot. Also, purchase a waterfall pump that is designed for the height & width of your design (its more than just gph).

create a water stream in your backyard
how to create a waterfall in your backyard diy backyard waterfall diy backyard waterfall
diy backyard waterfalldiy backyard waterfall

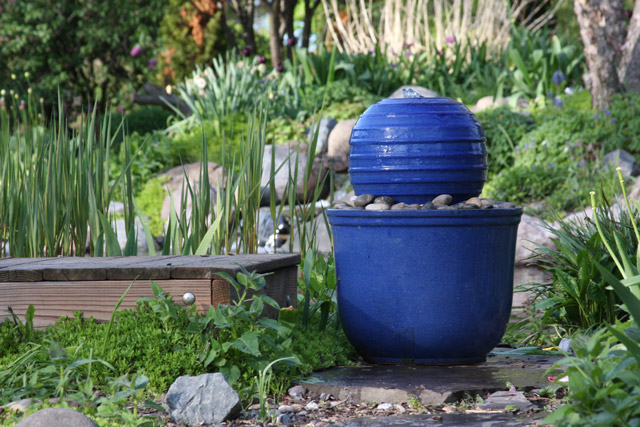
Maybe you don’t have two weekends to create a waterfall, but still love the serenity one creates? Why not try a small water fountain in your backyard like this from Willard & May:


Happy Weekend!

Weekend DIY: Outdoor Twister

Outdoor Party, Weekend DIY

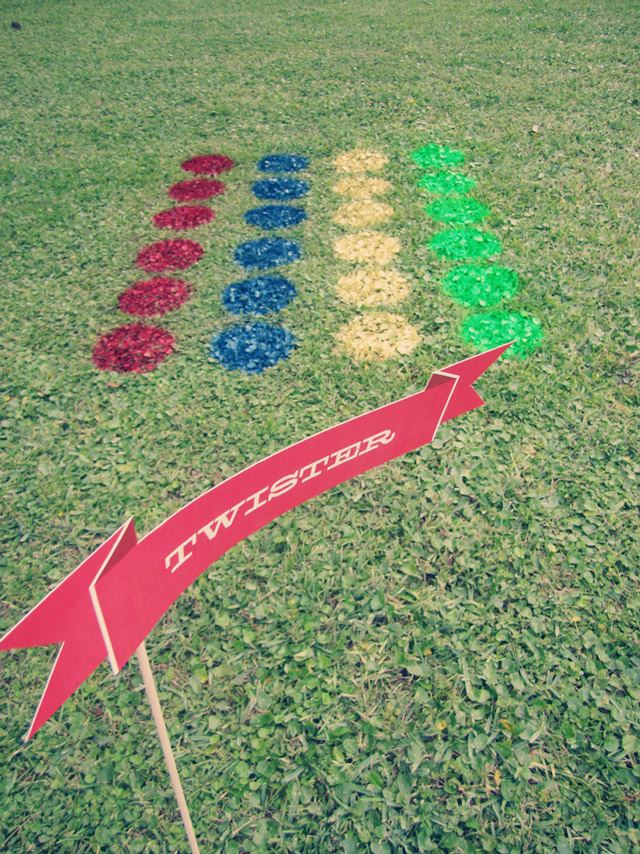
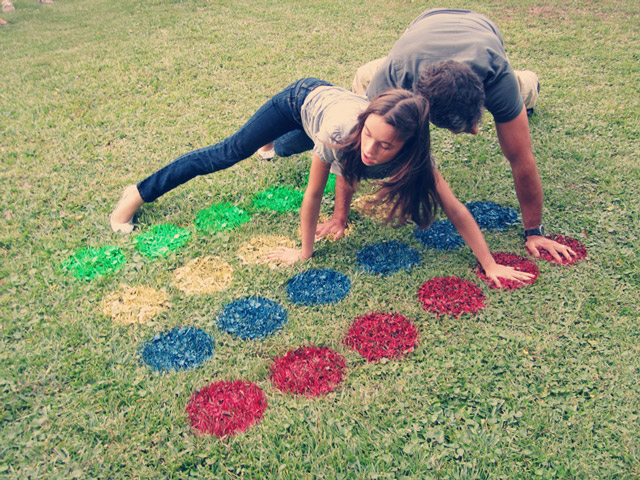
In our last post titled “Memorial Day Party Inspiration” we showcased a few great Memorial Day Party Ideas. Included in that post was a photo from the blog, You + Me of a twister game created right on the lawn – no need for the official game board! We found the original DIY post from another blog, Sassy Style and thought we’d share how to re-create this budget-friendly game!

backyard game twister how to

Here is what you’ll need: cardboard, craft knife, large bowl (or other round object), pen, red, blue, yellow and white spray paint, 1 piece of paper, scissors, and two containers or hats to hold the paper slips.

Step 1: Trace the large bowl onto the piece of cardboard. Then, cut out the circle on the cardboard, so what you have left is a stencil of the circle.

Step 2: Find a large enough space in your yard on the grass (the more level the better although a steep slope can add some extra fun!). You’ll need 1 row of 6 dots for each color (4 colors) – so measure out the 6 circles if you are unsure.

Step 3: Lay down the stencil and fill the area with spray paint. Make sure to spray enough so that it is dark enough to see. Then, move the stencil down, leaving enough space and spray paint another circle, and so forth, until you have 6 dots of each color in a row. (One note: many hardware stores will sell an outdoor “landscape” spray paint which washes off in just a few rainstorms! :)

Step 4: Instead of recreating a spin-board, make slips to draw out of the container or hat. Out of a piece of paper, make small slips that say: right hand, left hand, right foot, left foot, and you could get creative with other parts if you’d like! Then create slips for each color you spray painted.

Step 5: To play, just draw one slip for each container for each turn. Have fun!

Do you have a fun game you play outdoors with your family? If so, please share it with us below!

Weekend DIY: Hanging Basket Succulents

Gardening, Weekend DIY

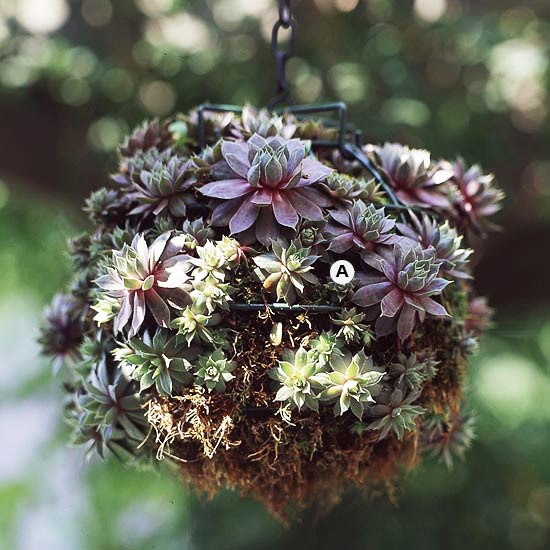
Back in February, we did a Weekend DIY post on building an indoor succulent garden. Now that it’s almost summer time, you can try using succulents outdoors within your rock gardens, or if you don’t have the space, try making a hanging succulent garden with a hanging basket. We browsed Pinterest for some ideas and thought we’d share the steps on how to make this succulent hanging basket, inspired by Better Homes and Gardens and Canadian Gardening. This hanging basket also works well for those that live in dry areas or often forget to water!

succulent hanging basket diy  (Photo Source: Better Homes and Gardens)

Here are the supplies you’ll need to re-create this look: a hanging basket, a variety of shorter succulents, coir or coconut lining to line the outside of the pot (sold at your local garden store), and landscape fabric to line the inside of the basket.

To get started, line your hanging basket with the coir lining (or use sphagnum moss to create an even more natural look) and line the inside of the basket with landscape fabric to keep the plants/soil from falling through the moss. Next, add the soil, being careful to leave enough room for the succulents. Plant the succulents on the top of the soil, but also on the sides as well, so that their roots grow into the moss. Give the basket a good drink of water, but then allow the basket to dry out completely before the next watering.

It is a good idea to allow the succulent roots time to establish if they are hanging on the outer sides, so that gravity does not win them over. Does this by treating them extra gentle during the first few waterings. For other succulent planting and growing tips, refer to our blog on growing an indoor succulent garden.

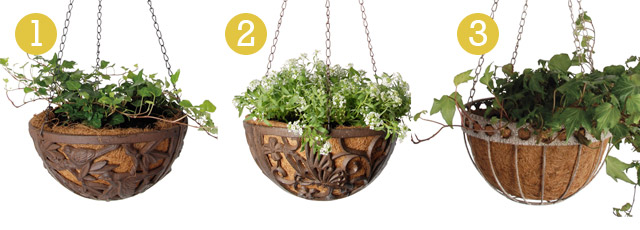
Plus, check out the selection of hanging baskets which each come with their own coir lining from Willard & May below:
hanging baskets online
(1. Bird Hanging Basket 2. Butterfly Hanging Basket 3. Rustic Hanging Basket)

Happy Weekend!

Weekend DIY: Mosquito Repelling Plants

Outdoor Party, Weekend DIY

It’s official: the days are becoming warmer and longer which means summer is almost here! However, that also means the insects are again making an appearance in our backyards. Bugs, including mosquitoes, can threaten us from truly enjoying our backyards. But before you think about grabbing the bug spray, candles, and lighting up the torches, why not try using mosquito repelling plants?

By adding groups or cluster of these plants around your patio, seating areas, or entrances to your home, you can create a barrier between the bugs and yourself. Plus, all of these plants can be found at your local garden center. And just think: you won’t worry about that awful deet smell following you everywhere!

mosquito-repelling-plants 1. Citronella
This grassy-like plant is a great repellent of mosquitoes. Citronella oil, which comes from this plant,  is a very commonly-used mosquito repellent and can be found in all sorts of mosquito repelling products. However, the actual plant itself has a stronger scent which works even better than the products you can find in the store. Plant this in the back of a border, or try planting in a pot with colorful annuals. Plant in a sunny area with well-drained soil for best results.

2. Catnip
Even though your cat may love it, mosquitoes hate the smell of catnip. This easy-to-grow perennial can be grown as a weed or plant. In recent studies, Catnip has been proven to be 10 times more effective in keeping the pests away. You can also crush the leaves and rub on your skin – but be careful for cats which you may attract! Plant in a sunny area.

3. Marigolds
Can’t believe something so colorful and beautiful can keep mosquitoes away? This annual comes in a variety of colors and can be added to containers near your front door to keep mosquitoes from entering your home. These flowers also emit a smell that mosquitoes dislike. An extra bonus: if you are having a hard time keeping pesky insects away from your tomatoes, try planting Marigolds near them as well to ward them off. Plant in a sunny area.

4. Horsemint (aka Bee Balm)
This fast growing perennial is grown to attract butterflies and hummingbirds, but it also repels mosquitoes. This emits an odor that confuses the mosquitoes and keeps them away. Horsemint can be easily grown in both a garden and in pots to move and rearrange as you host different backyard events. Horsemint is shade tolerant and drought resistant.

5. Ageratum (aka Floss Flower)
Use Floss Flower in your rock and border gardens to add color, texture and also keep mosquitoes from biting. The mosquito repelling ingredient found in this plant is called coumarin, which is also used in other mosquito repelling products. It is not advised to crush the leaves of this plant, because it can cause irritation. Plant in full or partial sun.

Read more about these mosquito repelling plants here at Earth Easy.

Happy weekend!

(Photo Source: 1. Wikipedia 2. Wikipedia 3. BioSurvey OU 4. Patrick Ahles 5. Wikipedia)

Weekend DIY: Modern Fence

Curb Appeal, Gardening, Pin Inspiration, Weekend DIY

Neighbors – You either love ’em or hate ’em. If you love them, celebrate that fact and invite them over for a bbq this weekend and realize that you are lucky. But, if you hate ’em we’ve also got a project just for you! This DIY project is all about building a fence, to either block out the neighbors or because it looks really awesome if you are into the whole modern look.

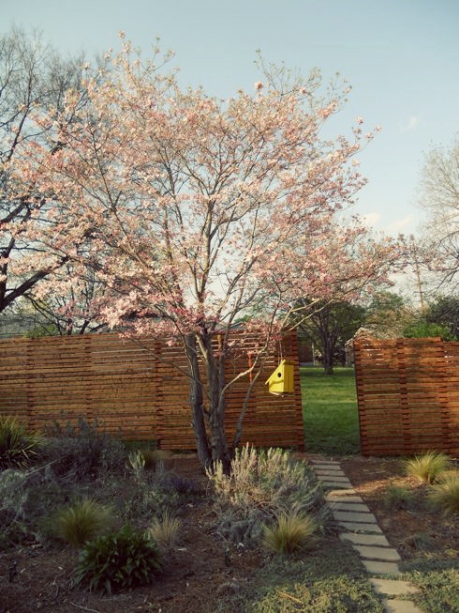
mid century modern fence
modern fence how to (Photo Source: My Mid-Century Modern Life)

We came across this awesome Modern DIY Fence from the blog, My Mid-Century Modern Life thanks to pinterest. I’m sure you’re looking at this photo and thinking, this is no way just a weekend project, and you are correct – this may take a few weekends, but we think this would be well worth your time in the end!

While we’d love to hash out the details of building this amazing fence, but we figured you could just hop on over to the original blog posts from My Mid-Century Modern Life and discover how they build this fence from scratch.

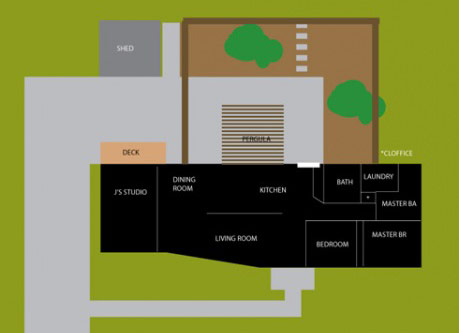
Step 1: Plan – Here is the post where they wrote about how to plan out the fence
backyard fence layout (Photo Source: My Mid-Century Modern Life)

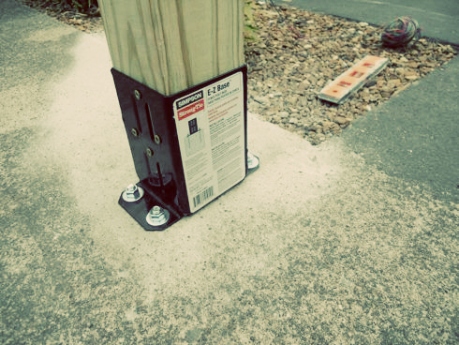
Step 2: Posts – Here is the blog post where they explained about creating the posts
diy posts (Photo Source: My Mid-Century Modern Life)

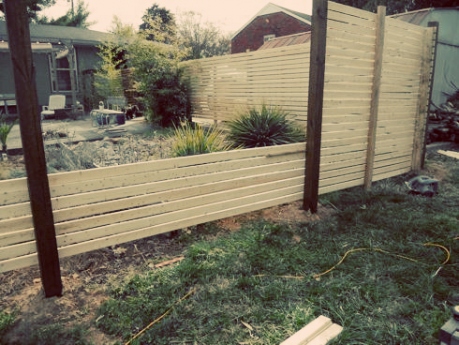
Step 3: Progress – Here is the post where they explain how to space the planks, attach them, stain them, and more
how to build a modern fence (Photo Source: My Mid-Century Modern Life)

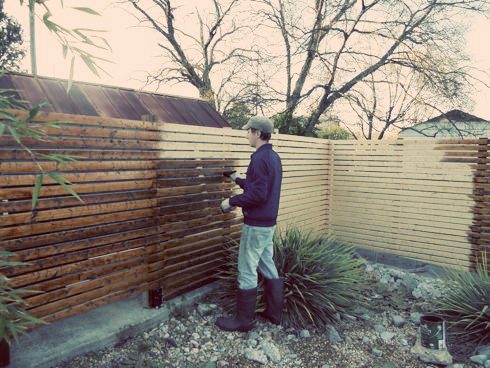
Step 4: Stain & Seal – This post they talk about finishing up the fence
staining a fence (Photo Source: My Mid-Century Modern Life)

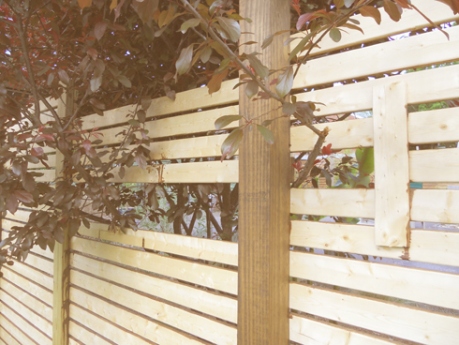
Step 5: Windows (optional) – Here is the post where they explained they added some windows to the fence to allow for a tree to grow properly
fence holes for trees (Photo Source: My Mid-Century Modern Life)

And maybe if this project scares you to death, you can hopefully get inspired to build a fence to add some privacy to your backyard. We also created a board on Pinterest with other fence/privacy ideas for you to check out!

Happy Weekend!

Weekend DIY: Outdoor Centerpieces

Outdoor Party, Weekend DIY

It’s just a few days away until May begins – and that means: Mother’s Day, Weddings, Graduation Parties, and plain ol’ outdoor get-togethers! There’s usually lots of planning involved for these events, such as food or catering, activities, invitations, guest lists, decor and more. Hopefully we can save you one of those steps by showing you this great and easy outdoor DIY centerpiece we found on the blog for Chatelaine, a Canadian Magazine.

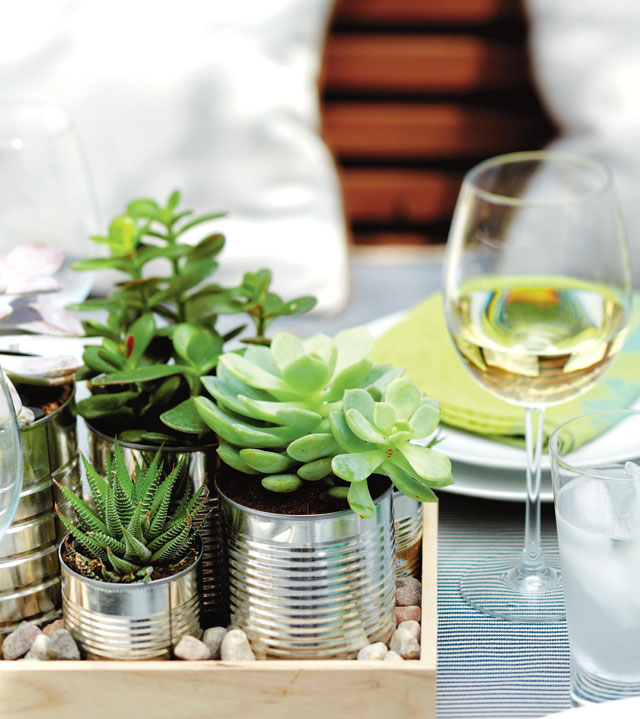
This quick ten minute project will add a natural touch to your event. Here is what you need for one centerpiece: one small wooden tray, six cans of varying sizes (use aluminum soup cans w/ the label removed), one handful of rocks, and six succulents (two of each variety). If you need more than one centerpiece, multiply these supplies by the number needed.


(Photo Source: Roberto Caruso / Chatelaine)

Here are some simple steps: 1.) Find old aluminum cans and remove their labels. 2.) Pick out succulents from a local garden center, making sure to get a variety for best results. Also make sure they aren’t too large for fitting into the cans you’ve prepared. 3.) Plant each succulent in a can. 4.) Arrange the cans on the wooden tray. 5.) Scatter rocks in between and around the cans in the wooden tray.

To add more color, you could spray-paint the cans any color you’d like!

Happy Weekend!

Weekend DIY: Tiered Planters

Curb Appeal, Gardening, Weekend DIY

After getting an unusual dose of summer weather this spring and if you are anything like us – you are itching to plant some fun annuals to bring some color into your life! Though for us in Wisconsin it is a little bold to go to a nursery and pick out some plants due to our crazy weather, it may be perfectly fine in your area to plant away! For us who have to wait for that fun step, we can prepare for that day with this project!

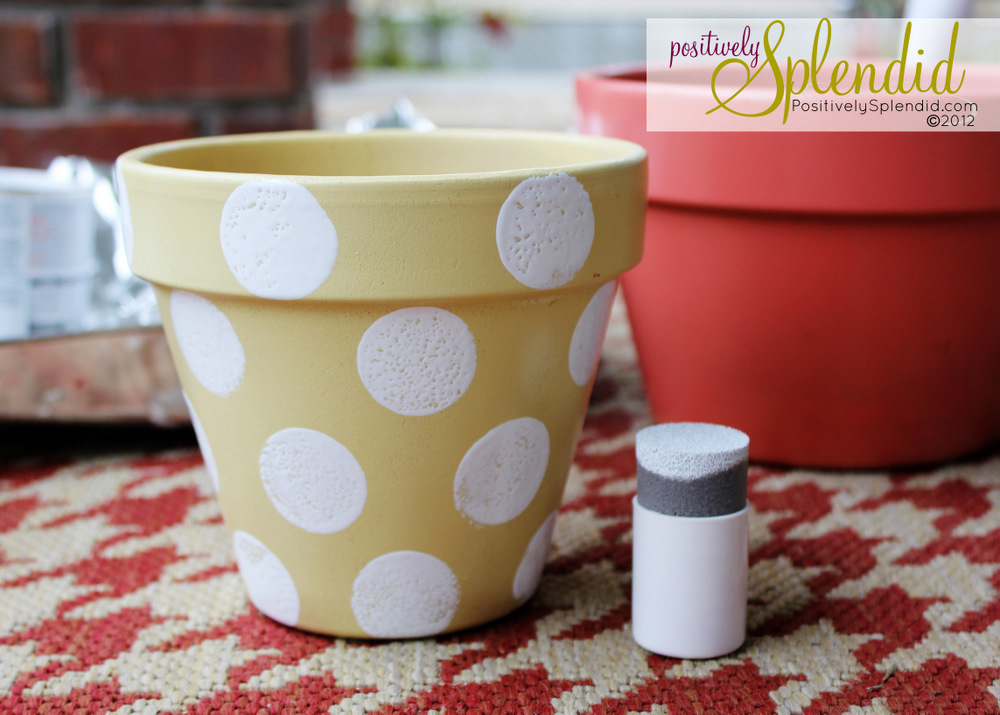
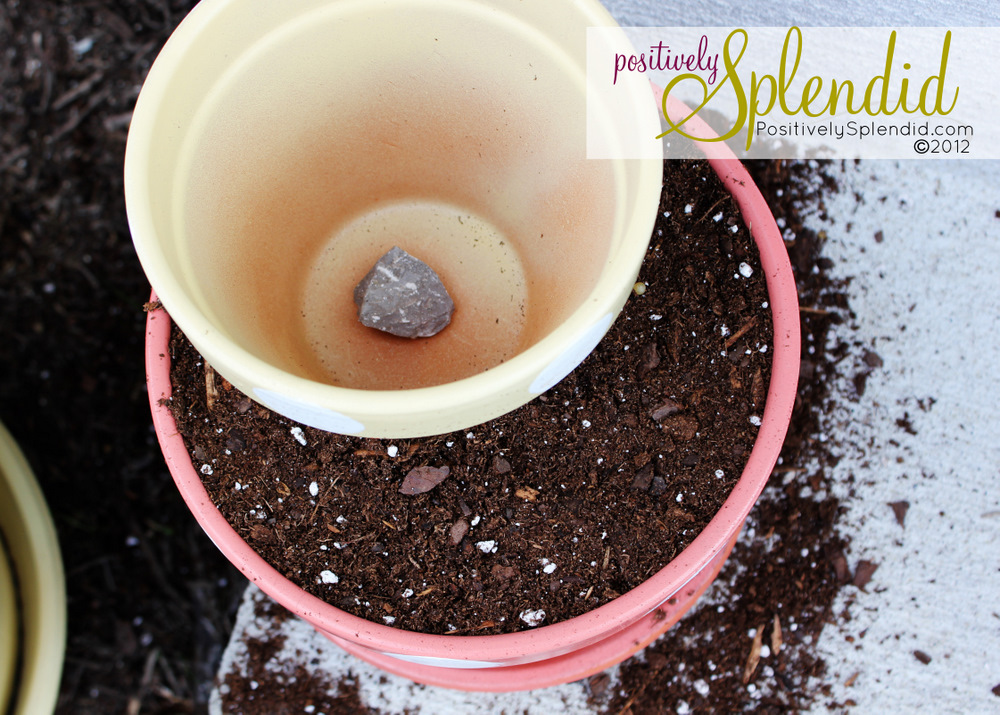
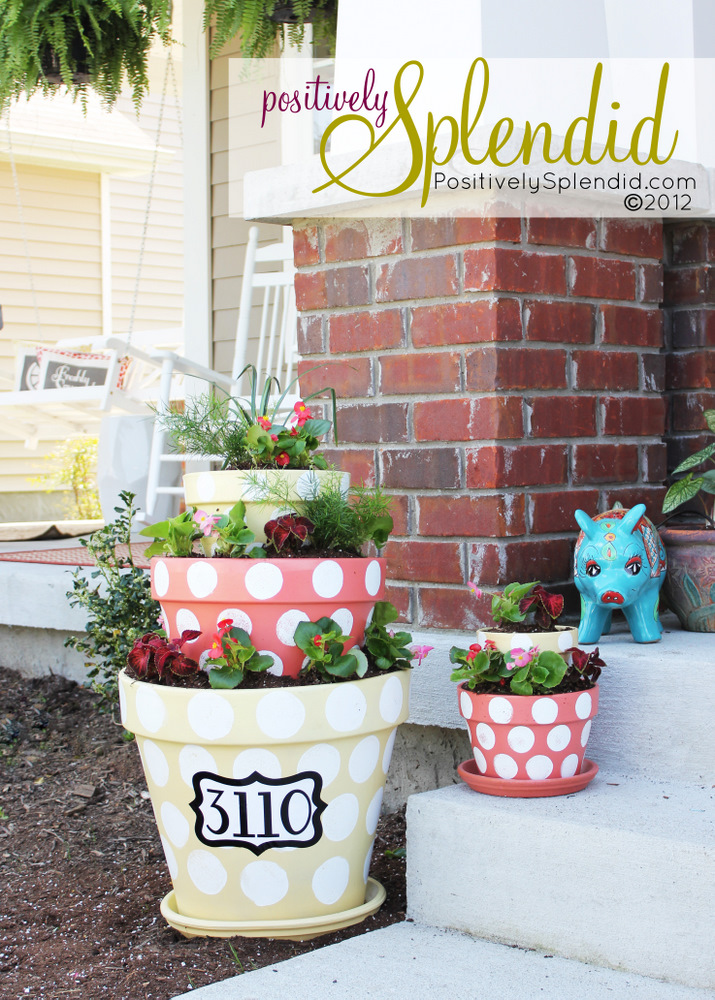
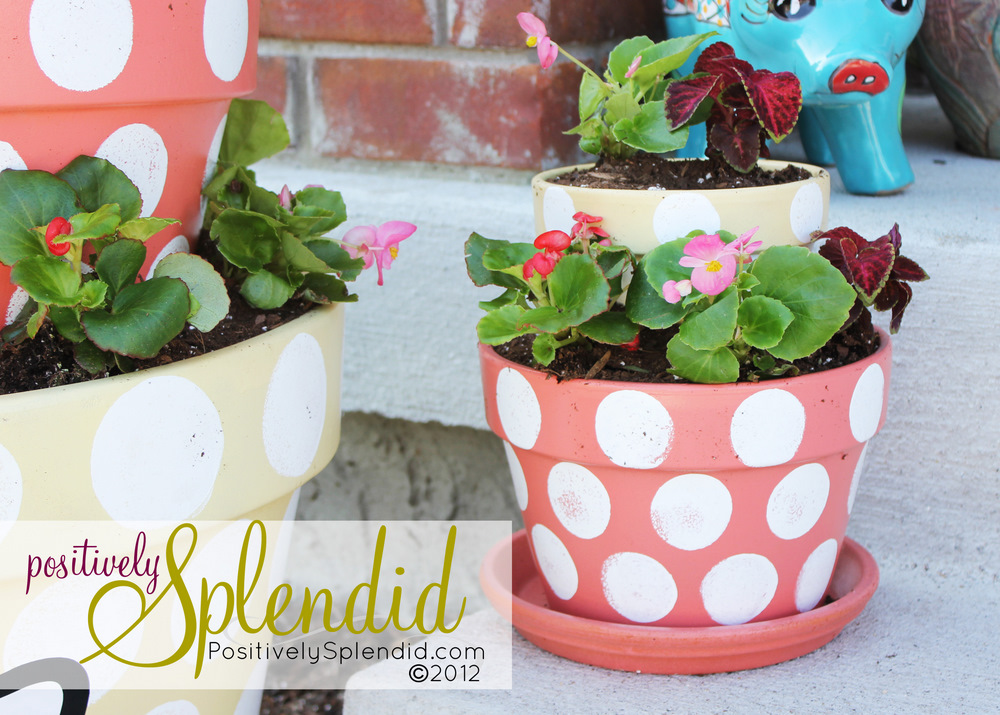
We found this fun DIY Tiered Planters from the blog Positively Splendid – the possibilities to create are endless, especially when it comes to painting colors, patterns, and what you plant in them. For this project you’ll need a few terra cotta planters (in 2-3 sizes), A terra cotta saucer for the largest pot, spray paint (1 or 2 colors), a polyurethane sealer, stencil (if you want to add house numbers), bricks, soil, and plants of your choosing. The steps are pretty simple, paint your pots how you’d like then apply a sealer. Then pick out your flowers. Stack the pots using the bricks, then fill in with dirt and the plants! For a step-by-step detailed instructions, refer to Positively Splendid’s blog post.

Here are a few photos to show the steps:


And if your house numbers are like some of ours in Wisconsin (a crazy 9 digits), you can skip the numbers, or make a cute mini version! We love the colors that were chosen for this example too:

(Photo Source: Positively Splendid)
Happy Weekend – if you have DIY you’d like to share, feel free to leave us a word in the comment section below!

Weekend DIY: Outdoor Canopy

Outdoor Decor, Weekend DIY

The weekend is ALMOST here and we’ve got an easy and chic Do-It-Yourself project to tackle this weekend. If you want to add more shade to your backyard, but want to skip the umbrella route, try a colorful or patterned canopy. We love the color palette of this one featured below!

This easy and budget friendly DIY project is from the magazine All You. The main things you’ll need to pick up are: 5 5-gallon buckets, 3 80-lb bags of cement mix, some PVC pipe, 4 planters of your liking, a large bag of gravel, soil, bamboo poles, 3 yards of outdoor fabric, and plants. Many of the other supplies you’ll have on hand. You’ll also need two days to do this project as you’ll need to let the cement set overnight – so start this project on Saturday, and finish it off on Sunday!

diy outdoor canopy (Photo Source: All You)
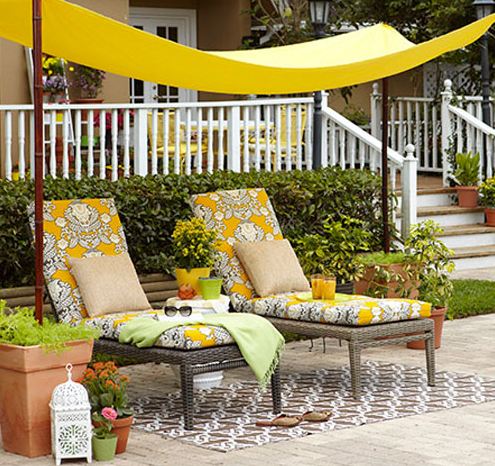
For the complete Do-It-Yourself project instructions and materials, visit All You. We also found another DIY Canopy idea from Apartment Therapy if you want to check out another way to do this same project.

Happy Weekend!